 Paraview Part 1
Overview
- Visualisation using ParaView
- Hands on Session 1 - Paraview Basics
- Hands on Session 2 - Paraview Client-Server Mode
- Hands on Session 2 - Large Data and Rendering Movies
- Hands on Session 2 - Terminating Paraview Servers
Visualisation Using ParaView
ParaView
- Open-source, cross-platform data analysis and visualisation application
- Has a user-friendly interface built on top of the Visualisation ToolKit (VTK) library
- An extensible, modular architecture based on open standards
- Mainly used to analyse large datasets (petascale size) using distributed-memory computing resources
- Supports a wide range of data formats
Domain Specific Supported Data Types
Structural Analysis
- Ensight
- Exodus
- LS-Dyna
- Spyplot
- Tecplot
- XDMF
Fluid
Dynamics
- CGNS
- Ansys
- Chombo
- Exodus
- Fluent
- Nek5000
- OpenFOAM
- Plot3D
- Tecplot
- XDMF
Astrophysics
- Calculator filters
- CosmoReader - Cosmo and Gadget2 particle formats
- Demand driven AMR slices
- Enzo Reader - AMR astrophysics simulations
- Flash Reader - AMR astrophysics simulations
- GenericIO - HACC cosmology particle formats
- GPU rendered point sprites in the Point Sprite Plugin
- HOP Halo finder filter from the yt plugin
- LANL Friend of Friend Halo finder filter
Climate Science
- Batch python scriptability
- Client-Server remote visualization of large datasets
- CAM reader
- GDAL reader
- MOC reader
- MPAS reader
- NetCDF (CF) reader
- Python Programmable filter
- Unstructured POP reader
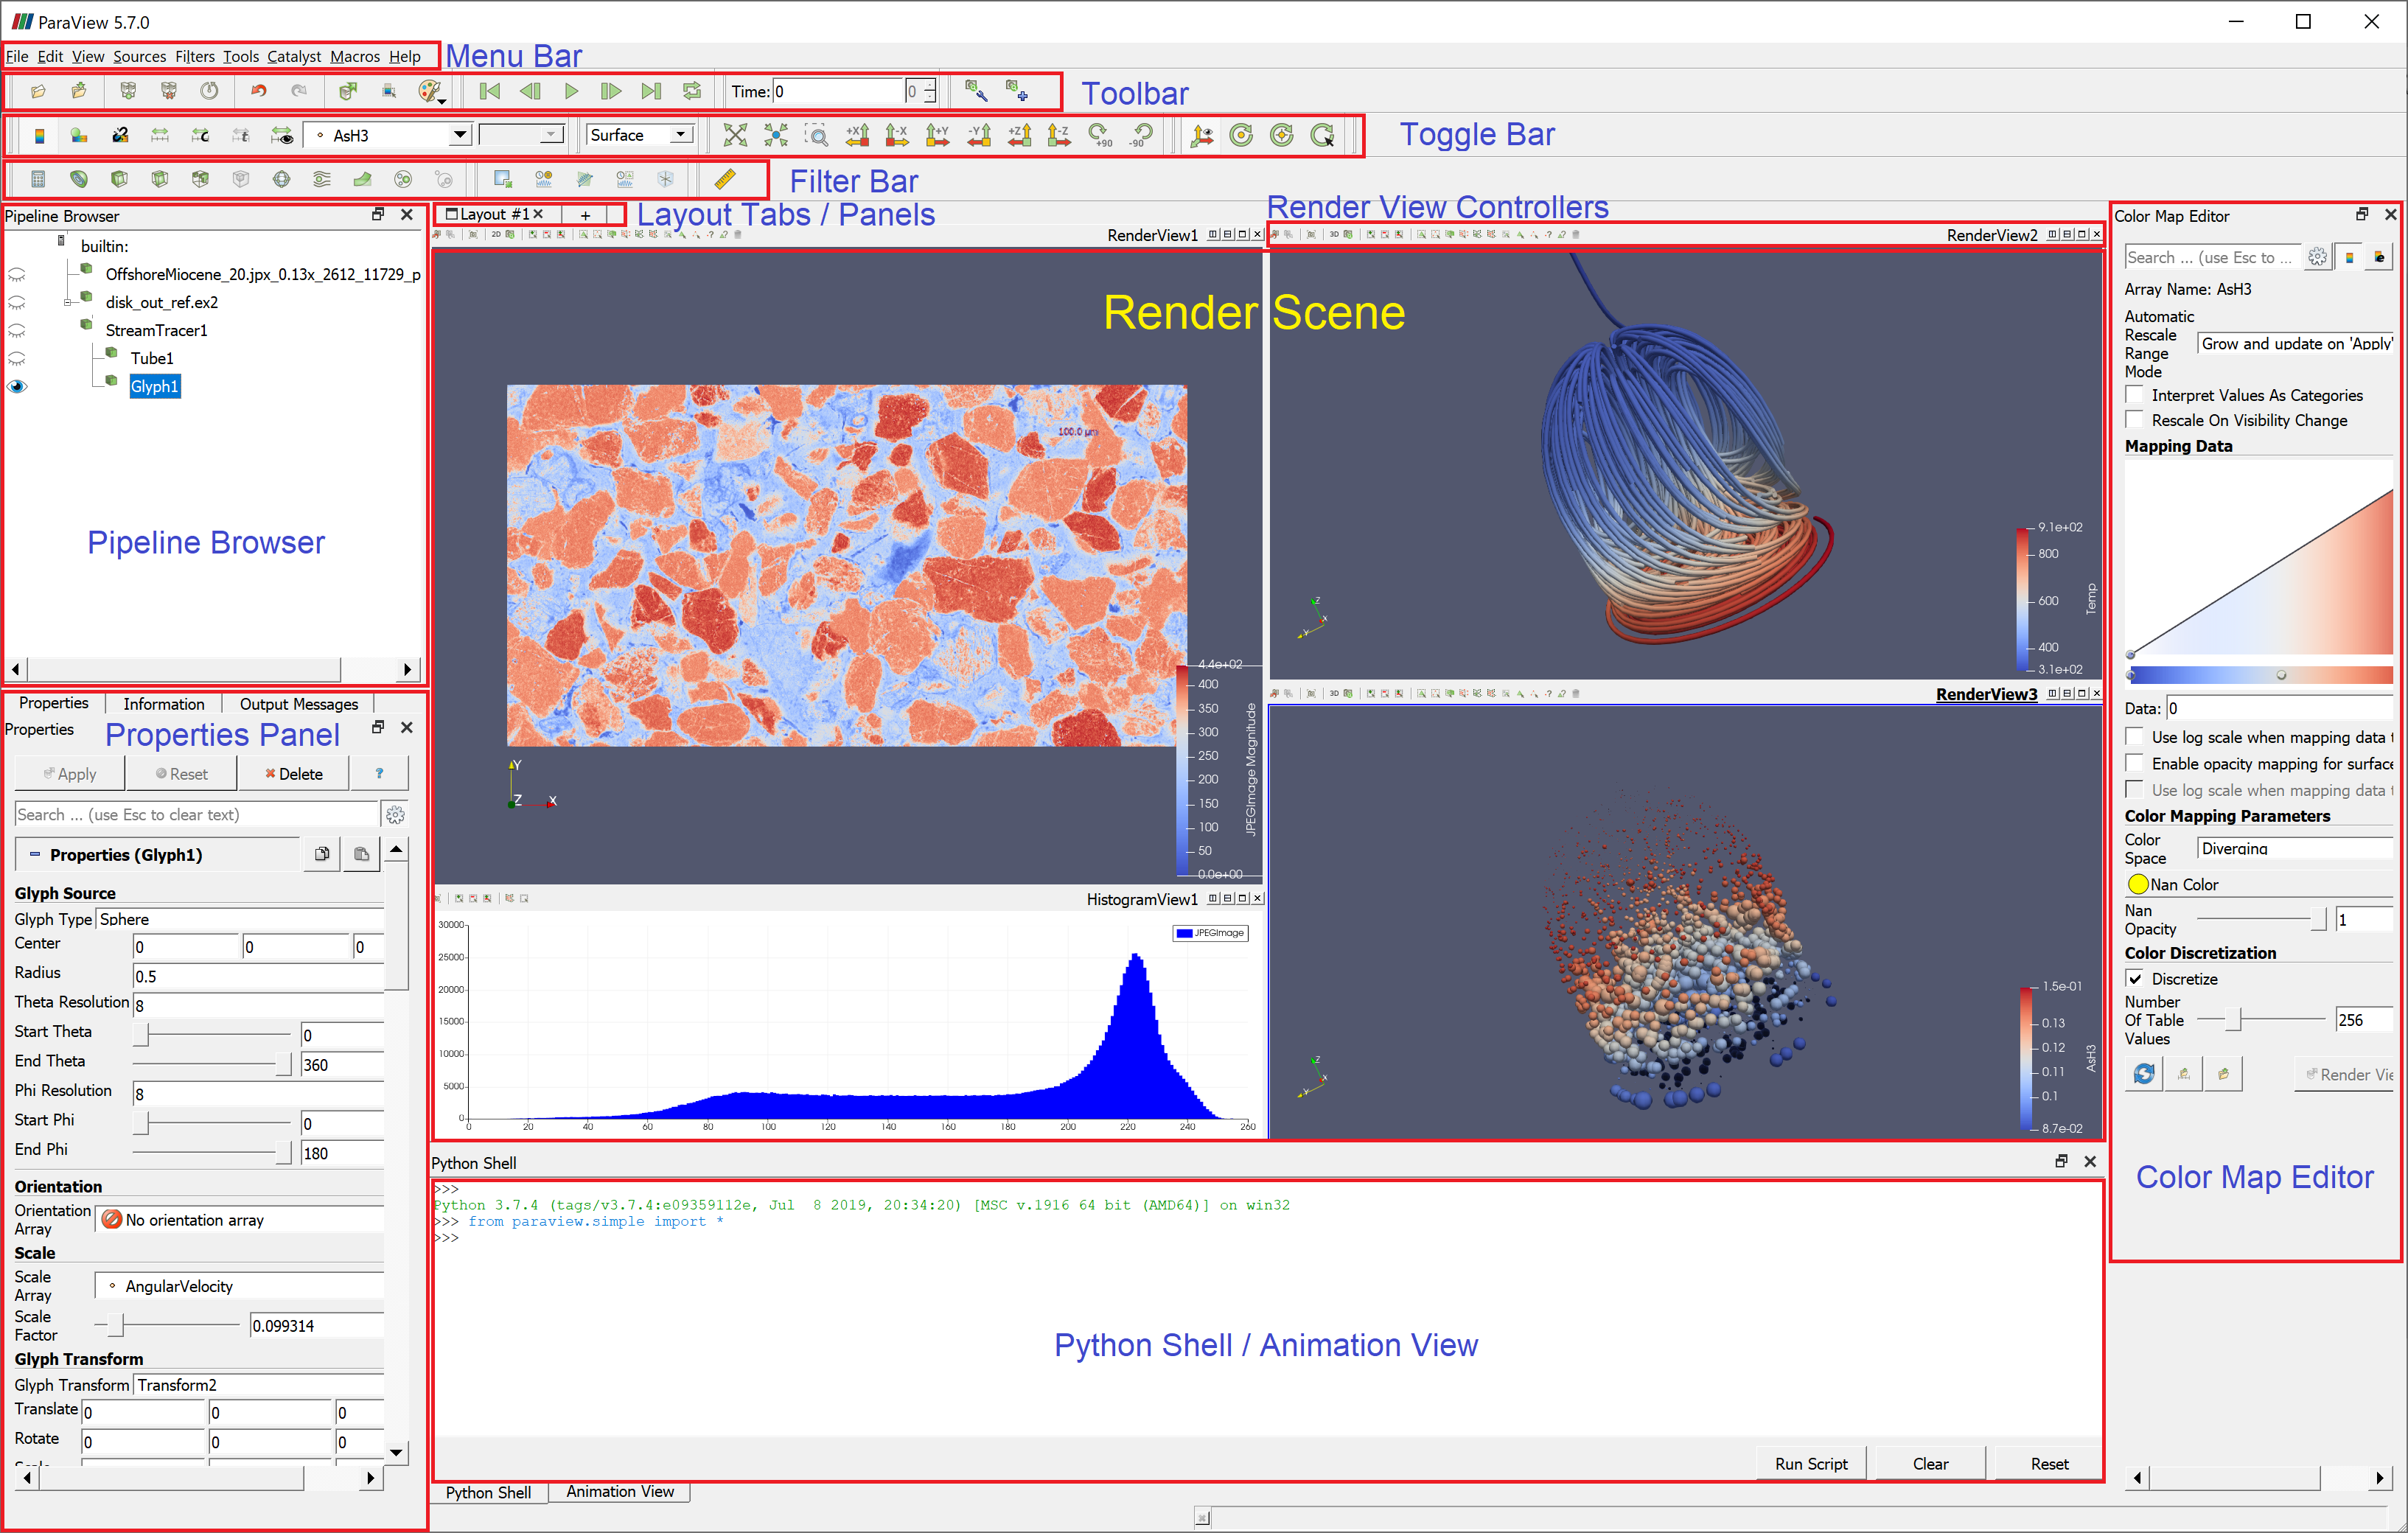
ParaView Interface
AWST ()
Questions?
Break-out room (hands-on session 1) will start in:
Hands On Session 1:
ParaView Basics
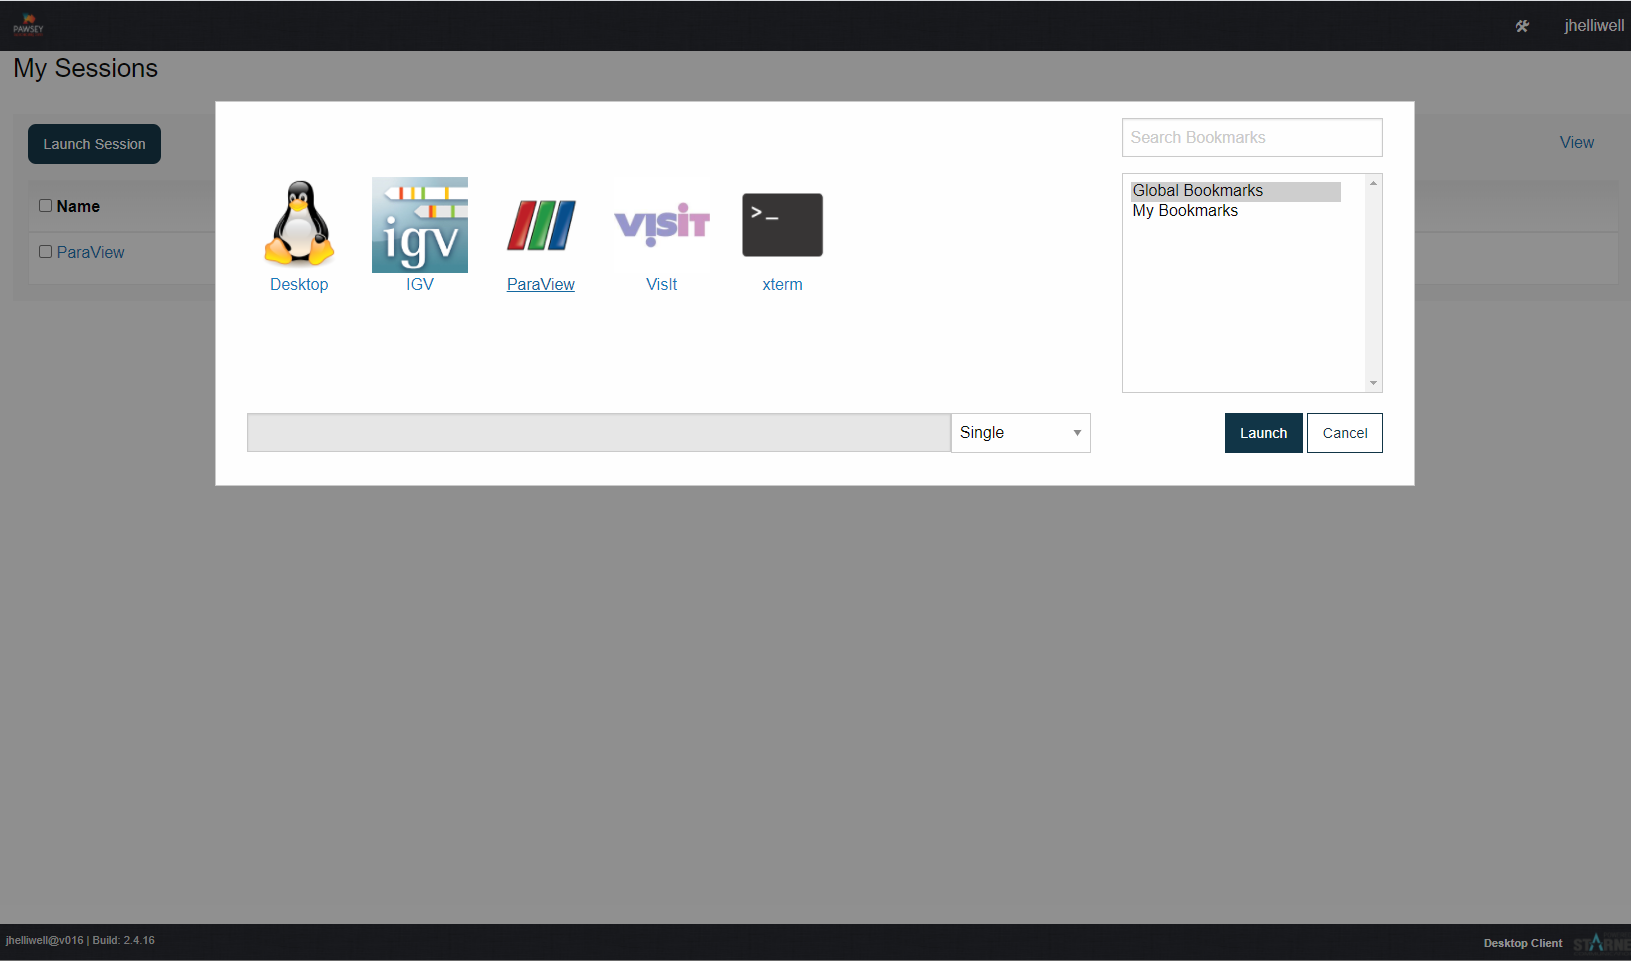
Launch Paraview Bookmark
- Open your preferred browser (e.g. Chrome, Firefox) and goto: remotevis.pawsey.org.au
ParaView Window
Data
- Simulation of the flow of air around a heated and spinning disk
Open Data
/scratch/courses01/remote_vis/paraview/disk_out_ref.ex2
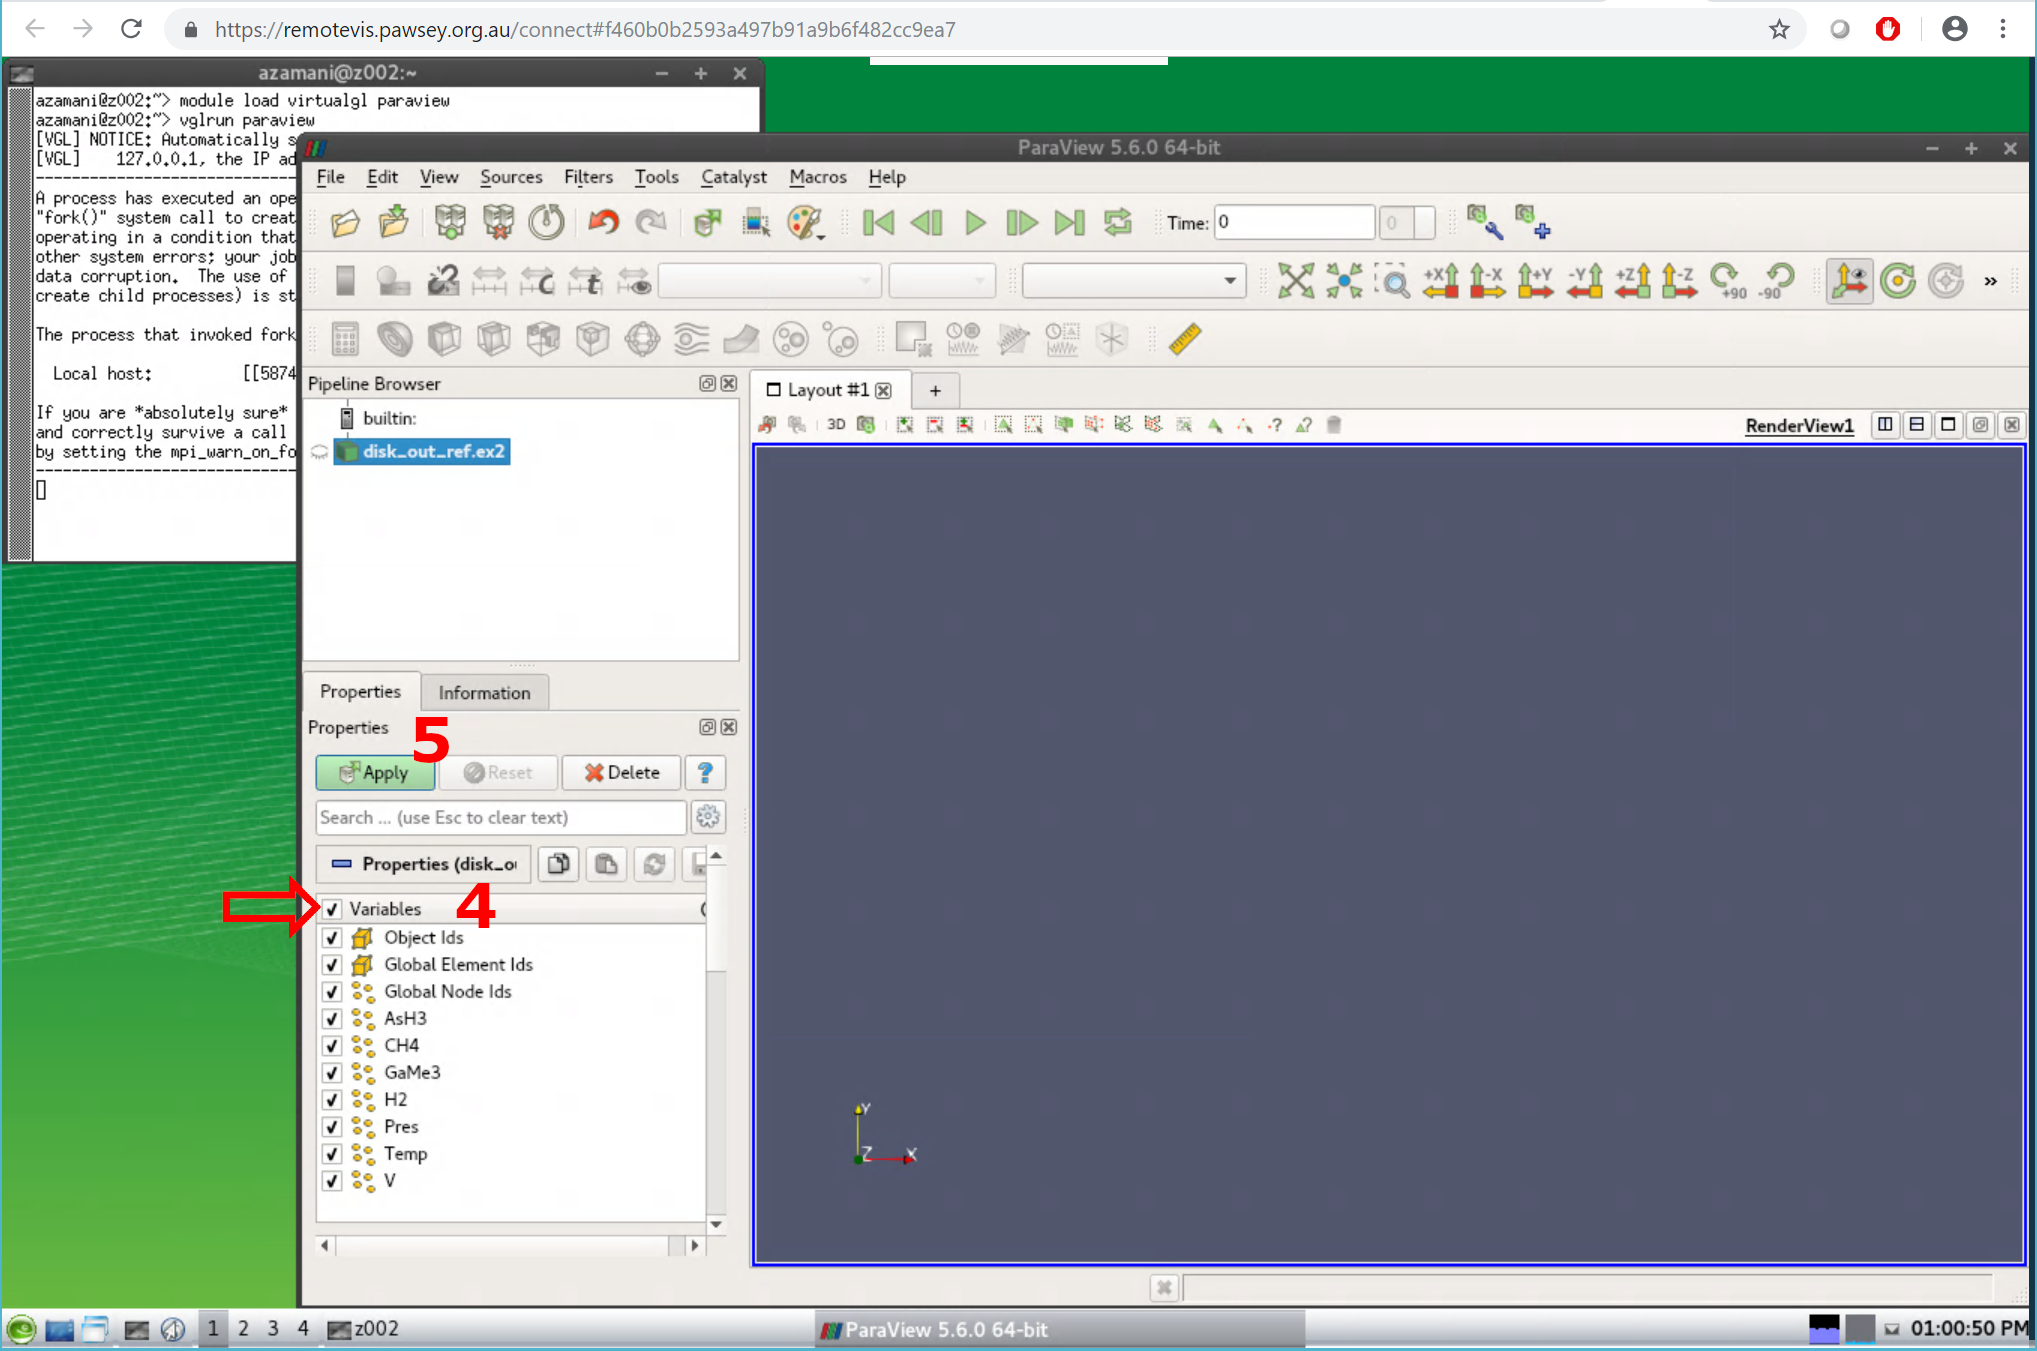
Load All Variables
- Click the checkbox to enable all variables in the properties panel and then click apply
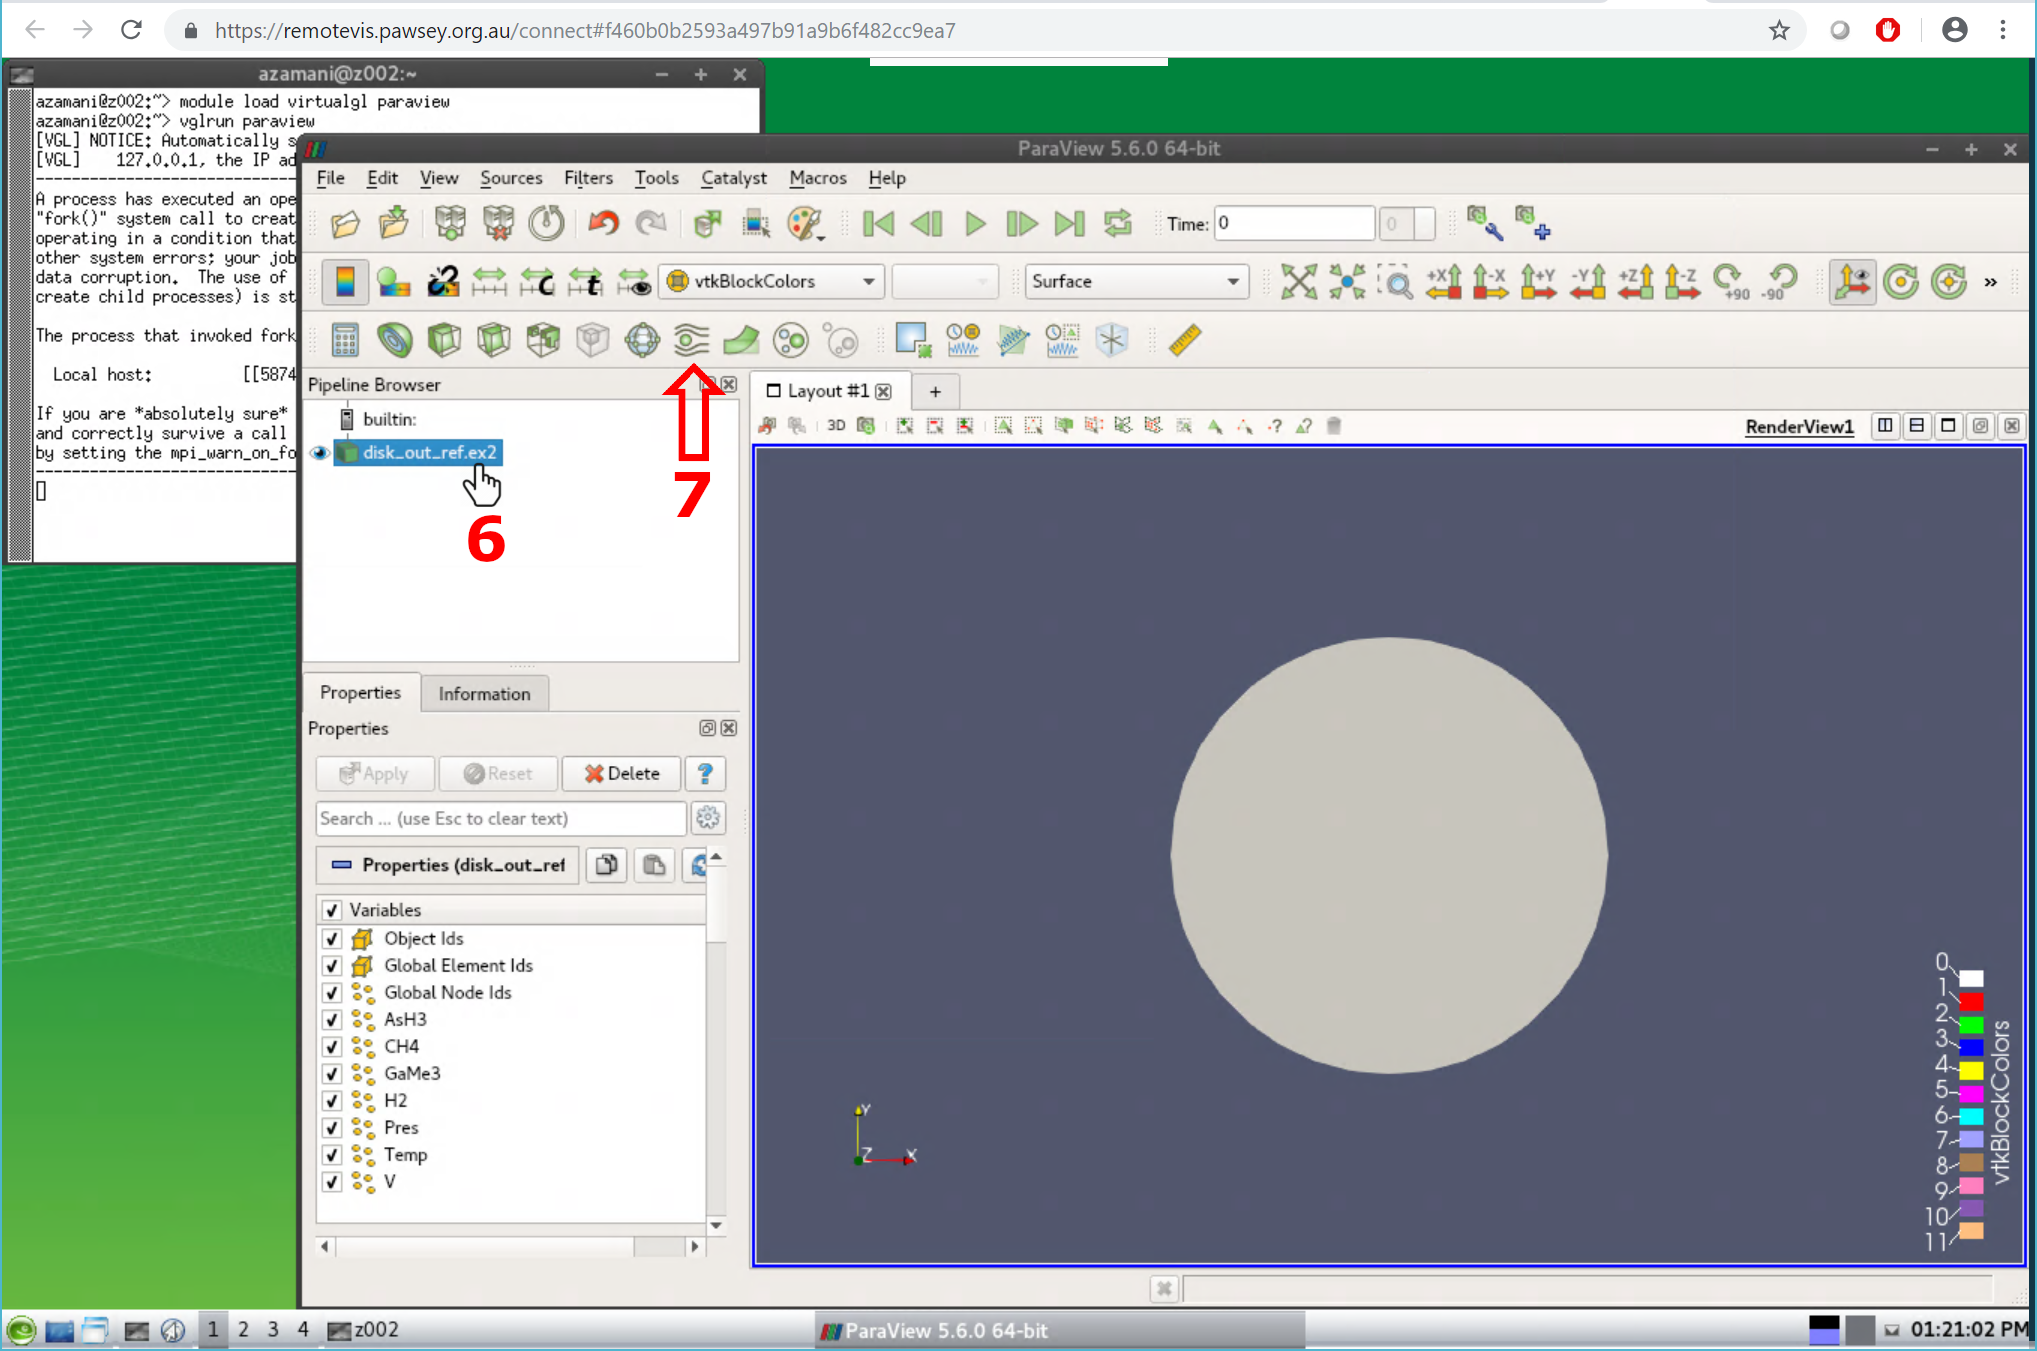
Add Stream Tracer
- While having the data selected in the pipeline browser, add a stream tracer filter to the data
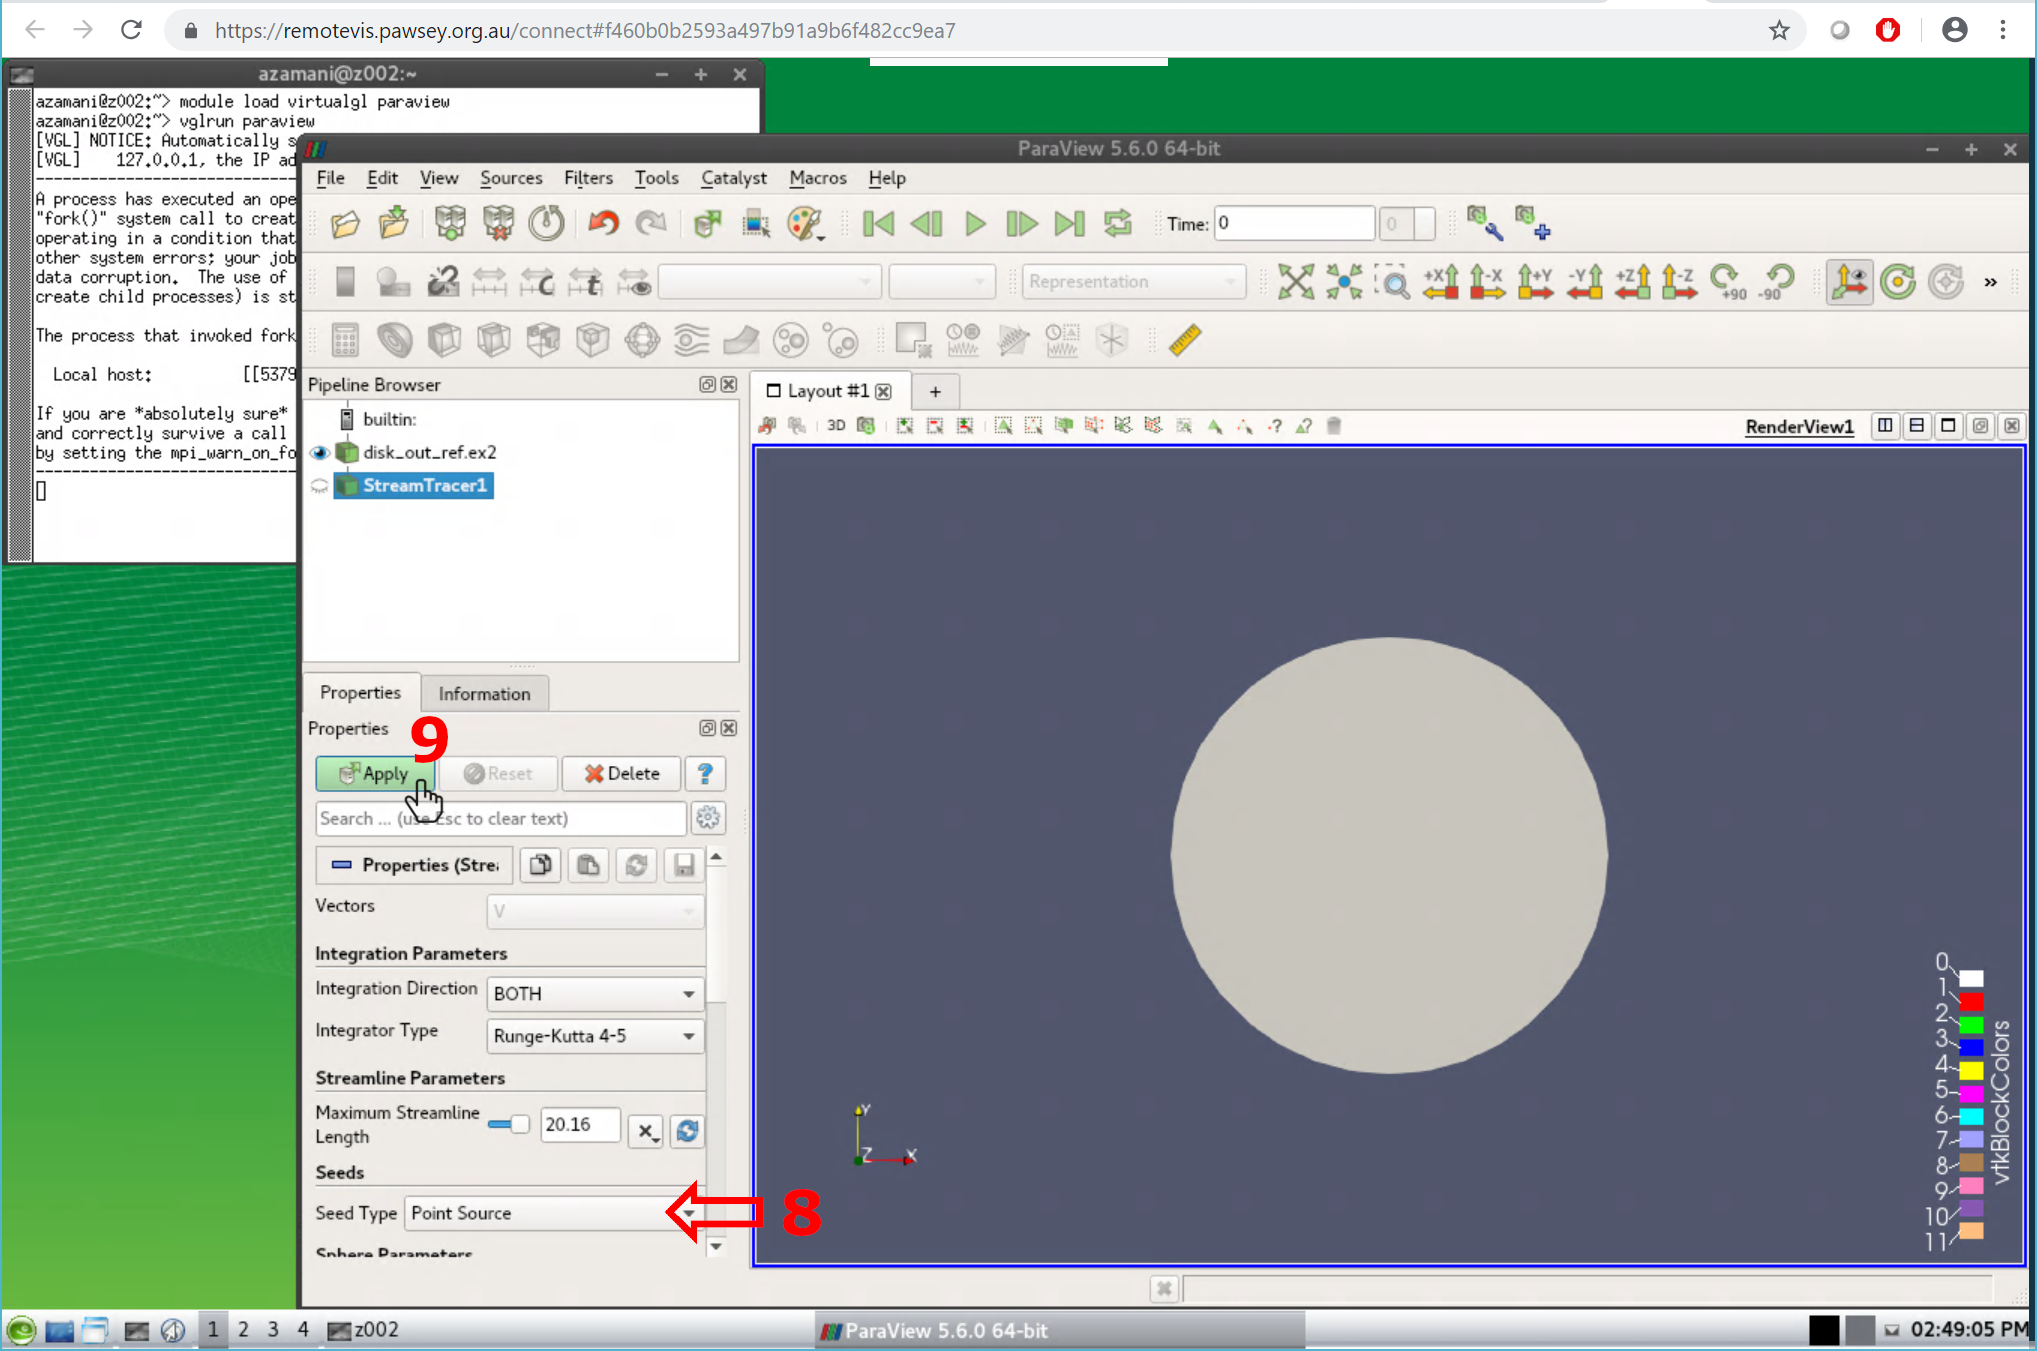
Add Stream Tracer cont.
- Set the seed type to "Point Source" and click apply to make the filter active
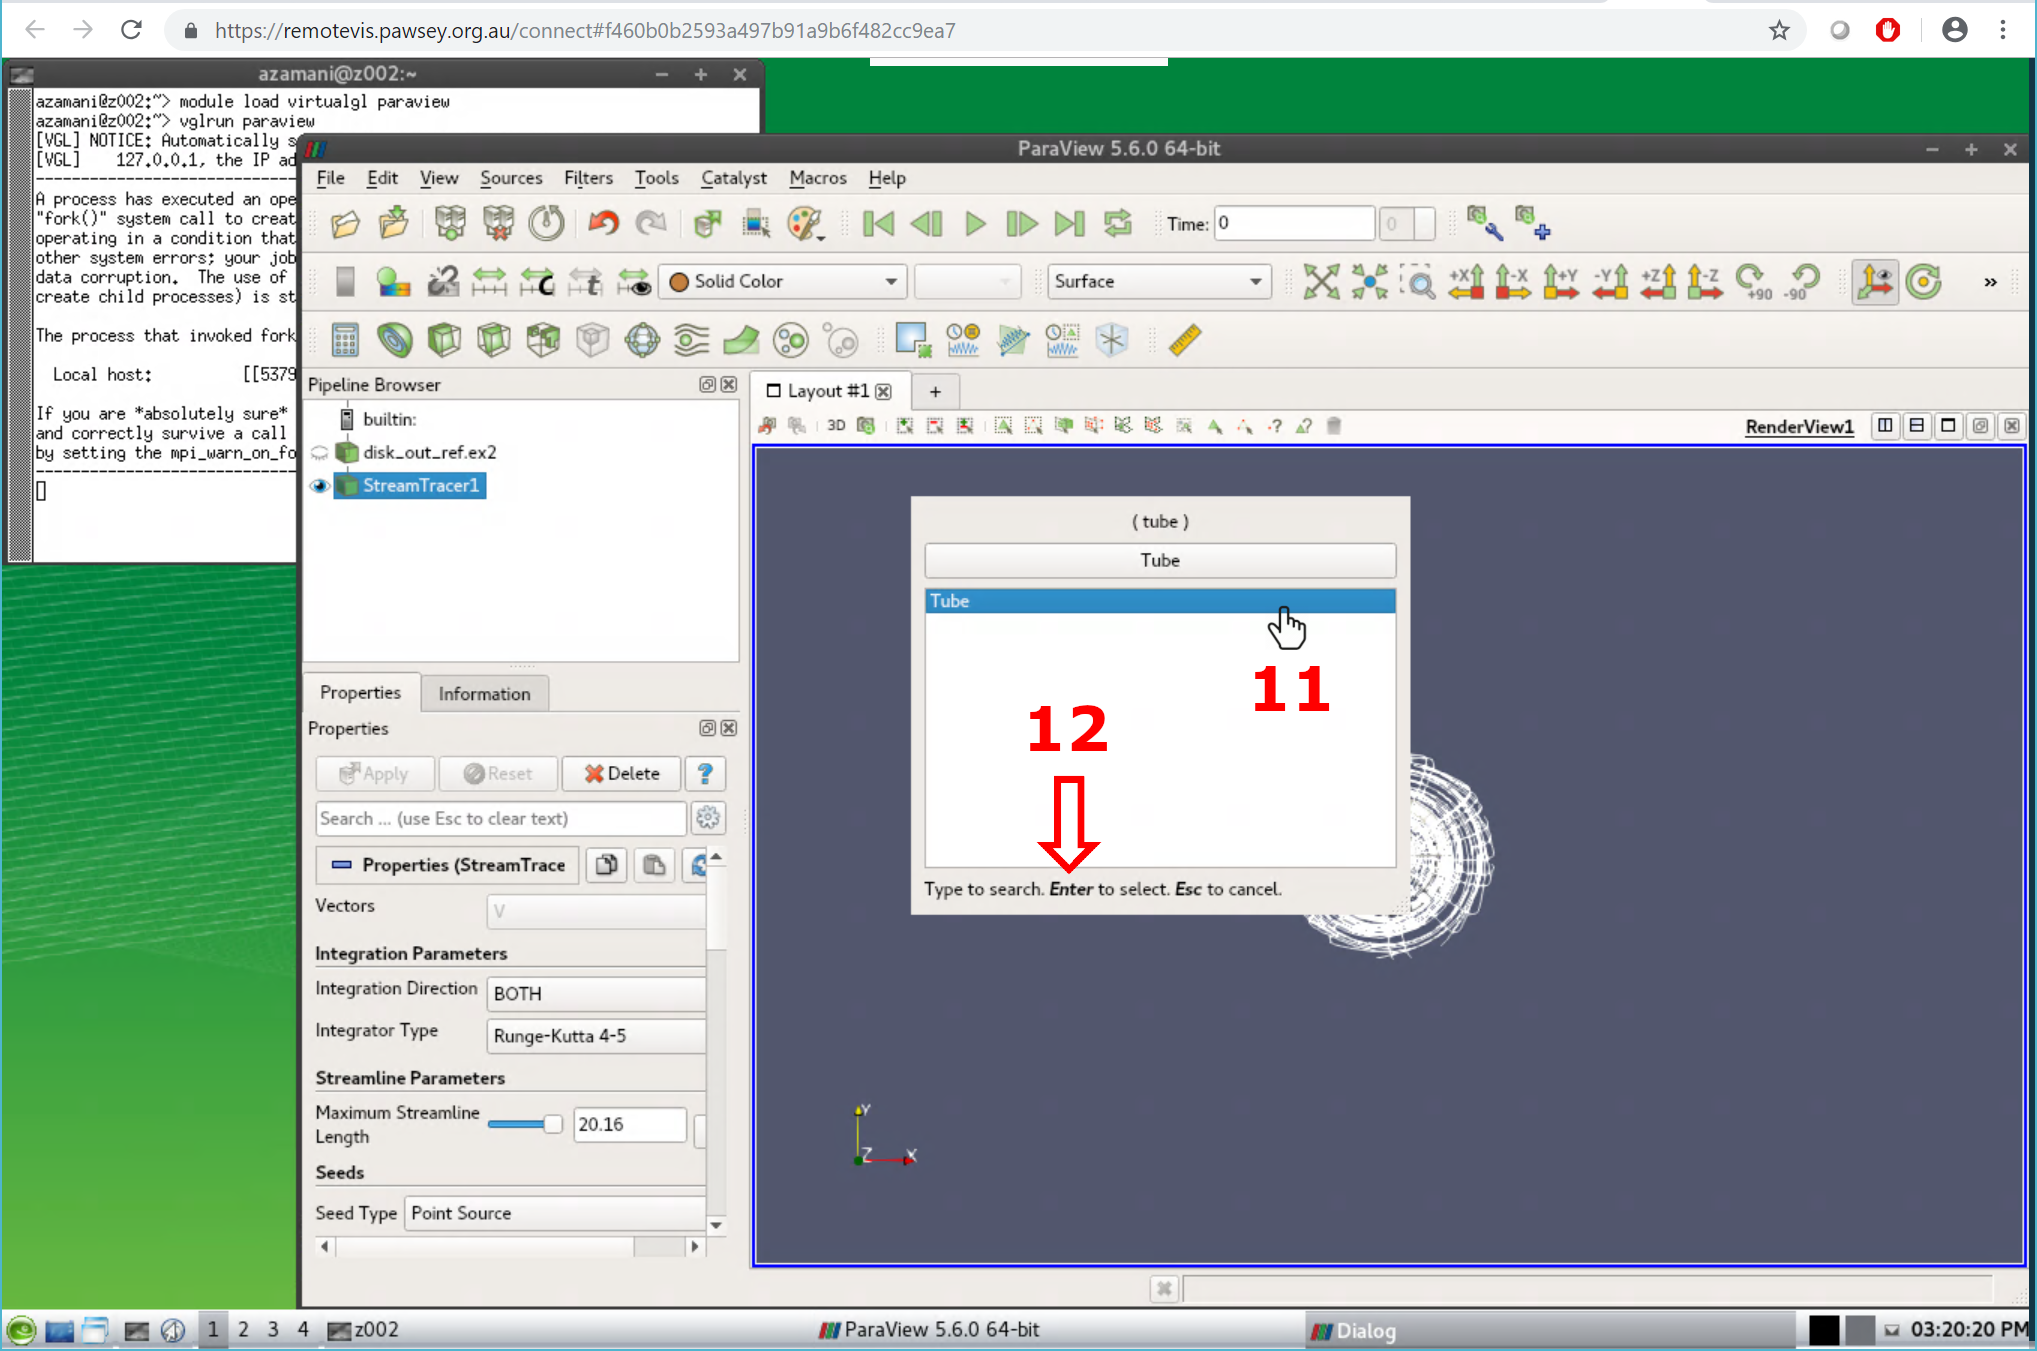
How to Search for Filters
- Click the filters menu in the top bar and select search
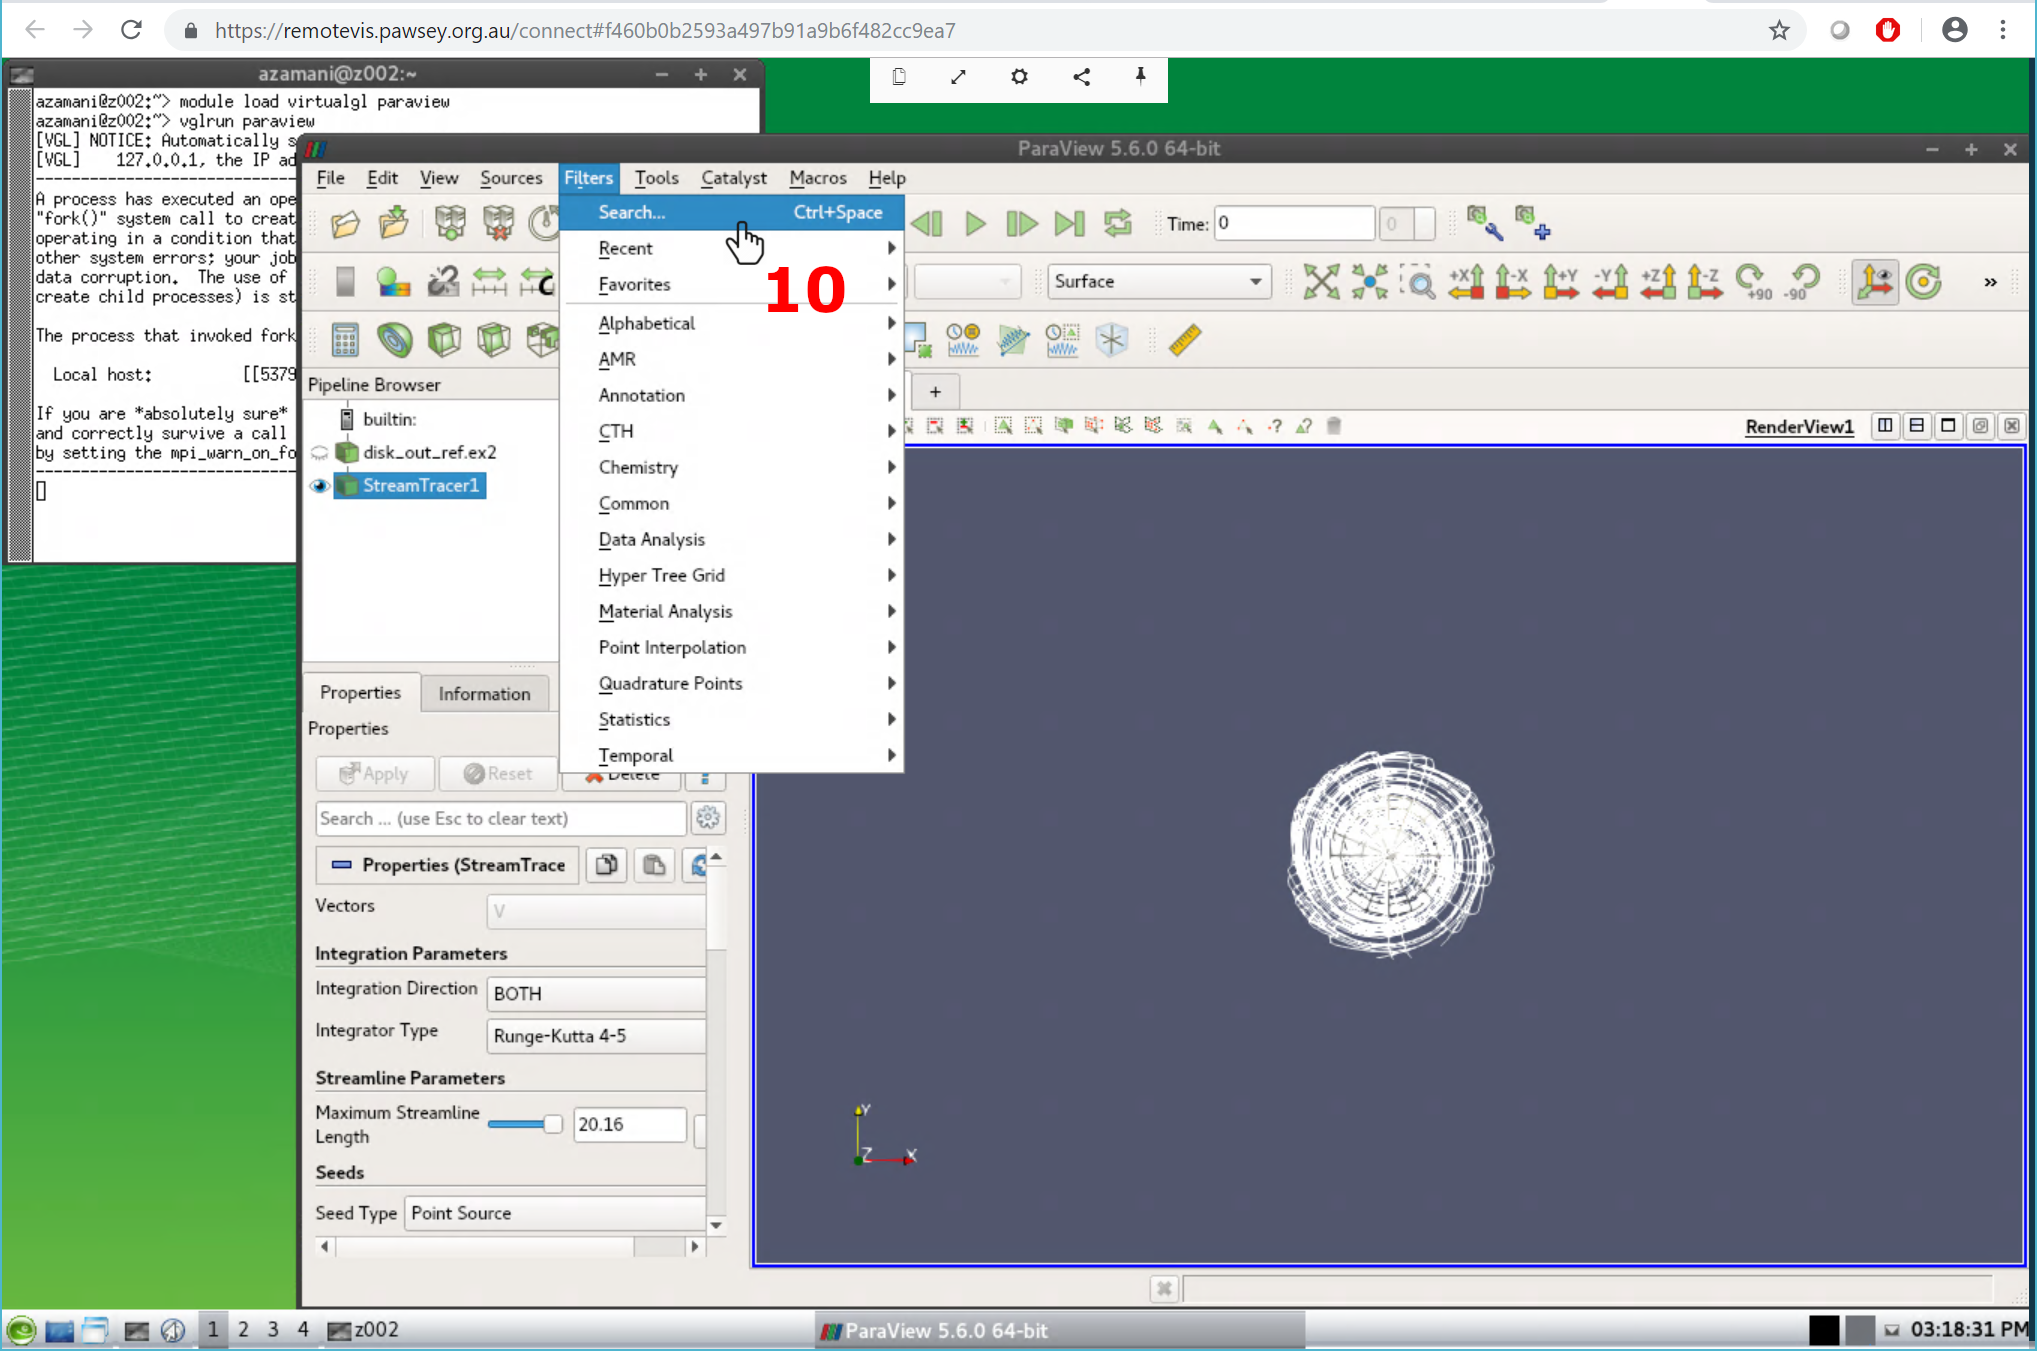
Add Tube Filter
- type all or part of "tube" to find the tube filter the press enter to add it
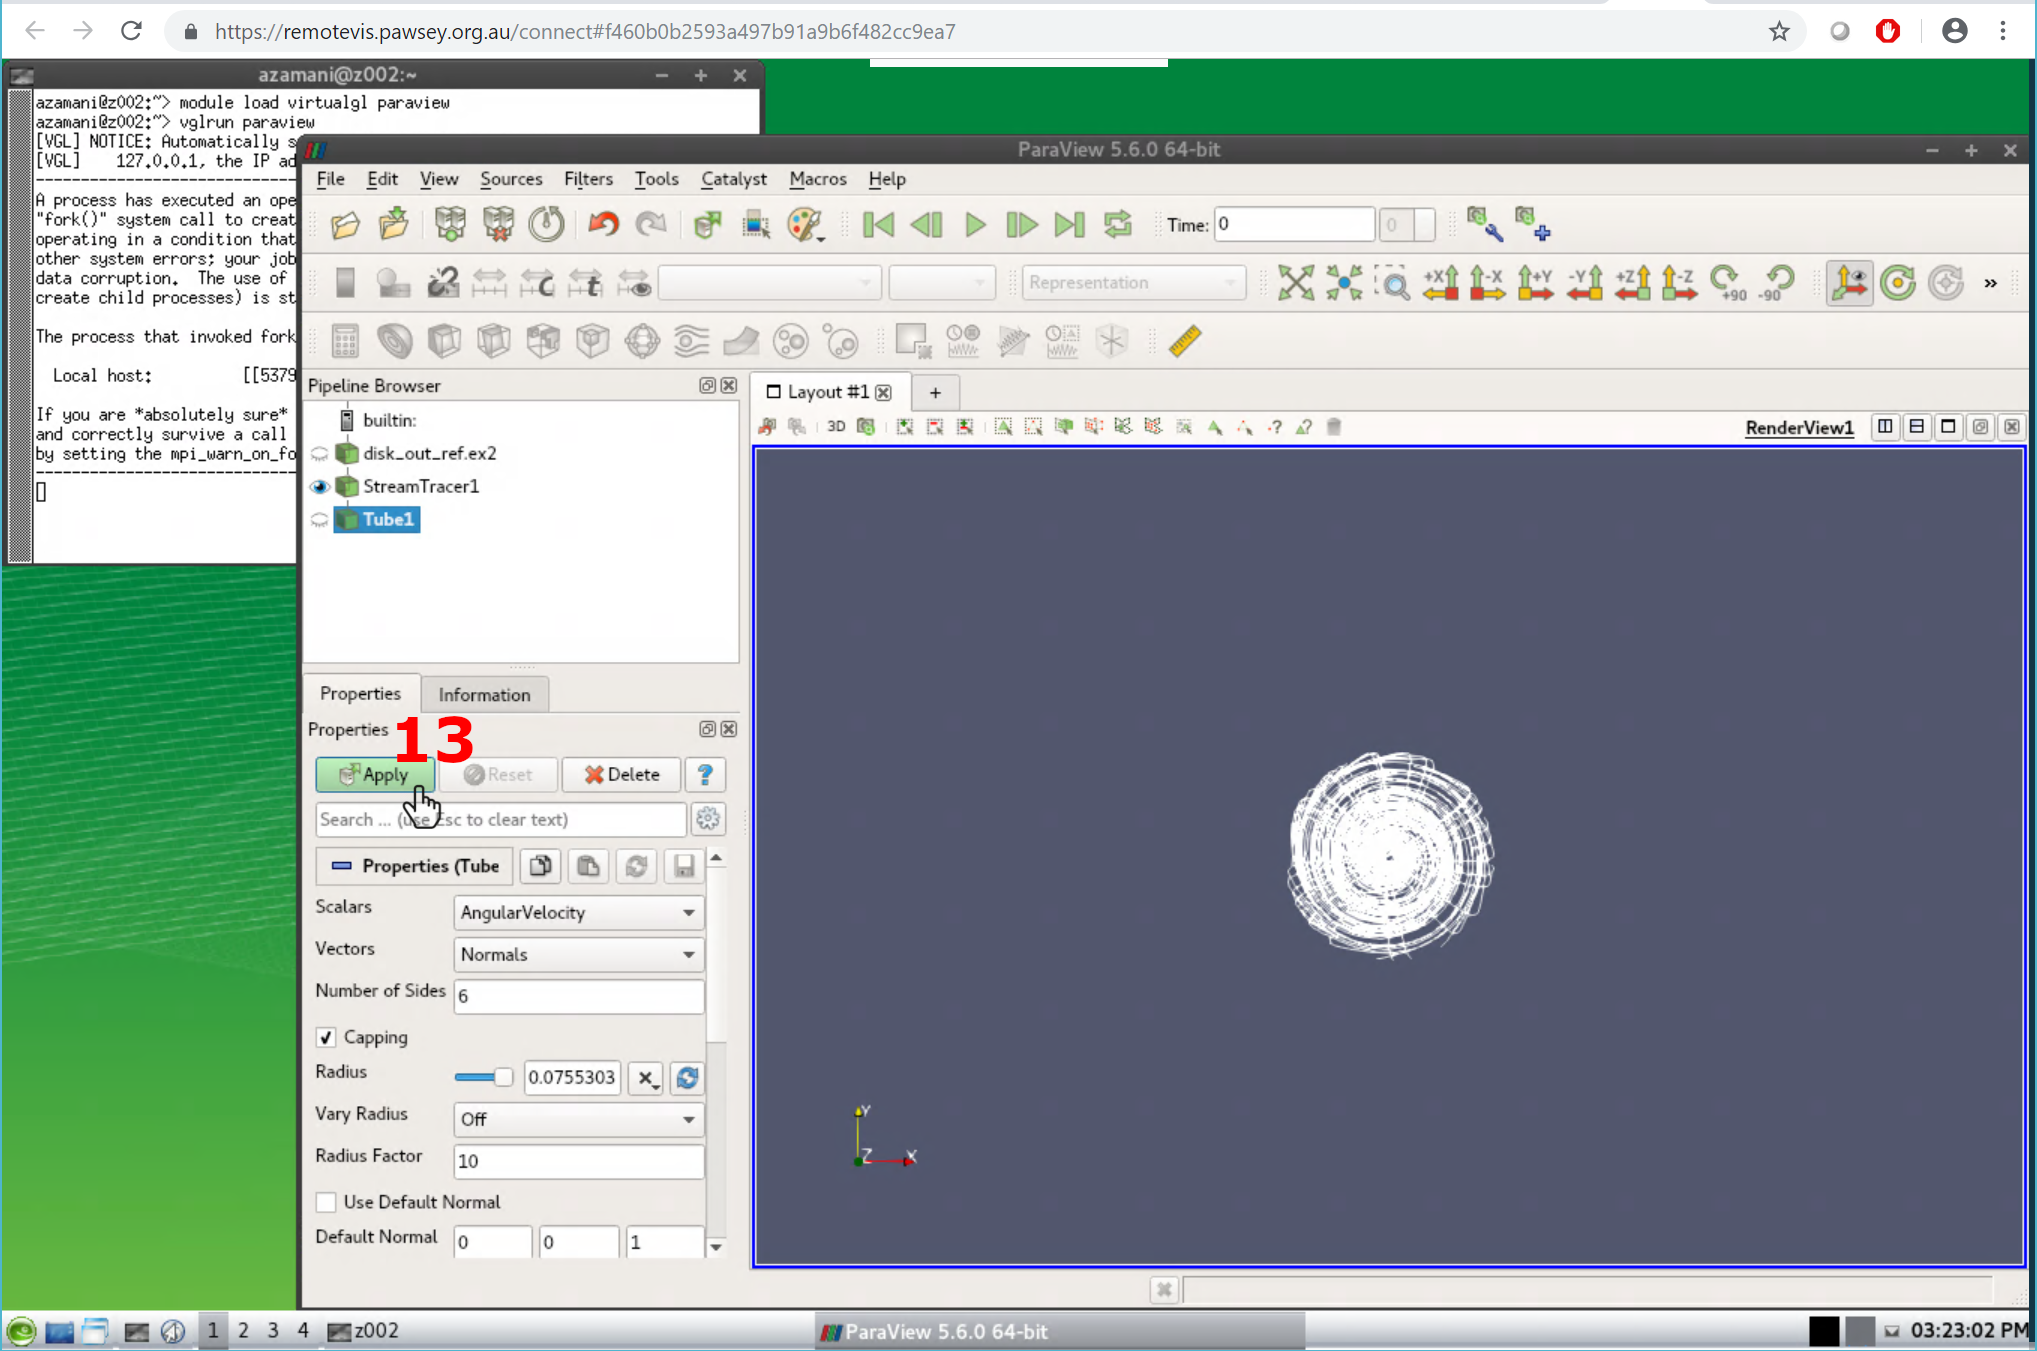
Activate Tube Filter
- Once again, you must click apply in the properties panel for the filter to activate
- You can also click the eye icon to apply
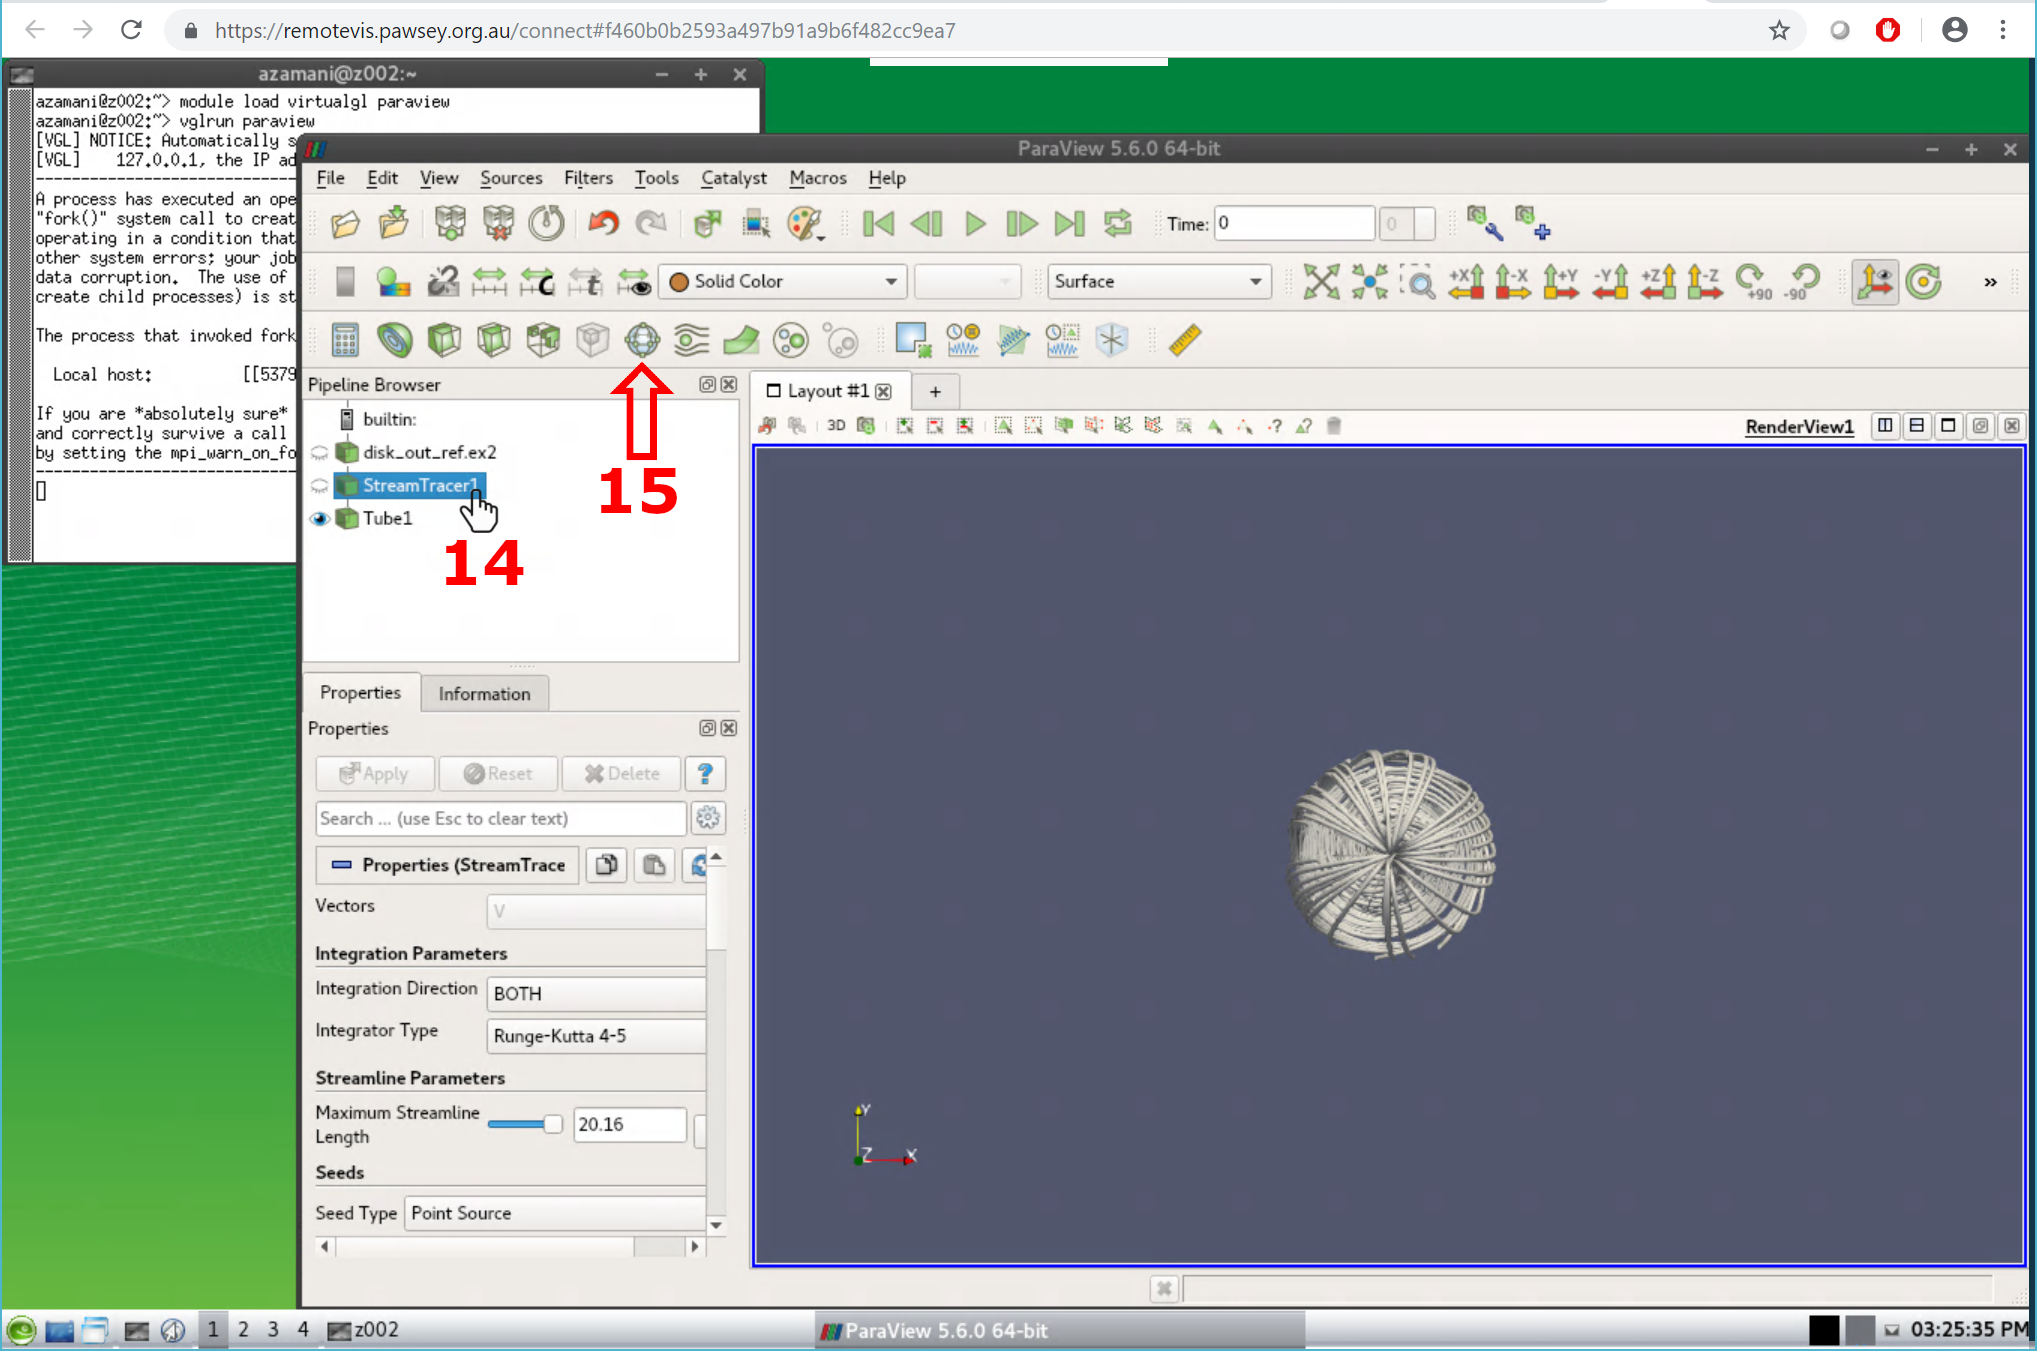
Add Glyph Filter
- Select the stream tracer object in the pipeline browser
- Add a Glyph filter from then filters bar
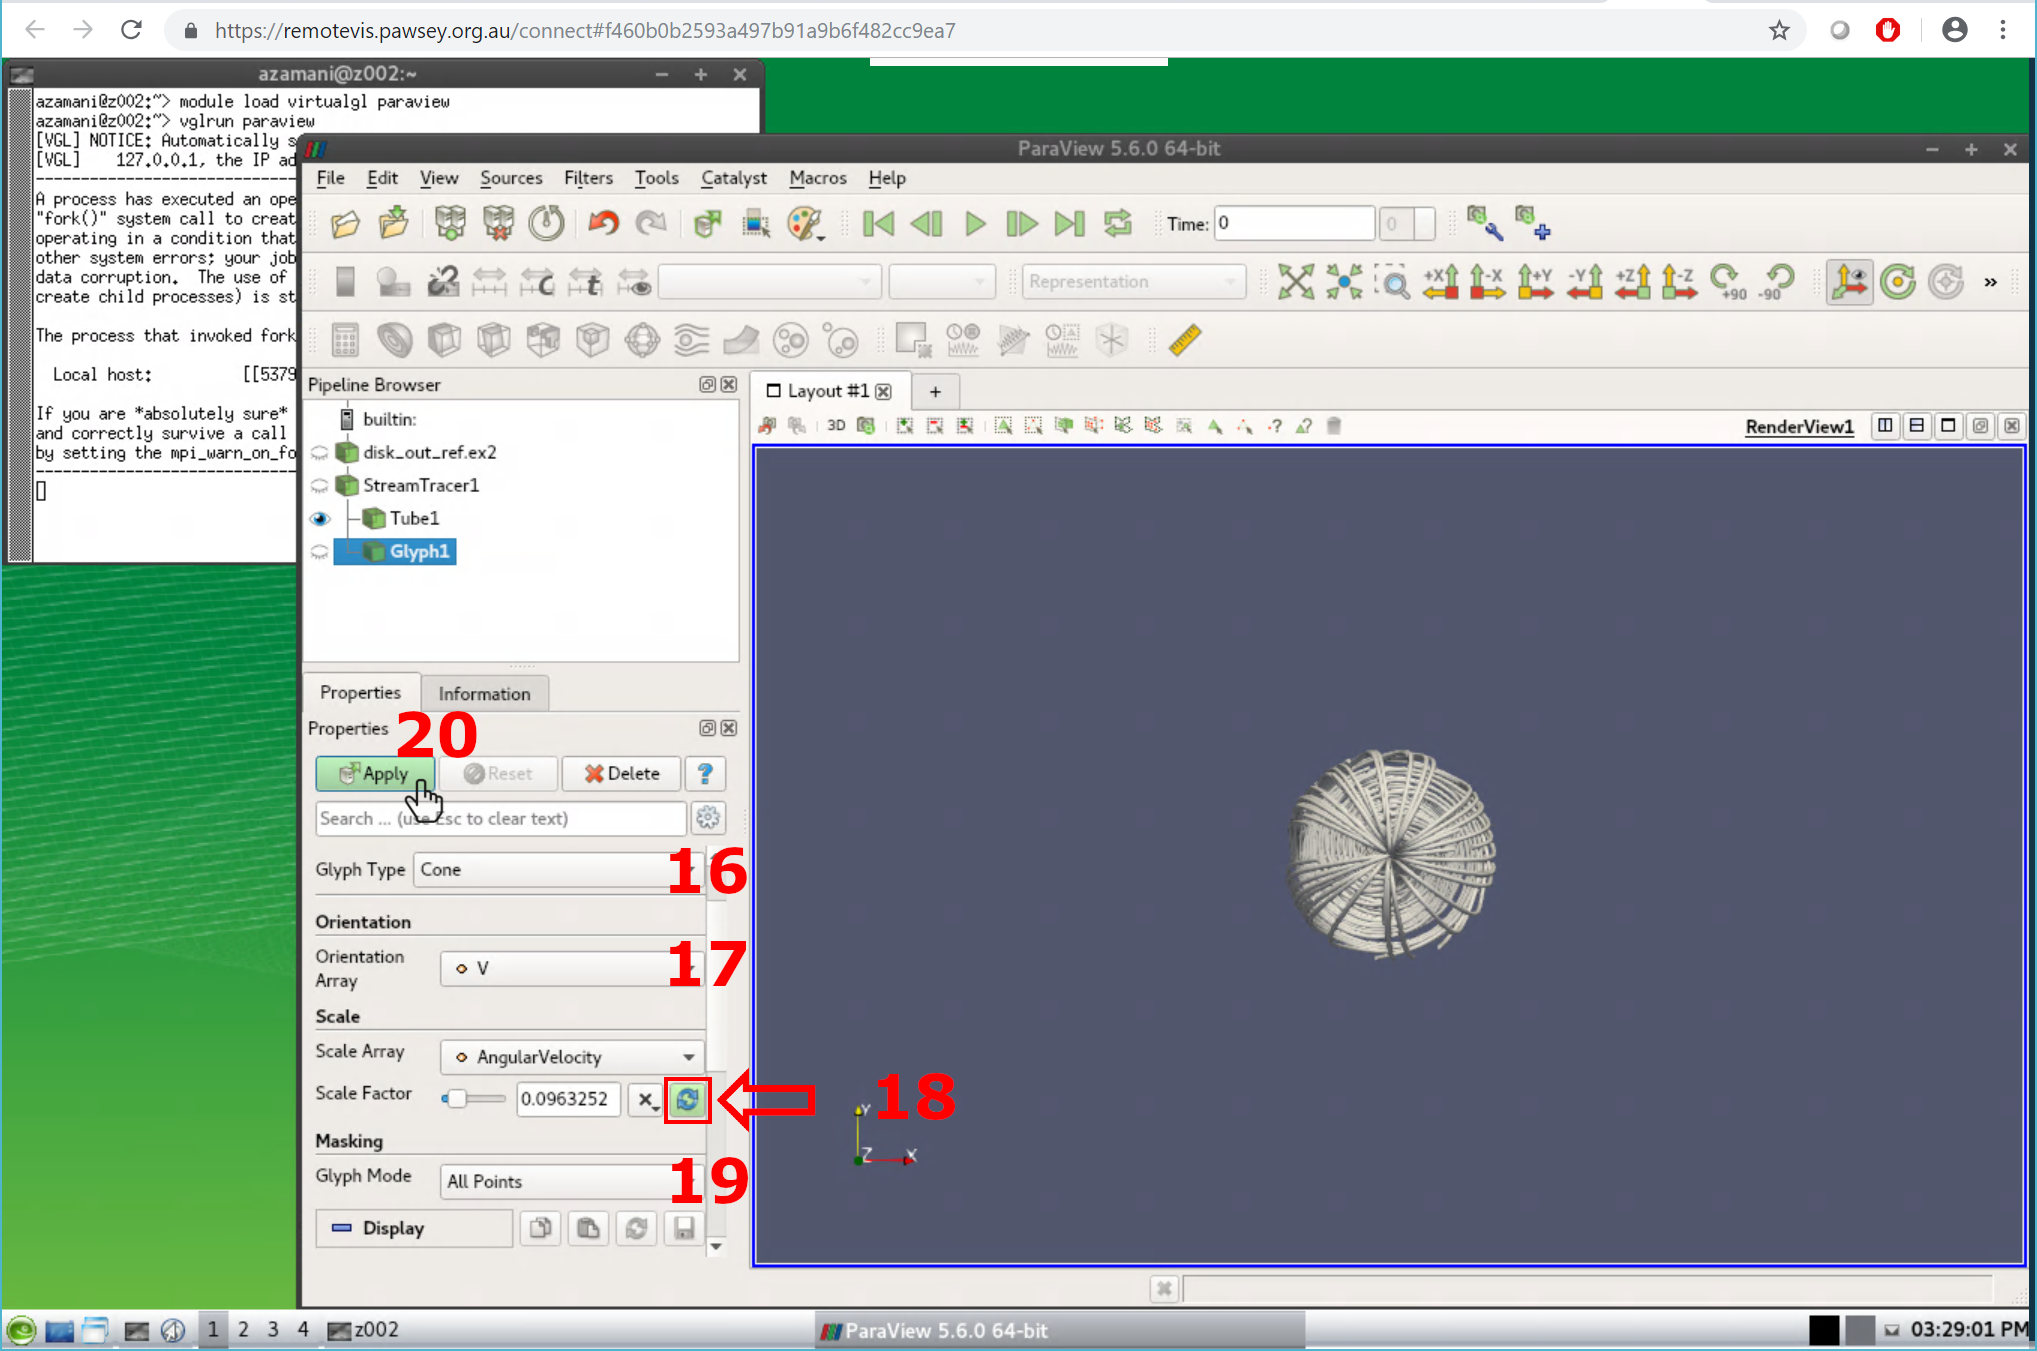
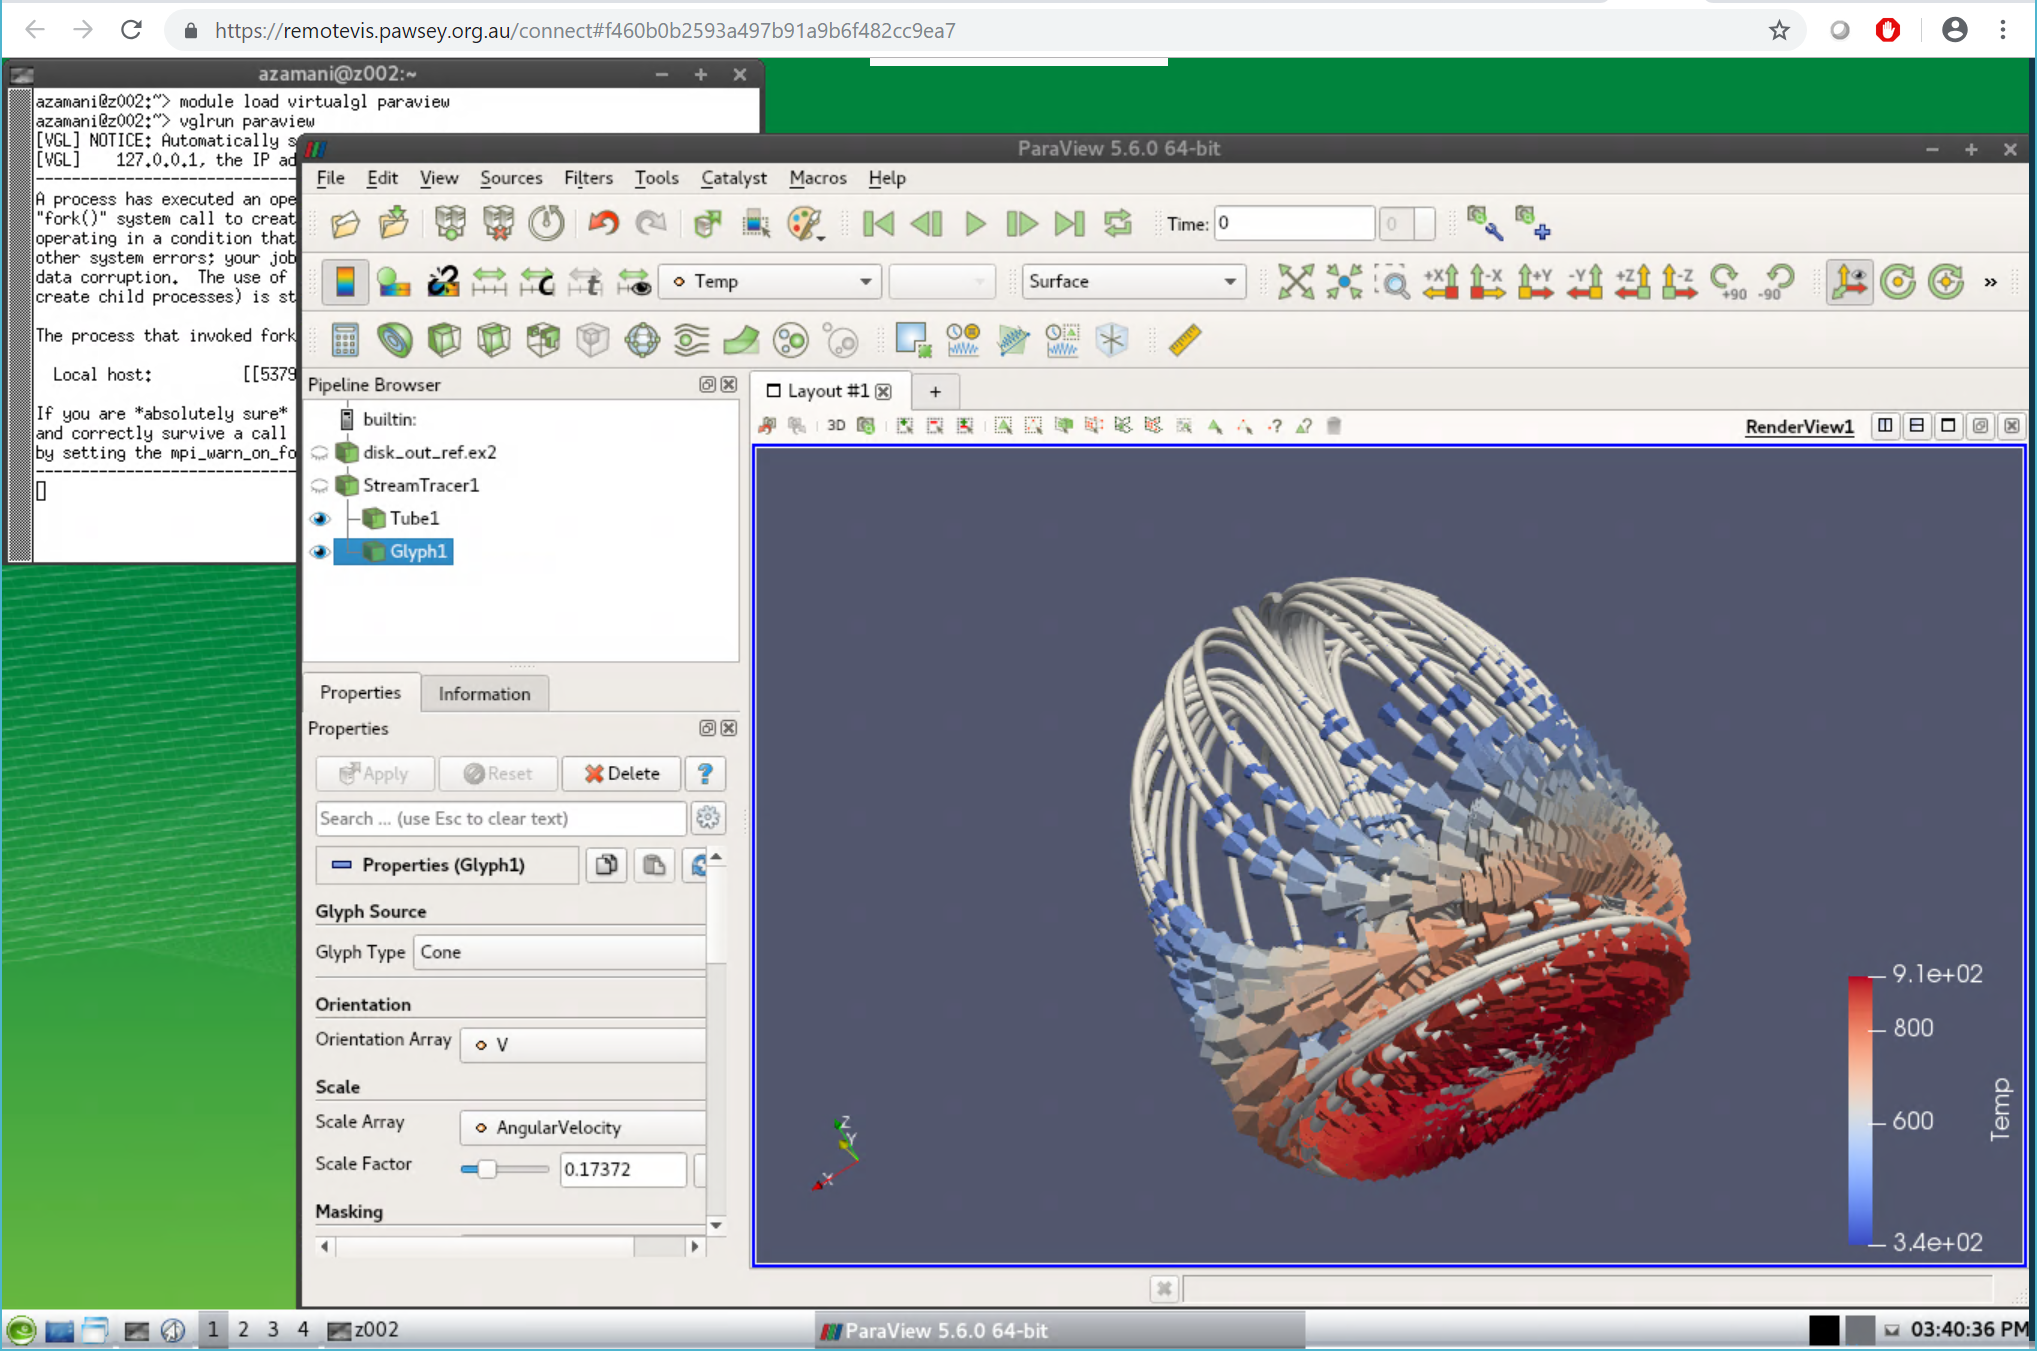
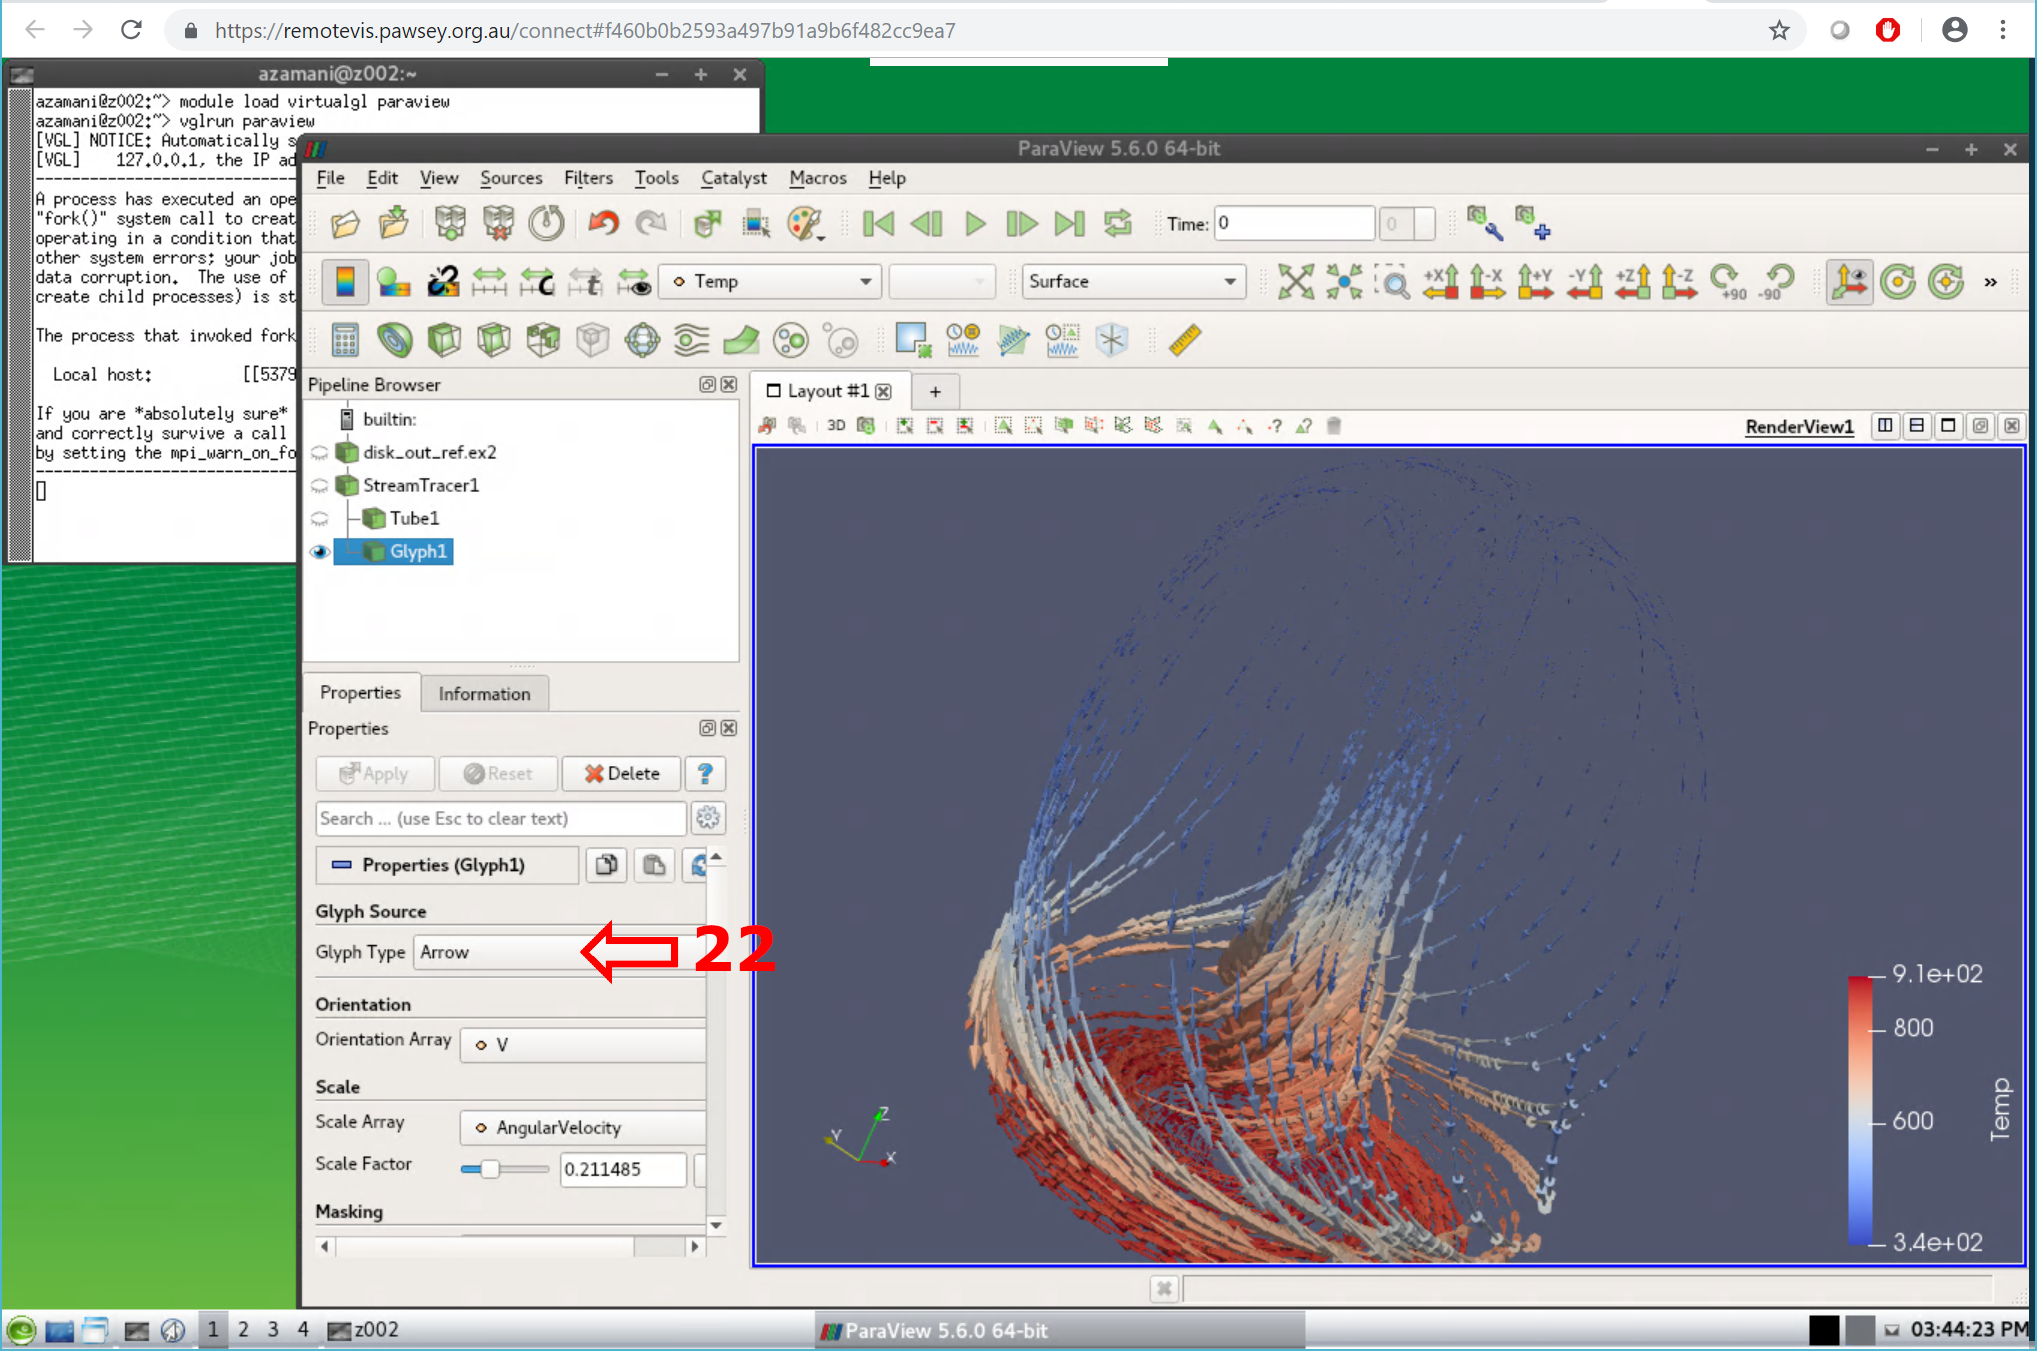
Configure Glyph Filter Properties
- Glyph type: Cone Orientation: V
- Press the refresh scale factor button to automatically adjust scale
- You may need to manually adjust the scale and click apply to get good looking arrows
- Masking glyph mode: All points
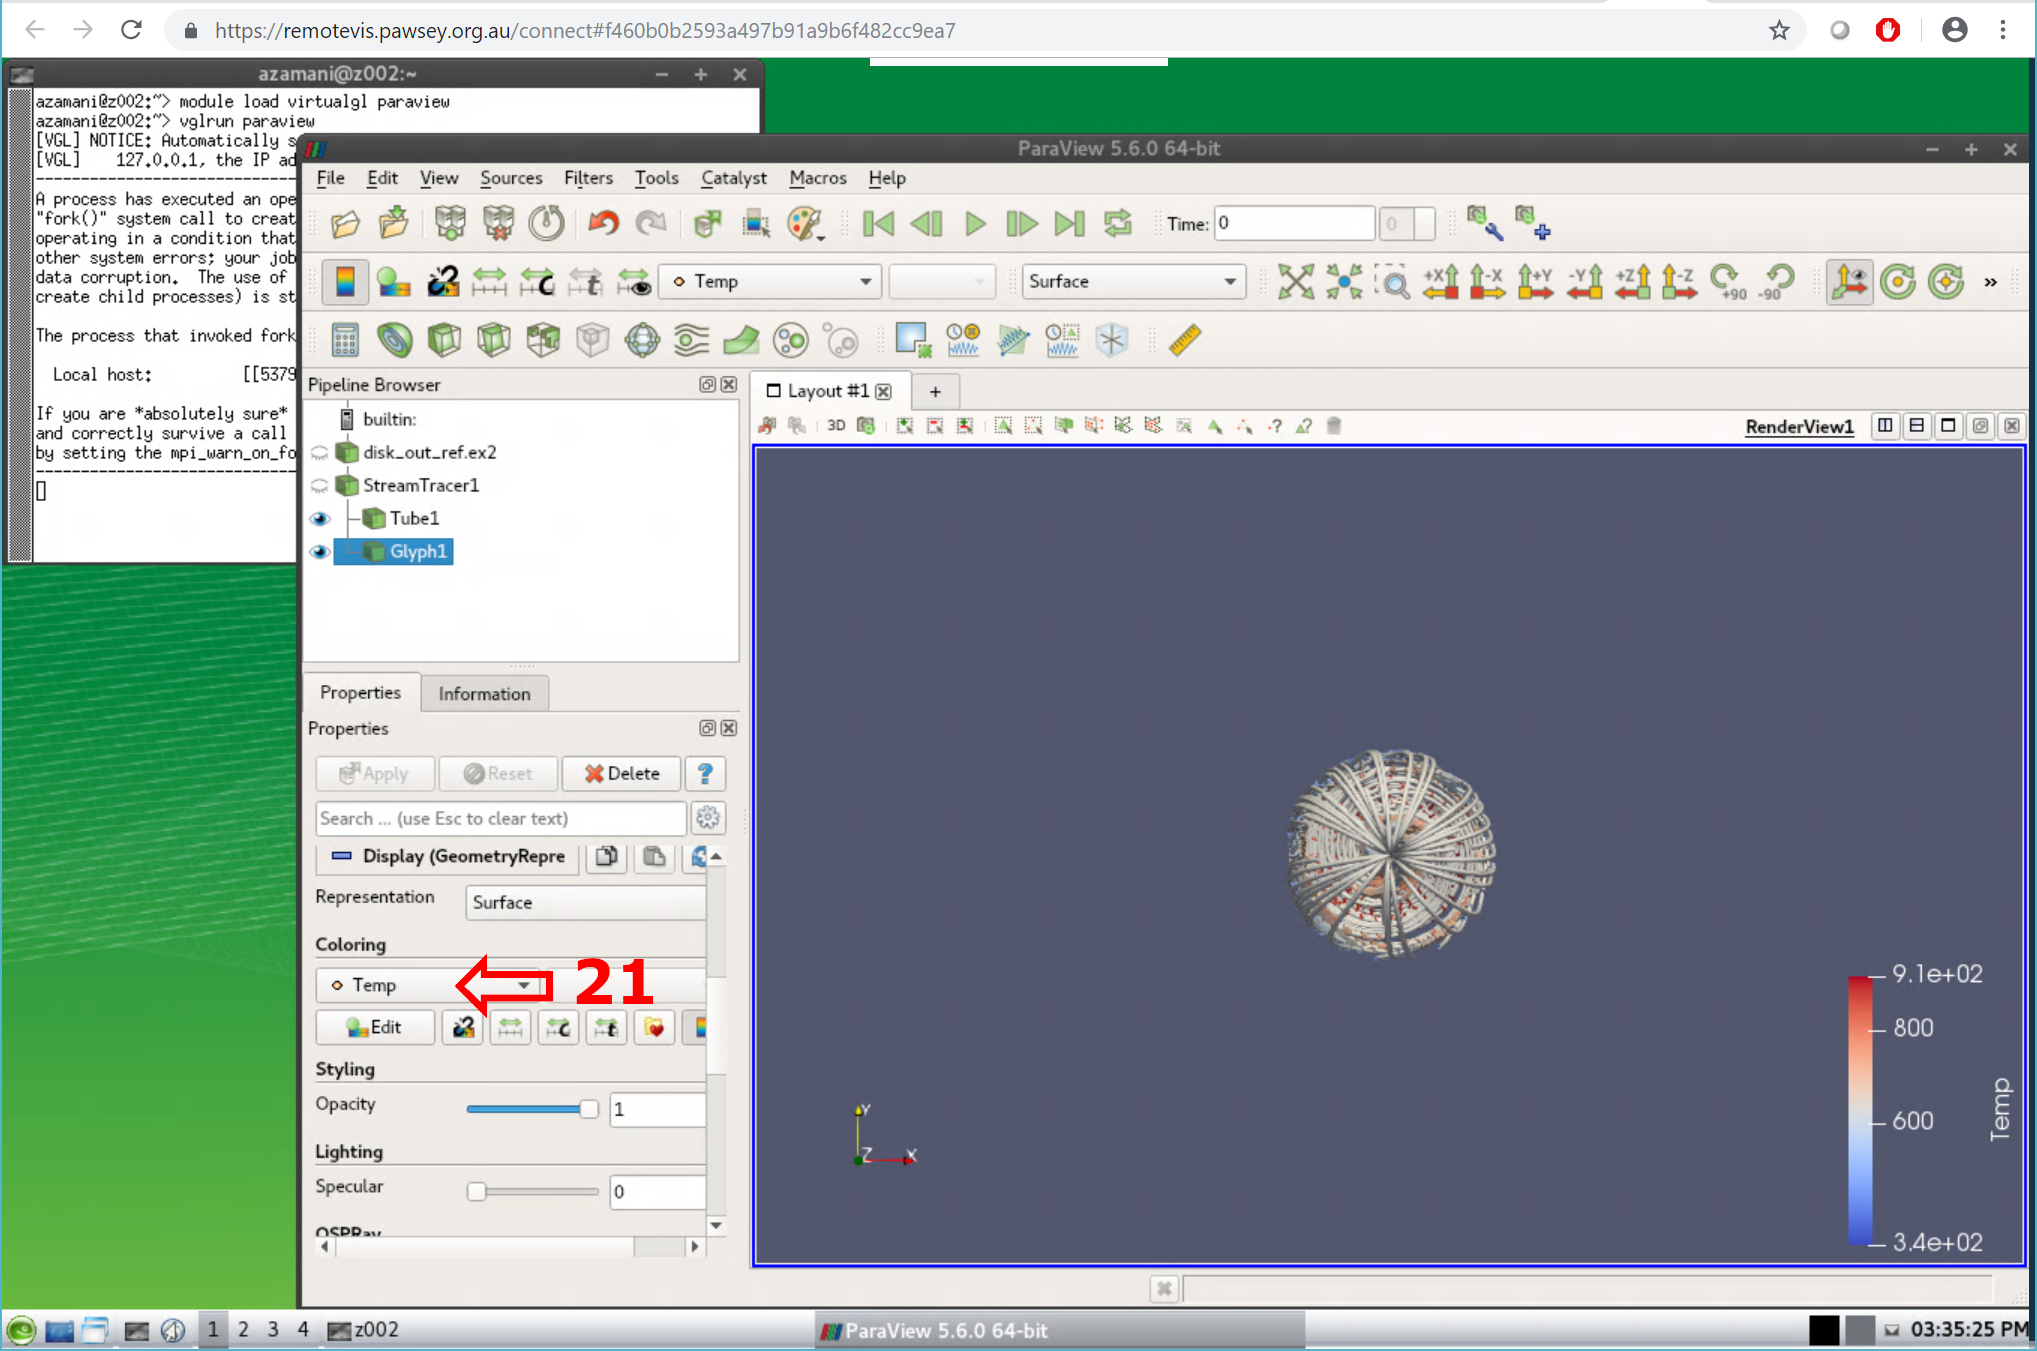
Configure Glyph Colouring
- Scroll down to colouring and set the variable to use for colour to "temp"
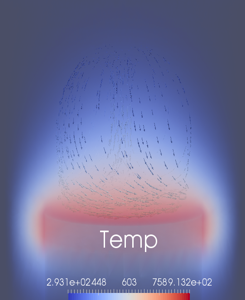
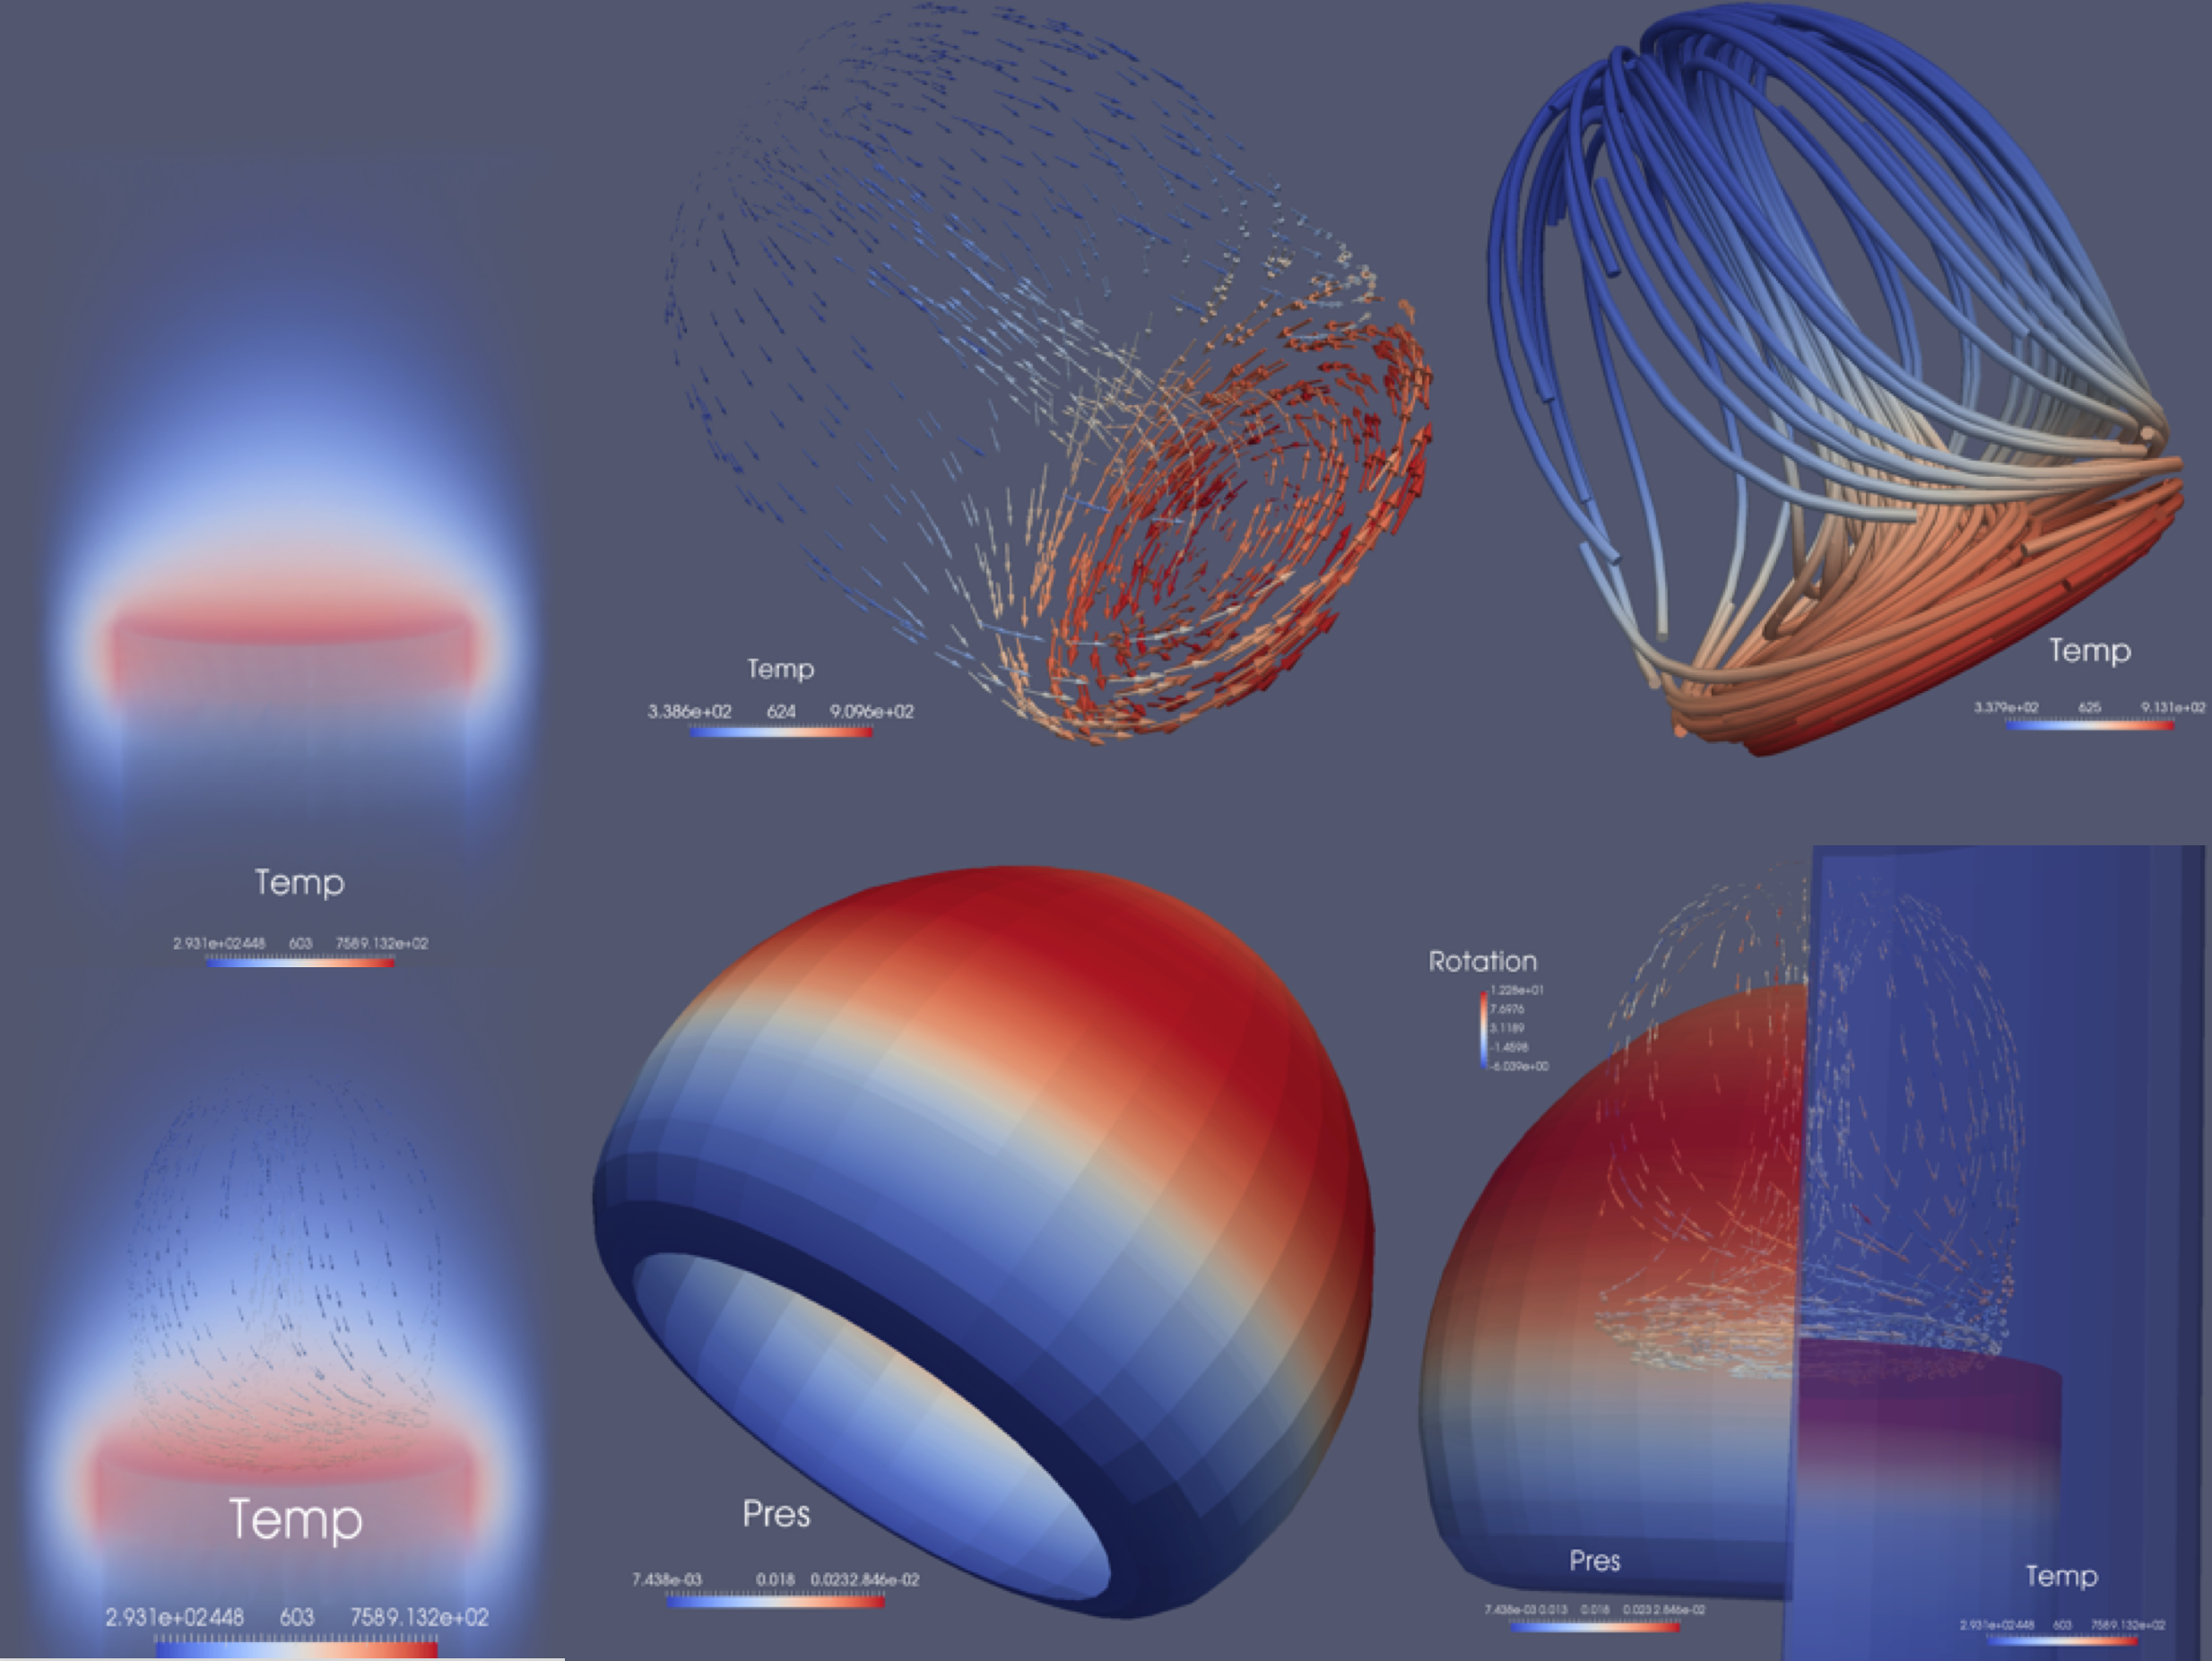
Visualisation
- The final visualisation should look like this
Optional Experimentation
- Try experimenting with different representations for different data points
AWST ()
Questions?
Break-out room (hands-on session 2) will start in:
Hands on Session 2:
Paraview Client-Server Mode
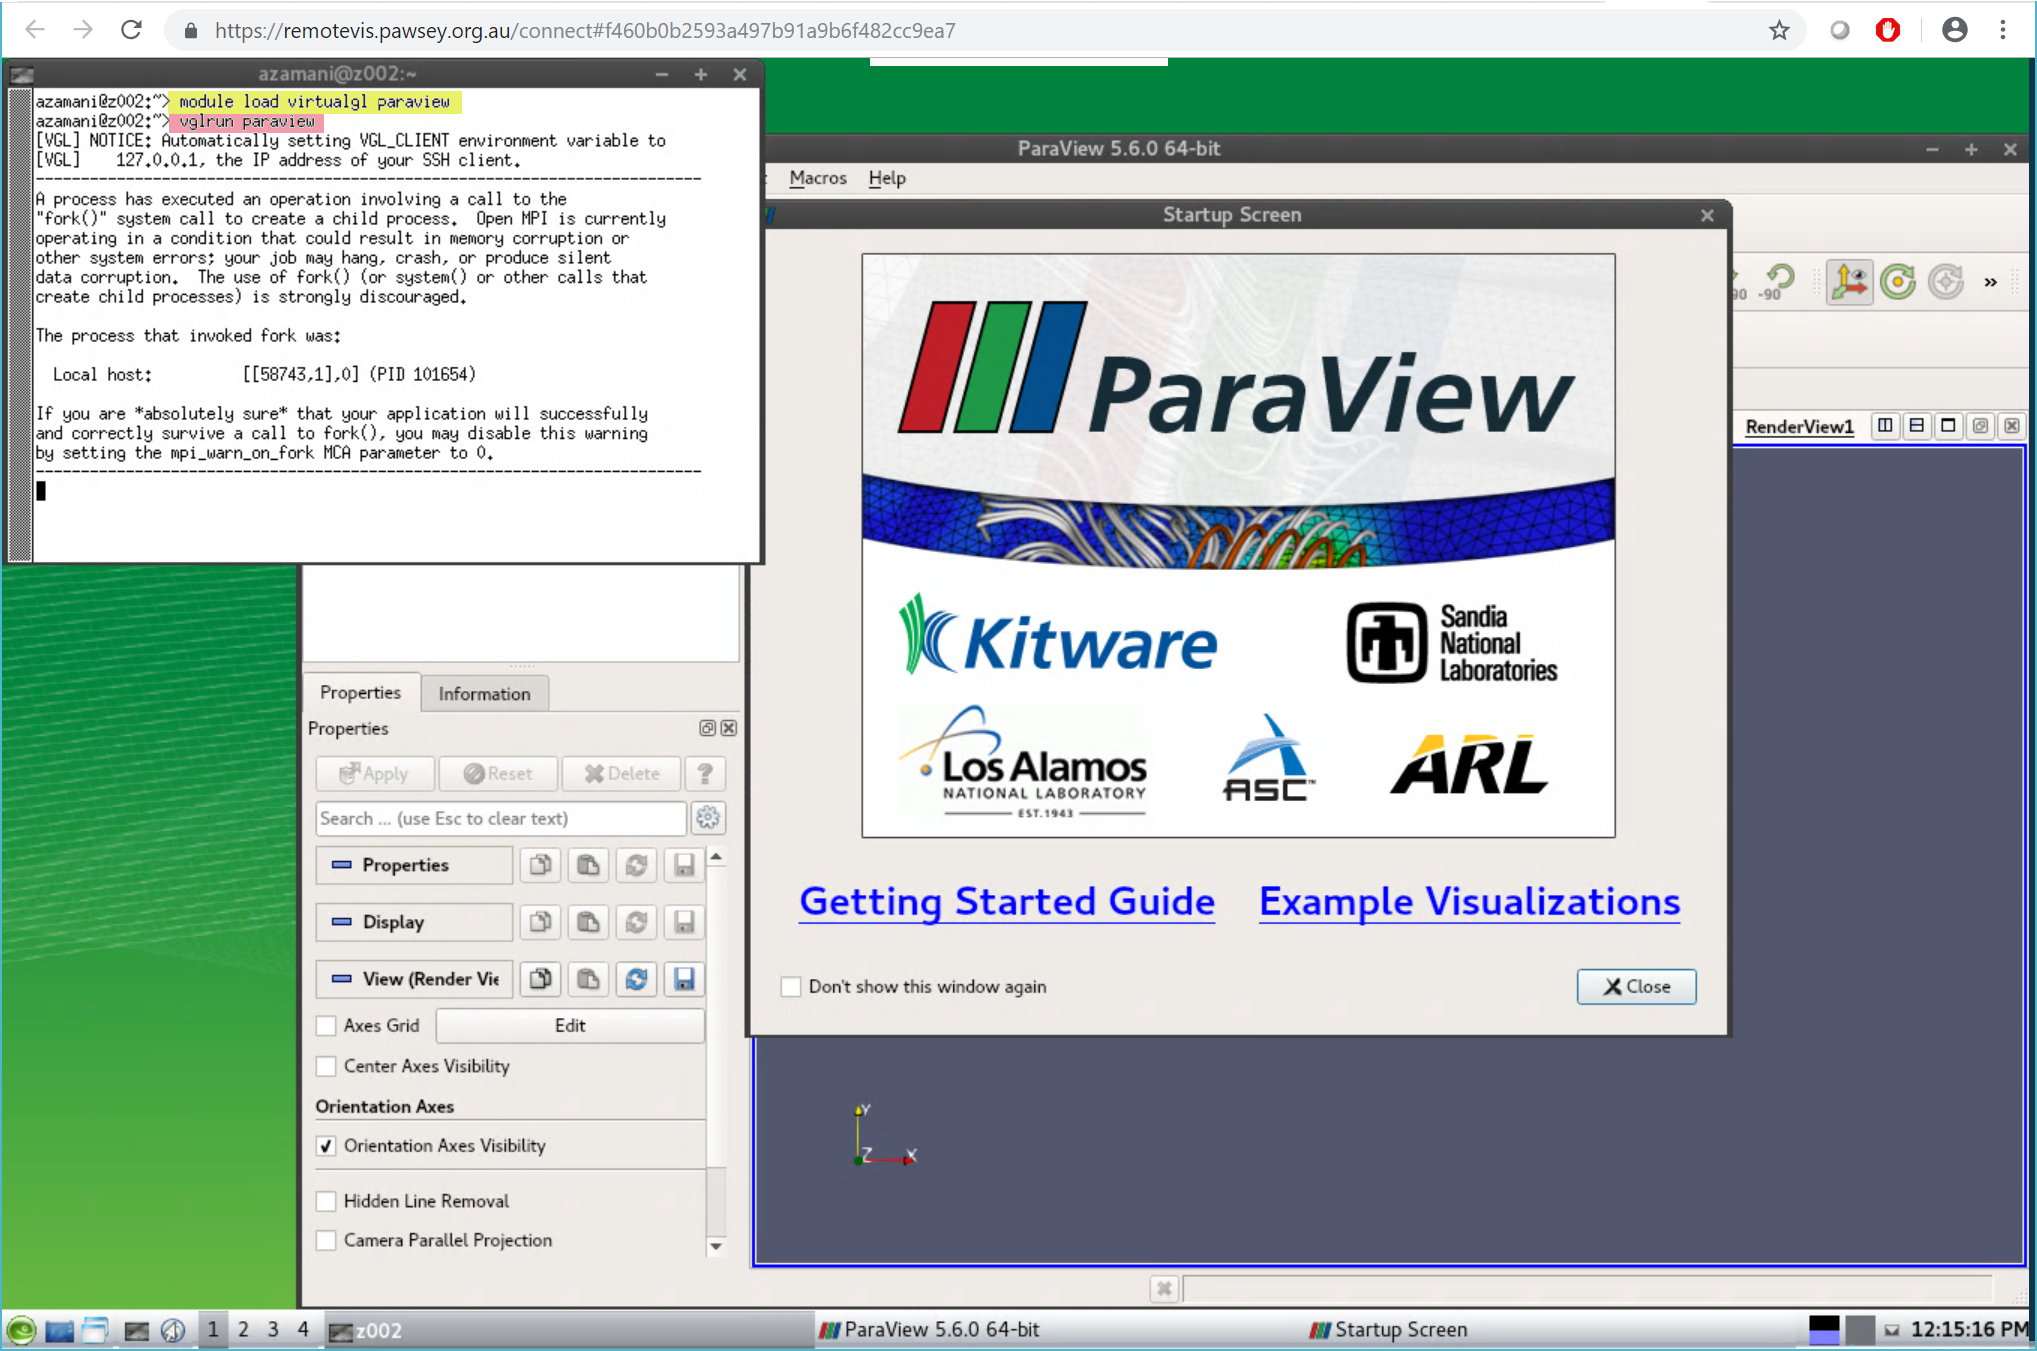
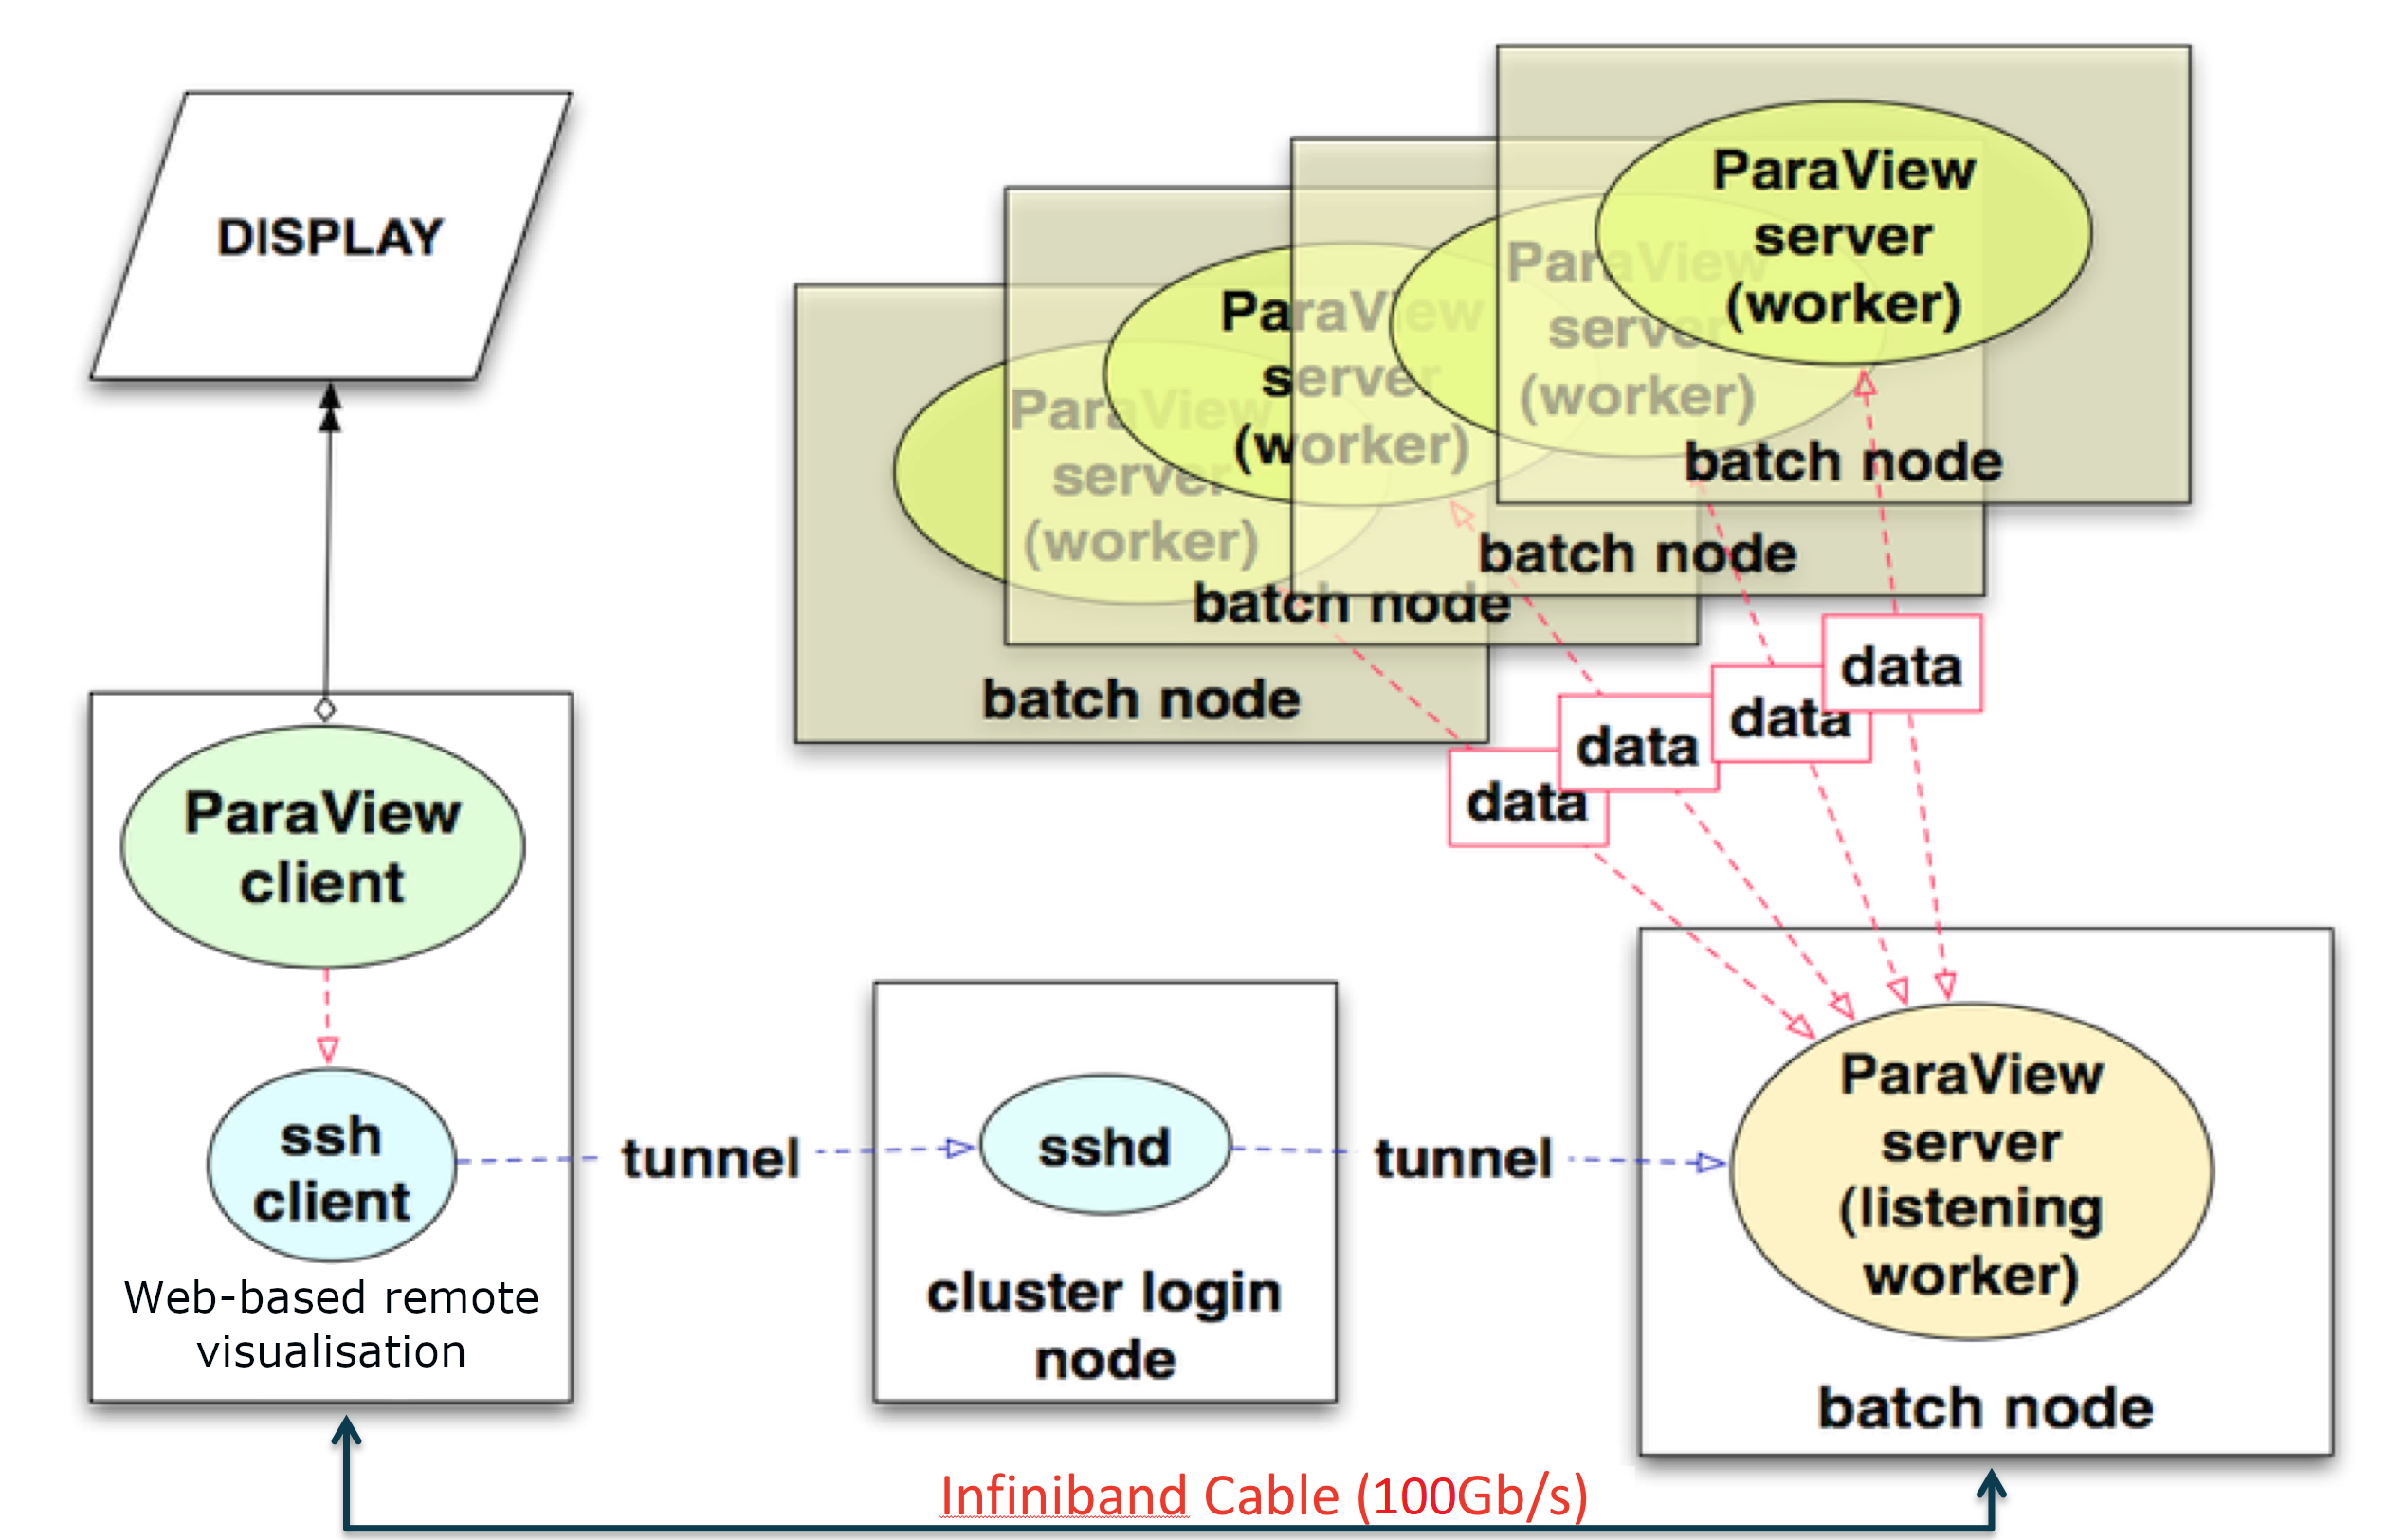
Client-Server Mode
- To visualise large datasets, ParaView comes with the ability to run ParaView across multiple nodes using the distributed-memory paradigm
- We recommend to run the client on one node - make use of the graphics card on the corresponding node to visualise quickly at the front-end
- The ParaView servers run on other compute node(s) - The data communication is very fast, as the nodes are connected by an Infiniband cable (100Gb/s signaling rate)
Client-Server Mode
Launch Paraview Bookmark
- Open your preferred browser (e.g. Chrome, Firefox) and goto: https://remotevis.pawsey.org.au
Open the Server Configuration Window
- The server configuration for pawsey systems should already be loaded
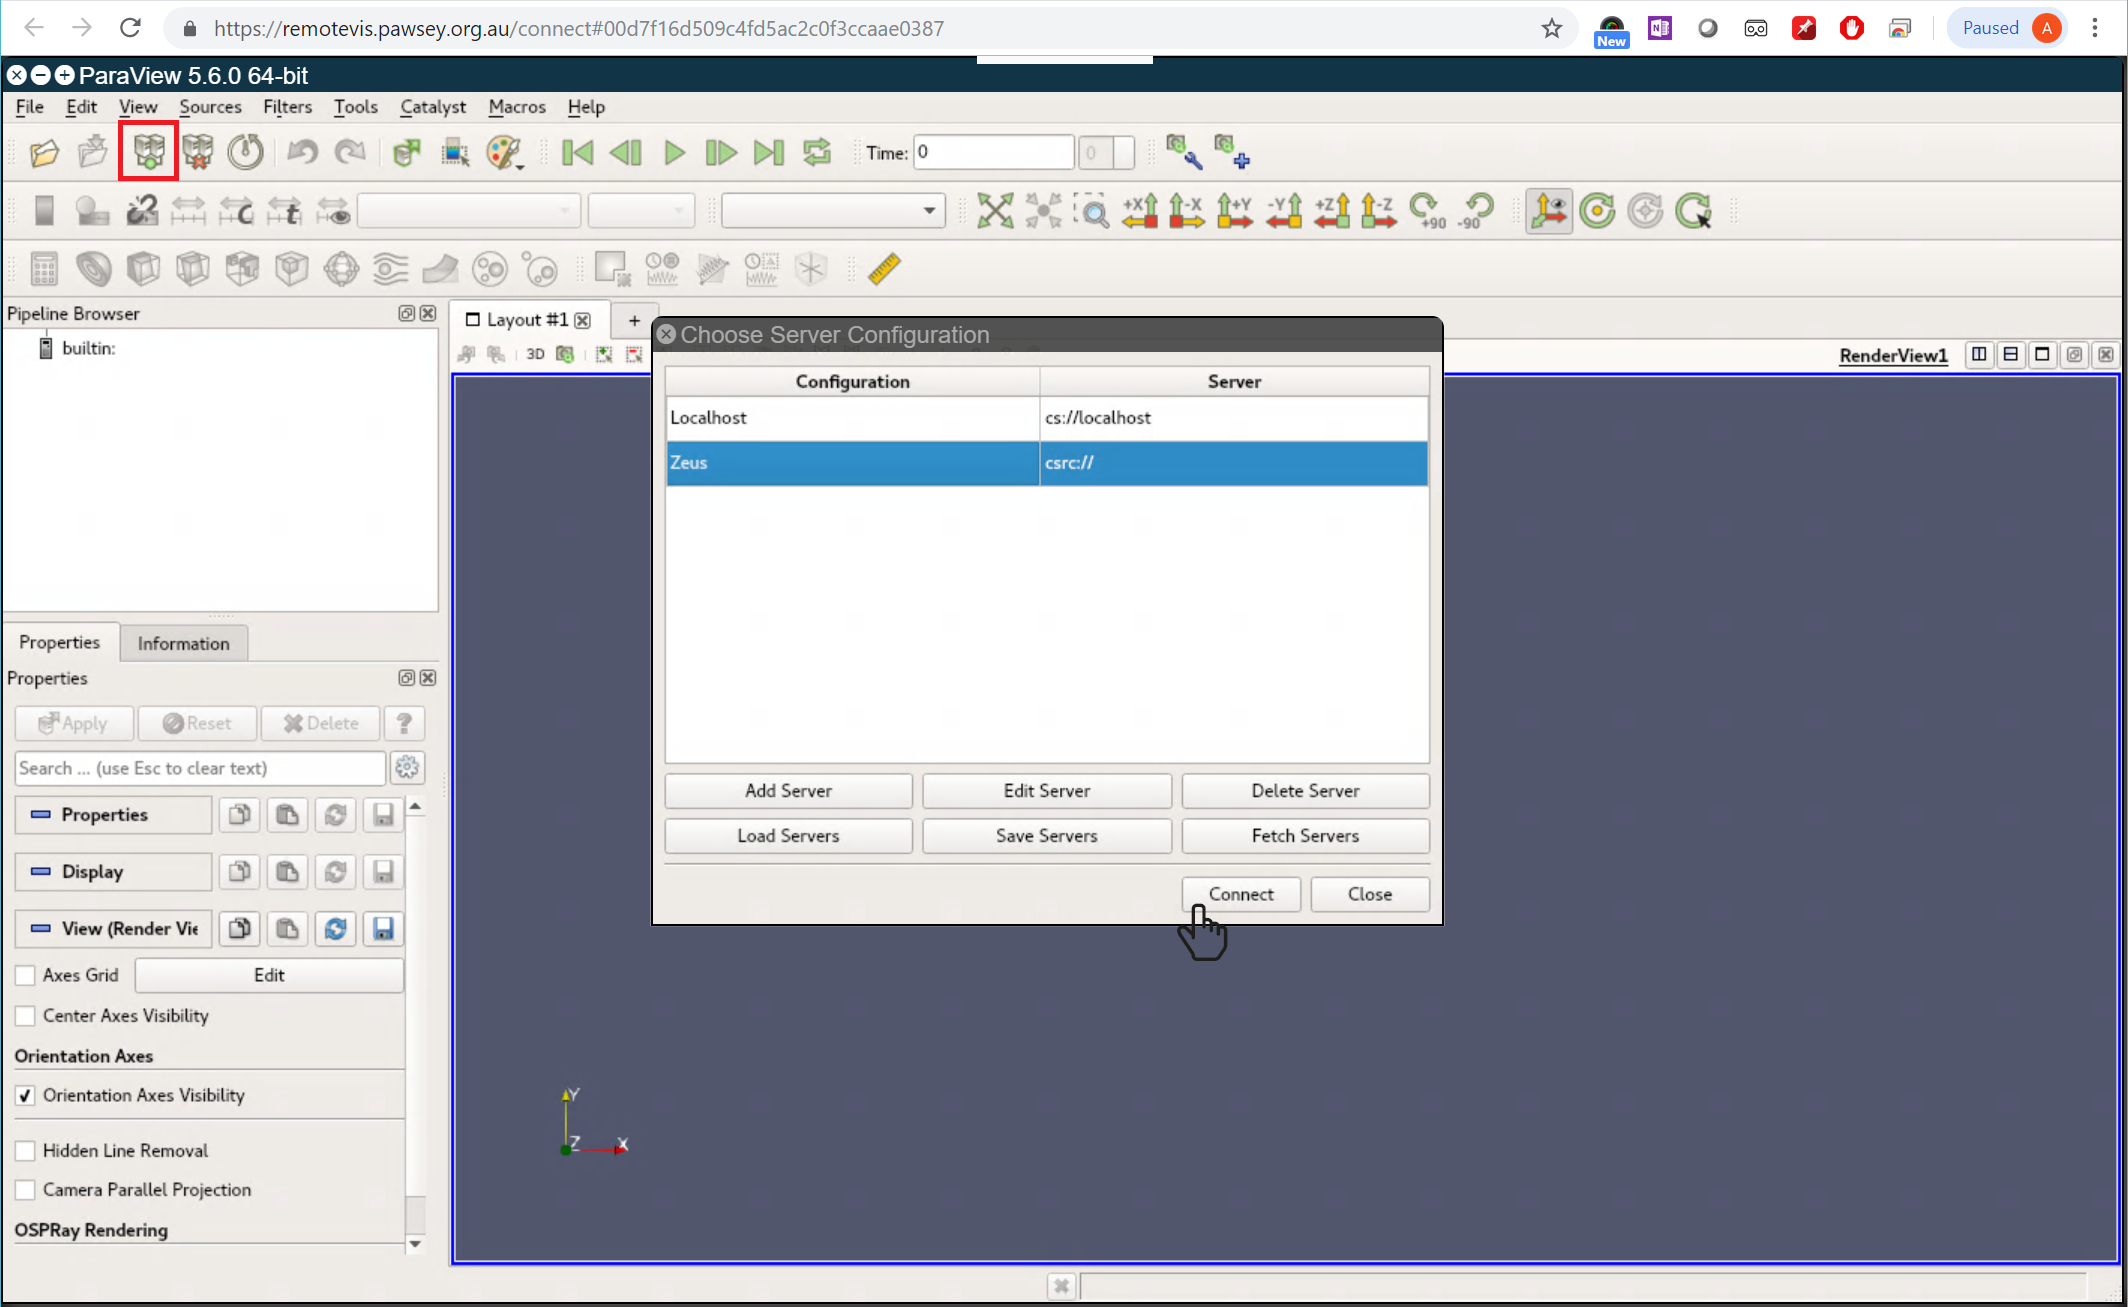
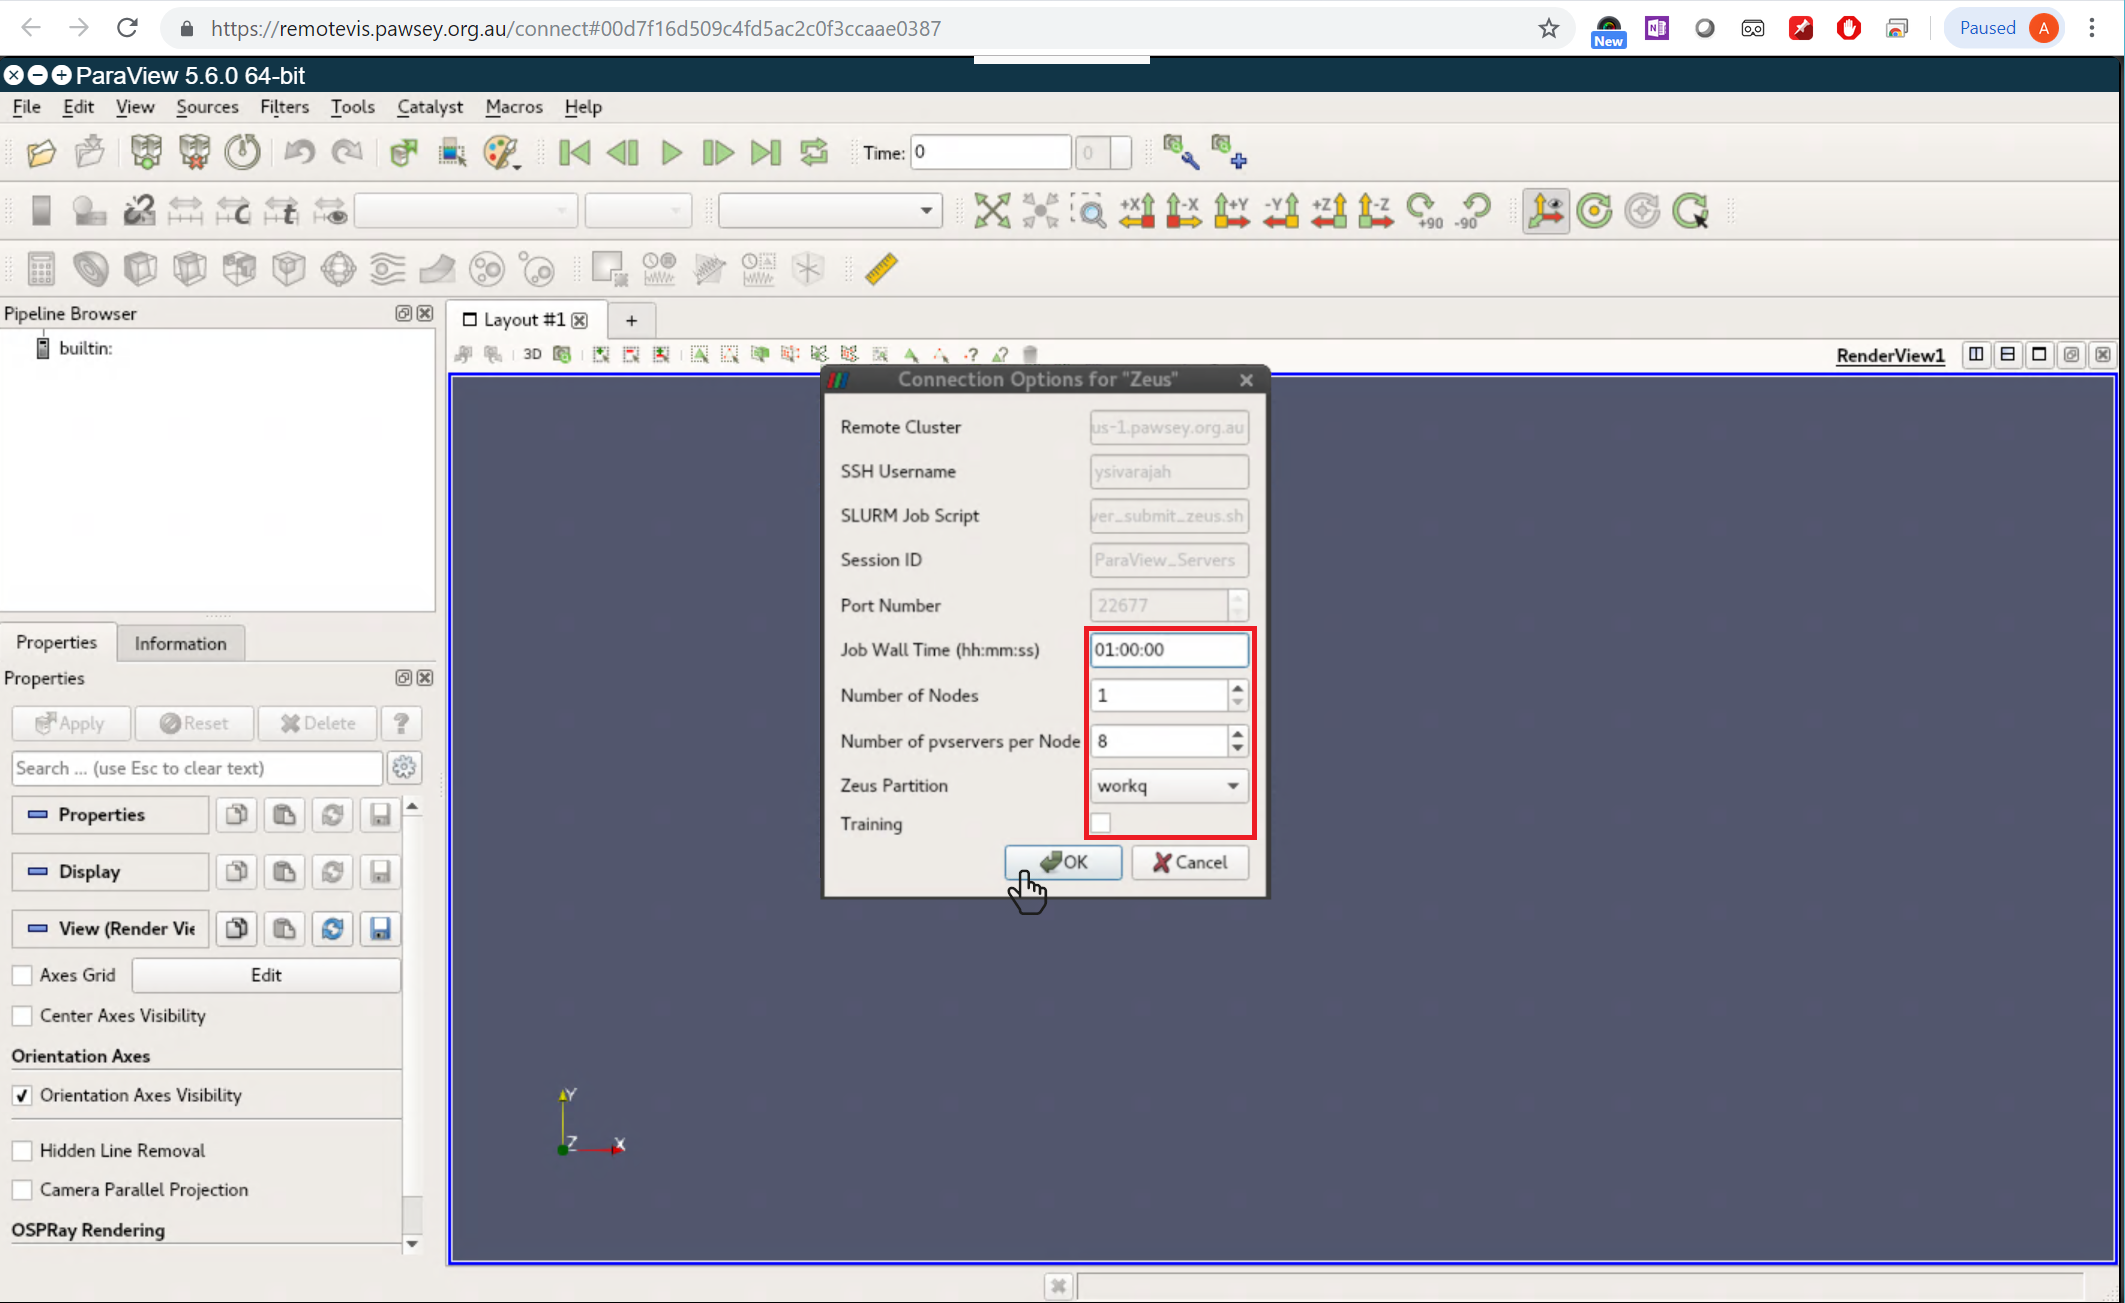
Configure the Connection
- Check the training box if you are doing this in a live training session
Enter your Password
- The password prompt may appear in the console window you used to launch paraview
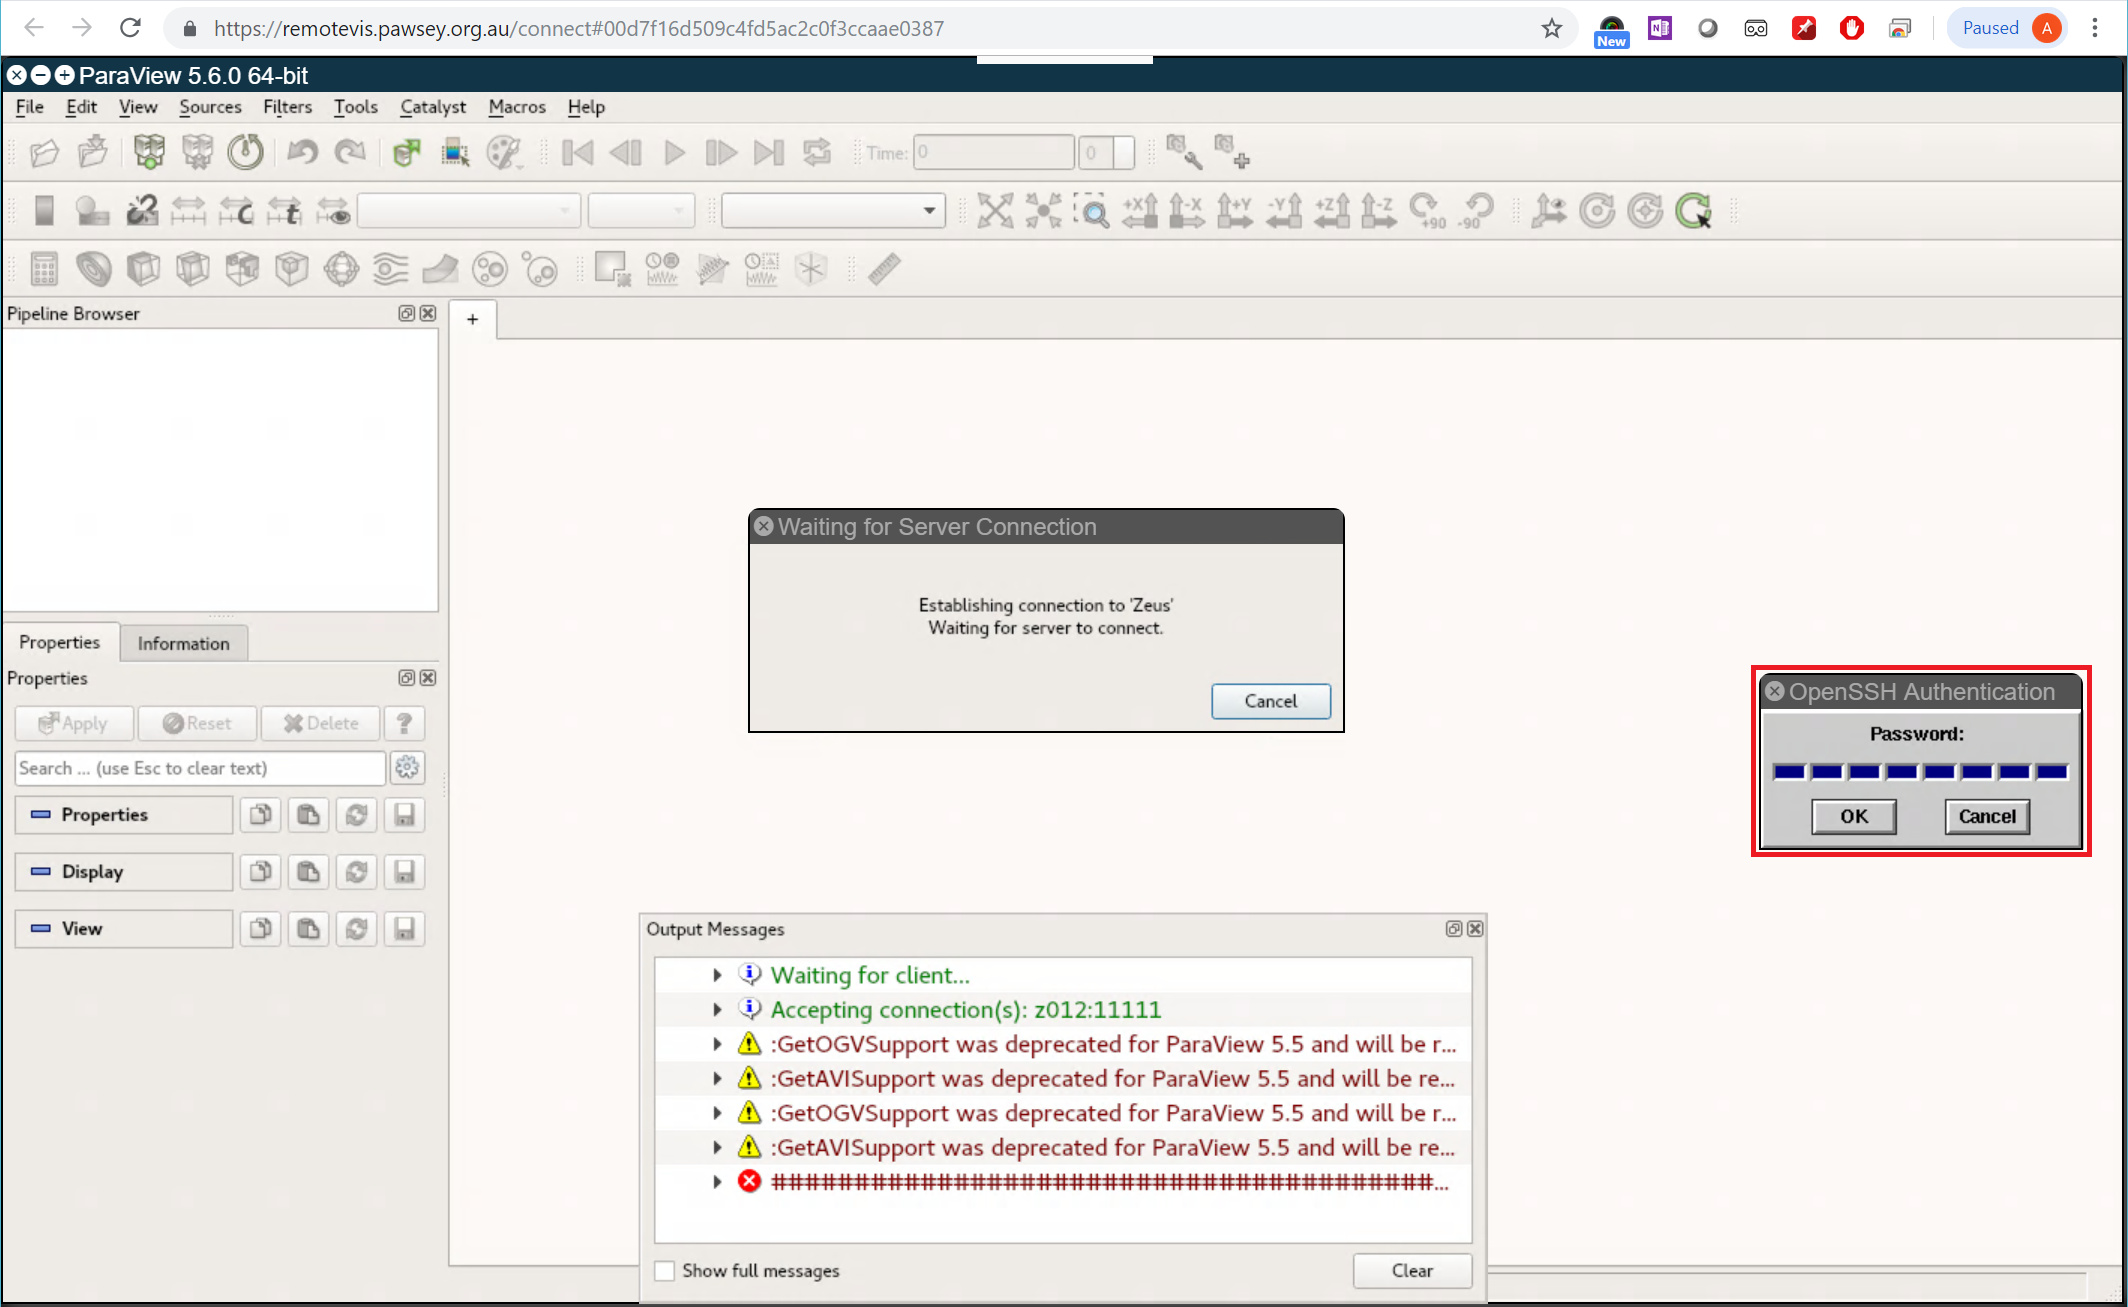
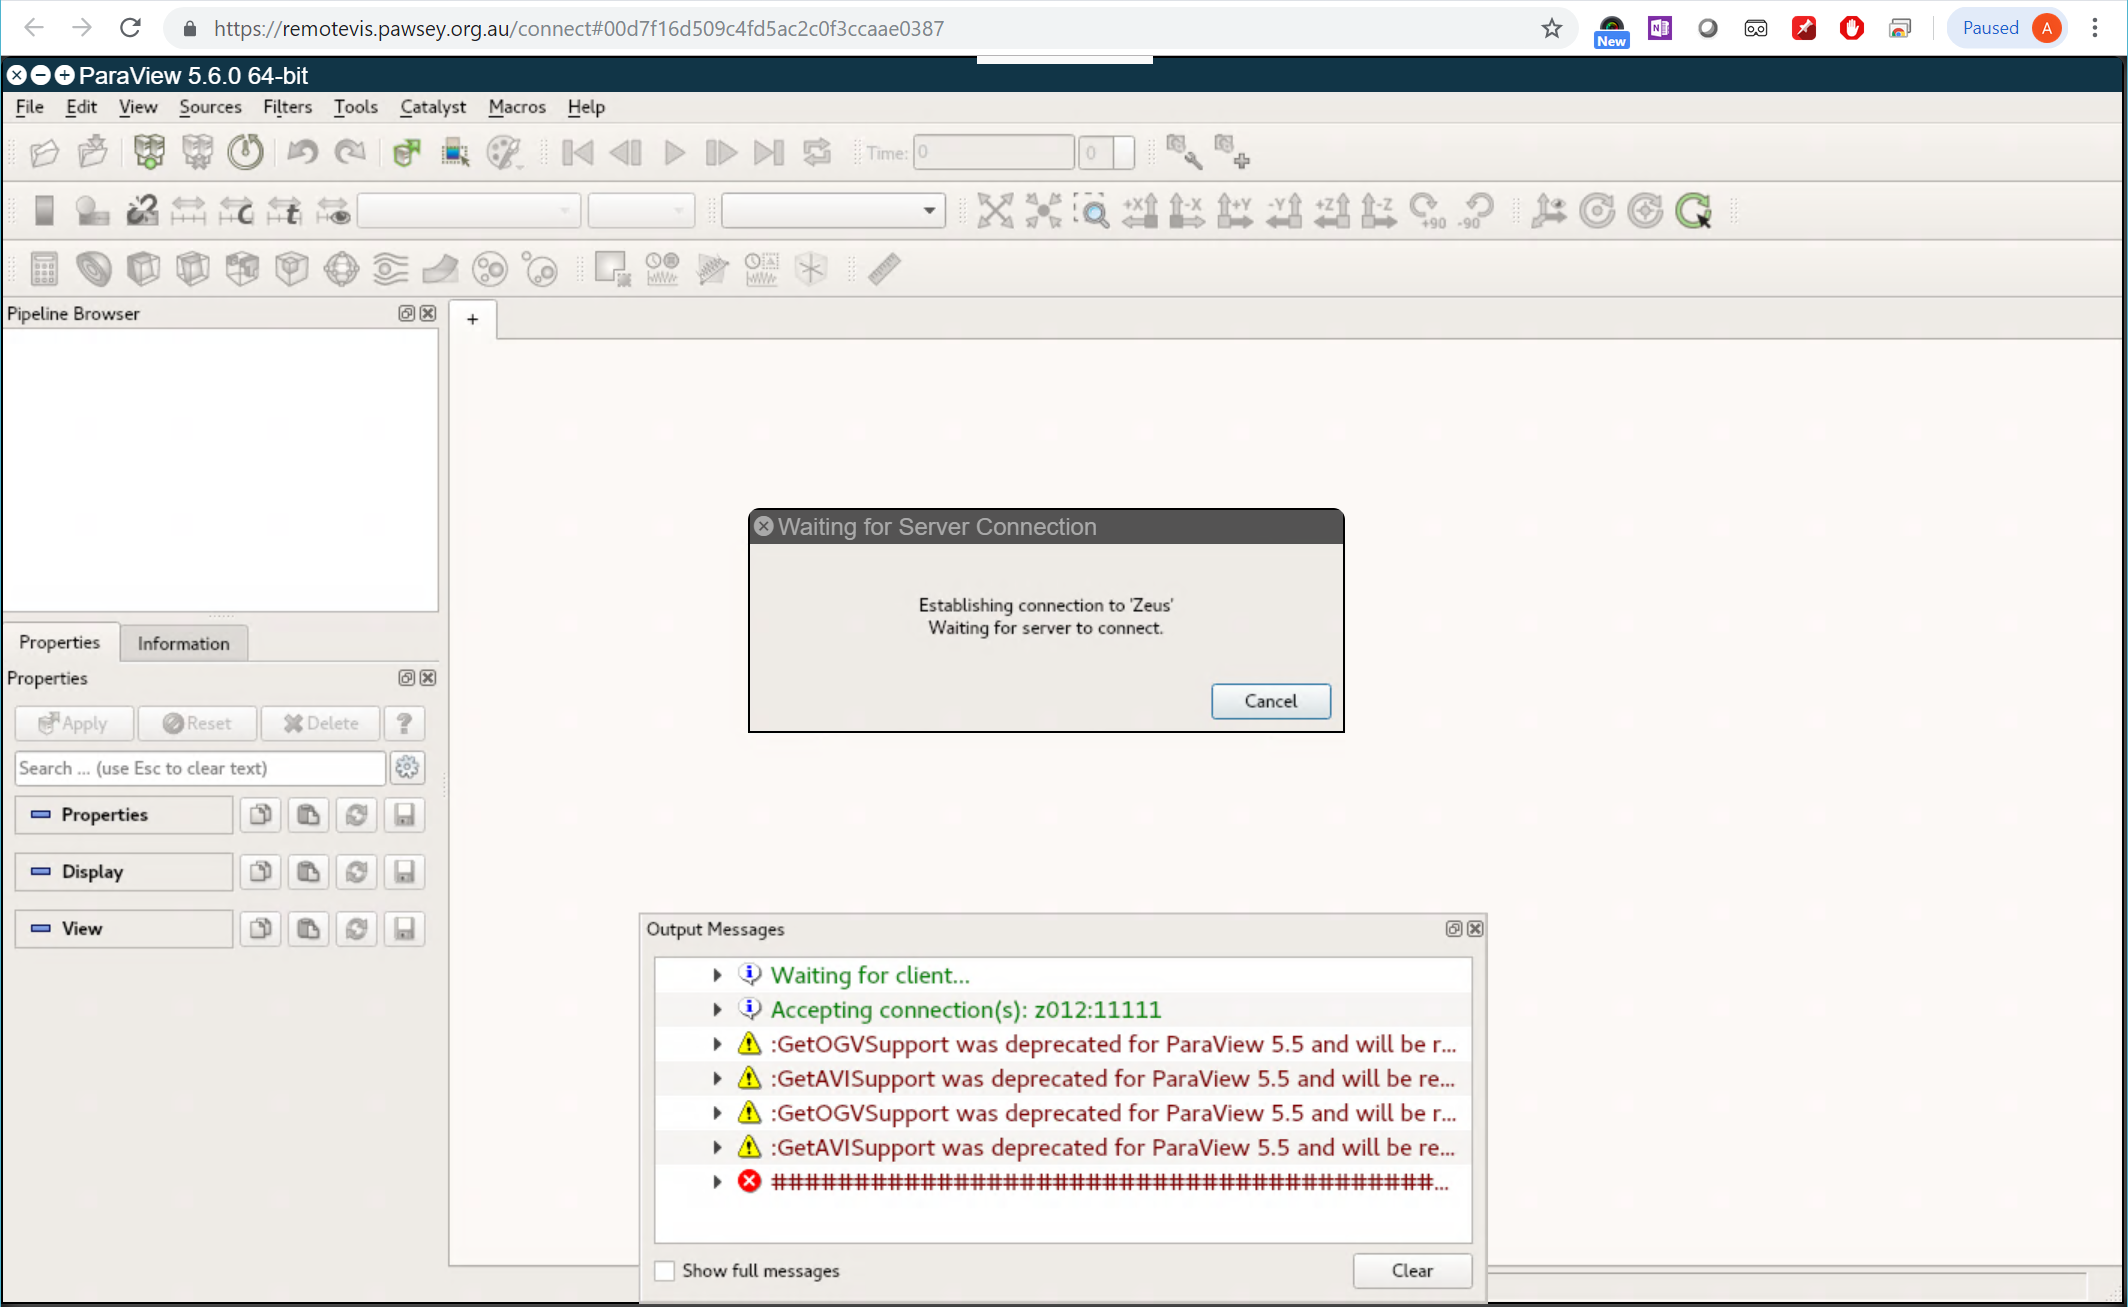
Wait for the Job to be accepted
- Be patient as this may take a while if you do not have a reservation
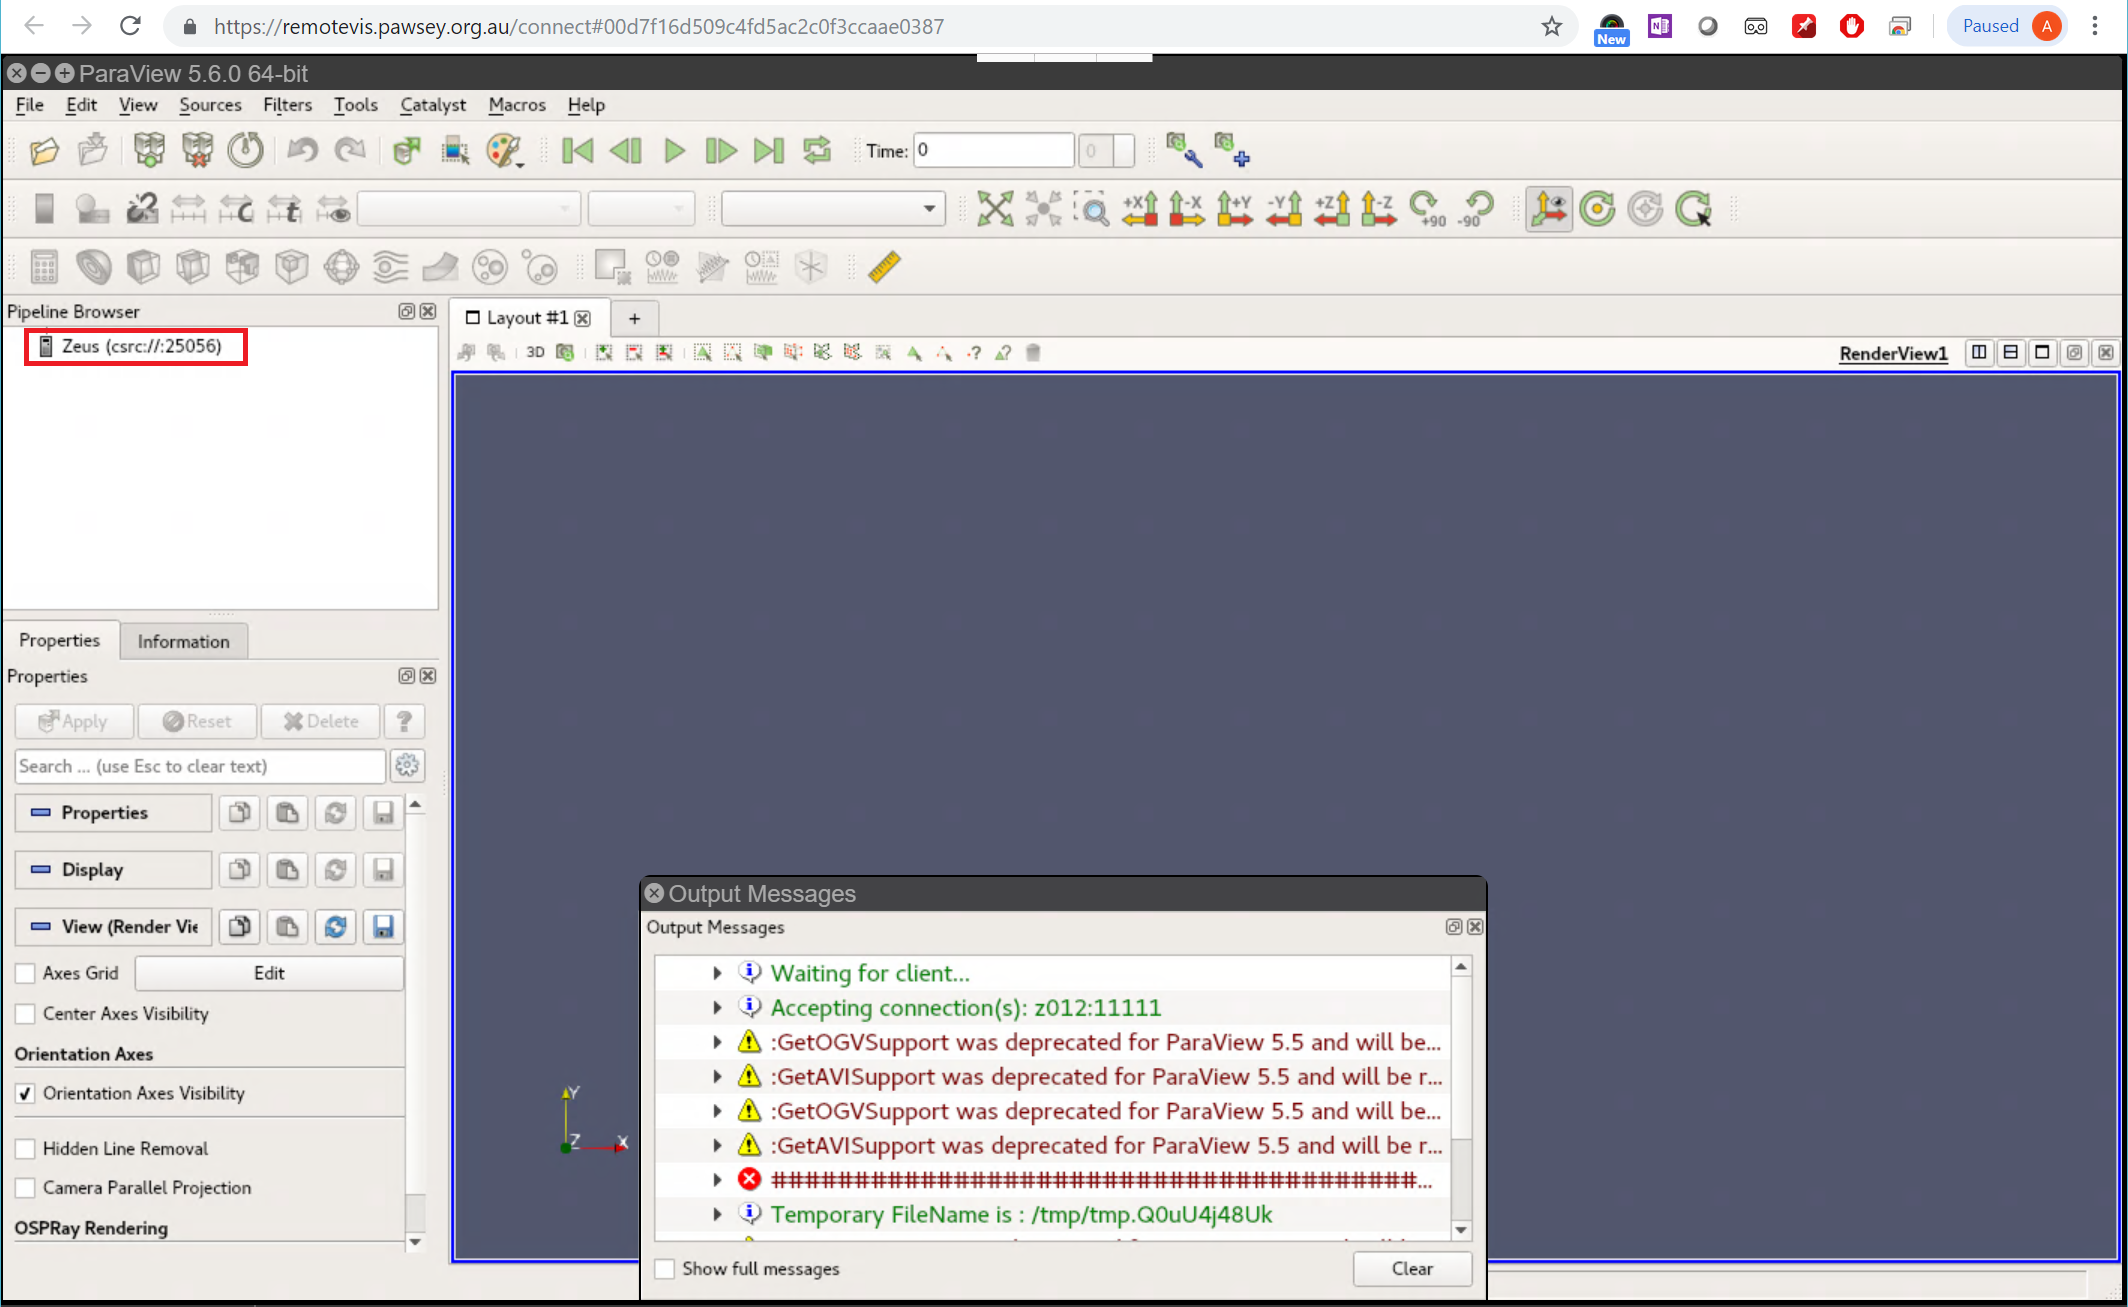
Confirm the Connection is Active
- If the pipeline browser shows the server name, then remote rendering is active
Optional Activities
Check the status of your Job
Open a terminal (MobaXterm if using Windows) on your laptop
ssh couxyz@zeus.pawsey.org.ausqueue -u $USER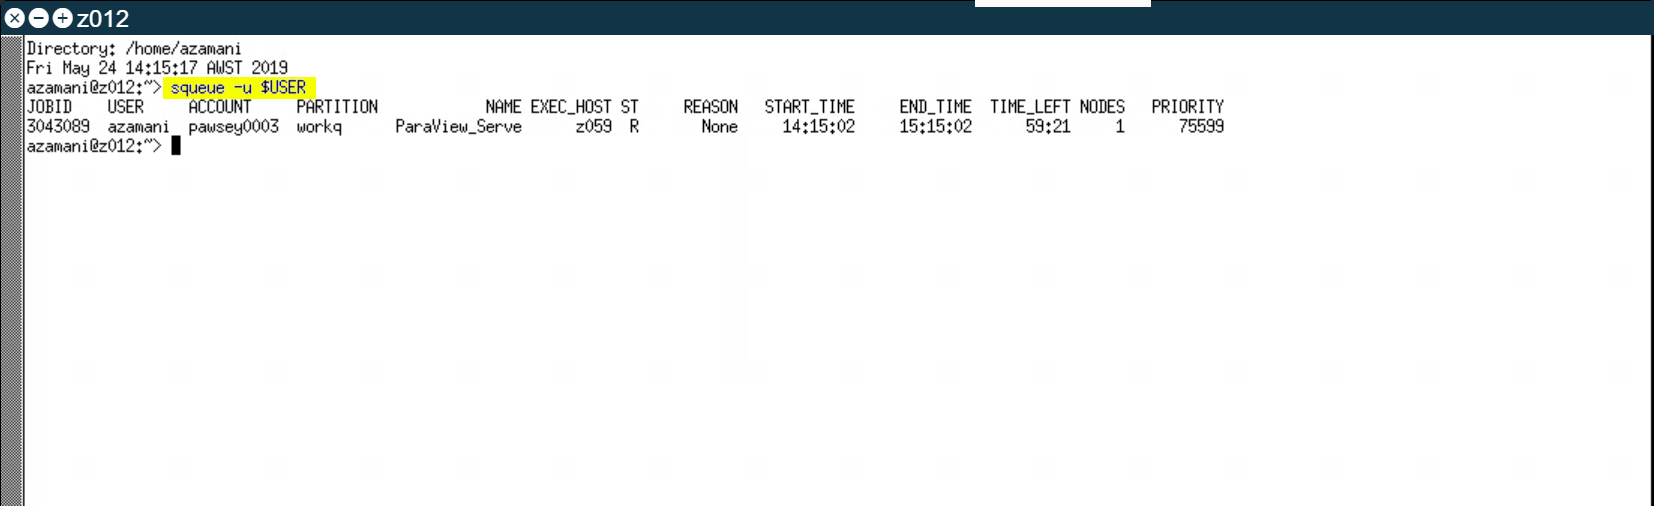
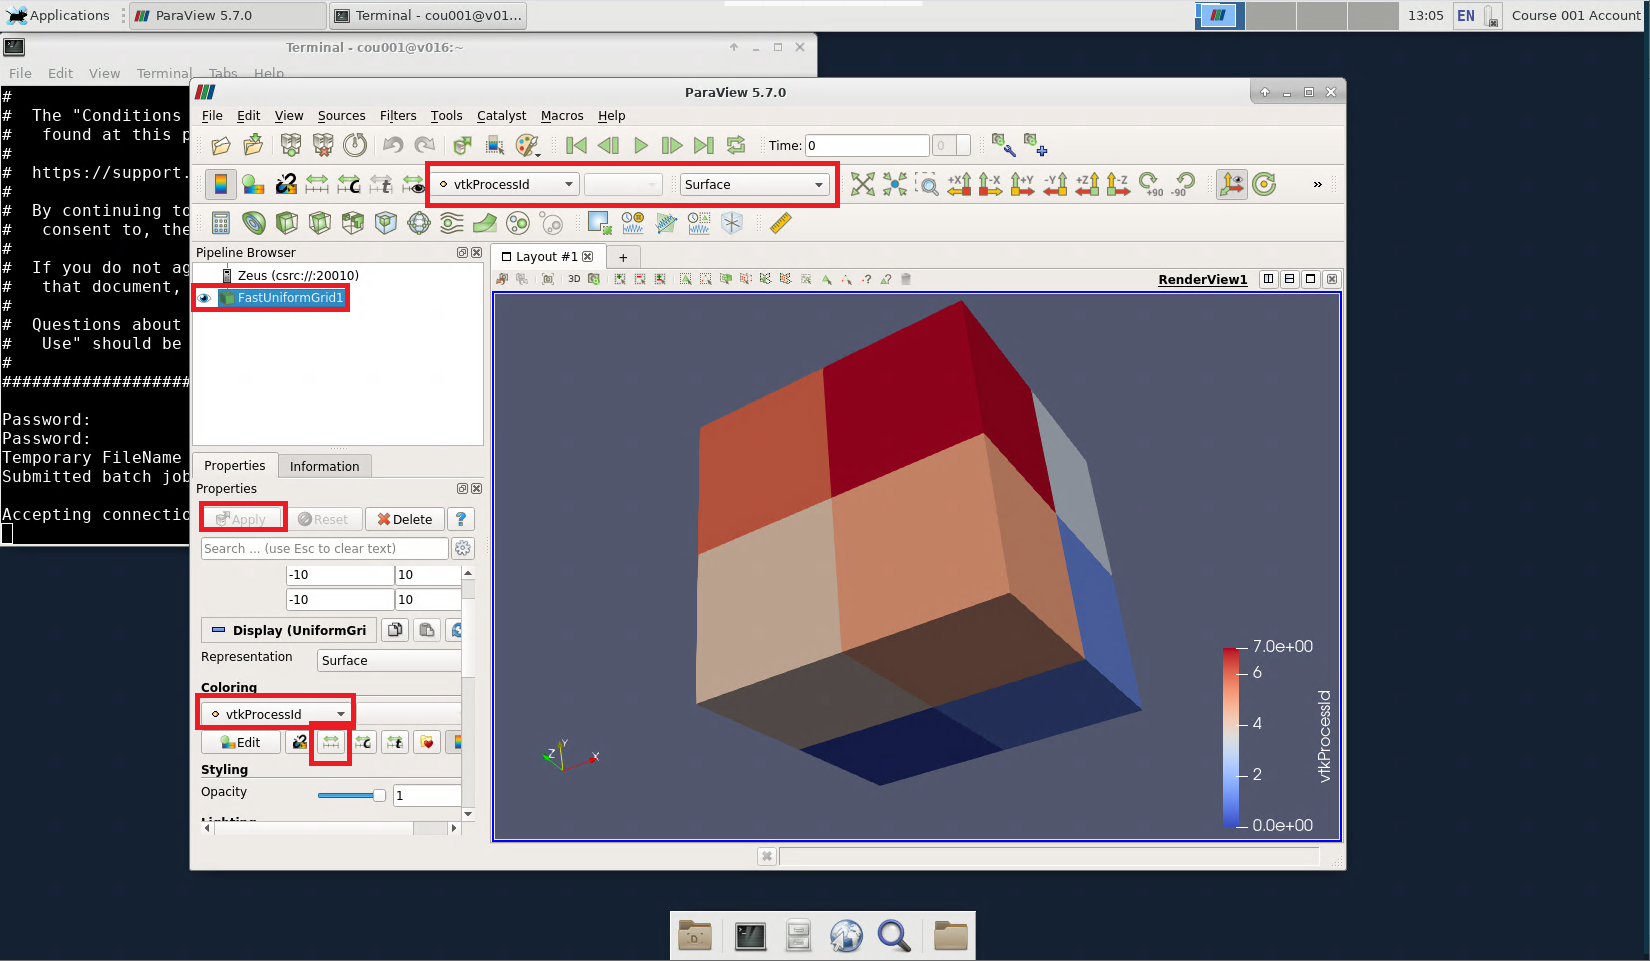
Showing What Each Server Process is Rendering
For Efficient Parallel Rendering
Open "Settings" dialog box (Edit -> Settings)
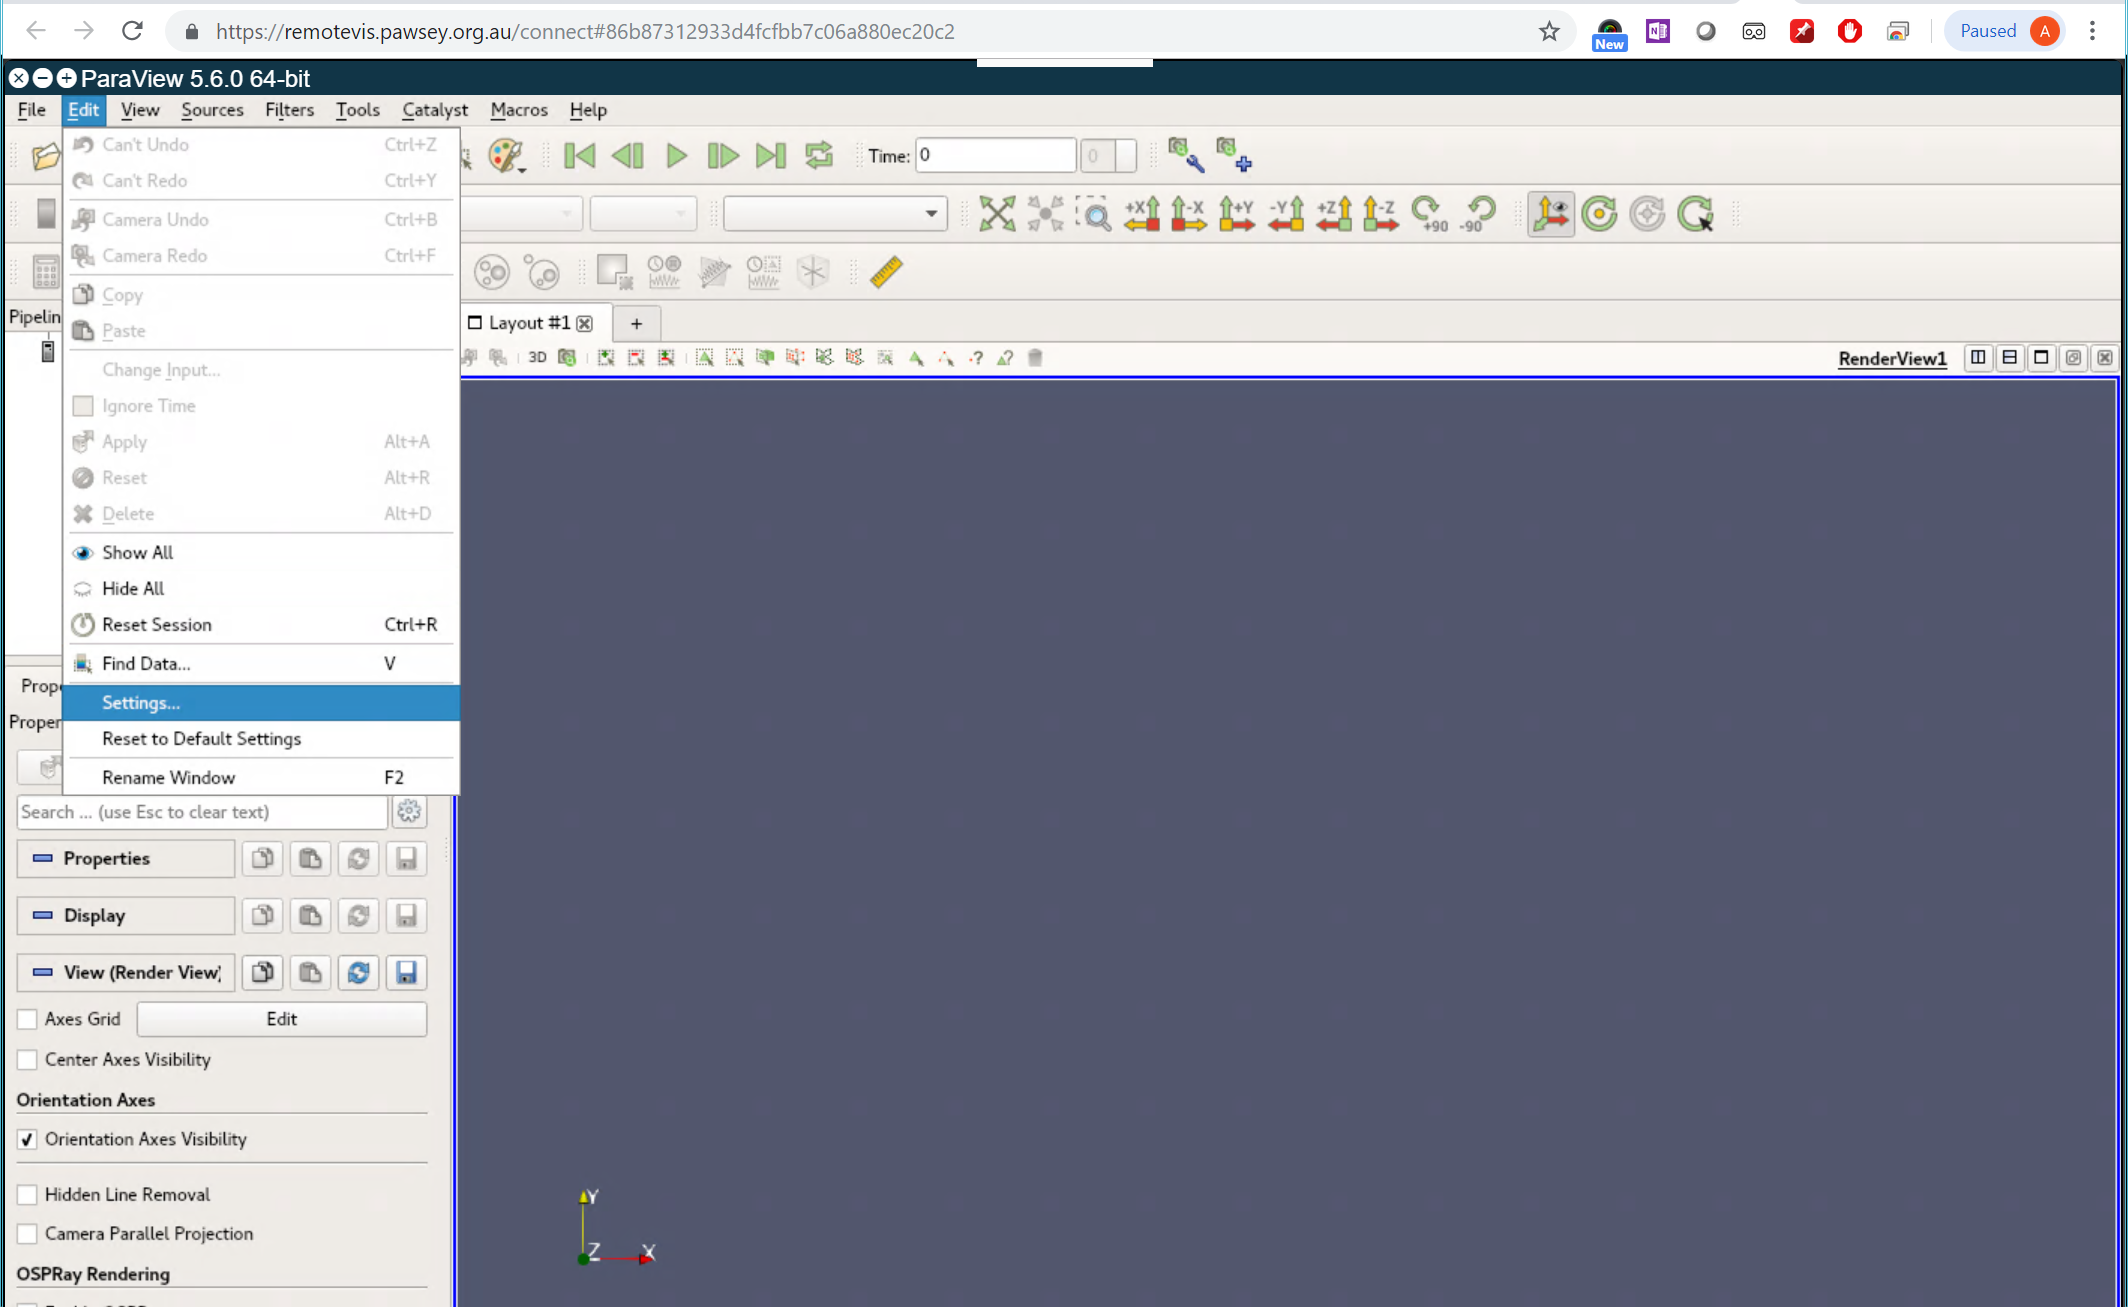
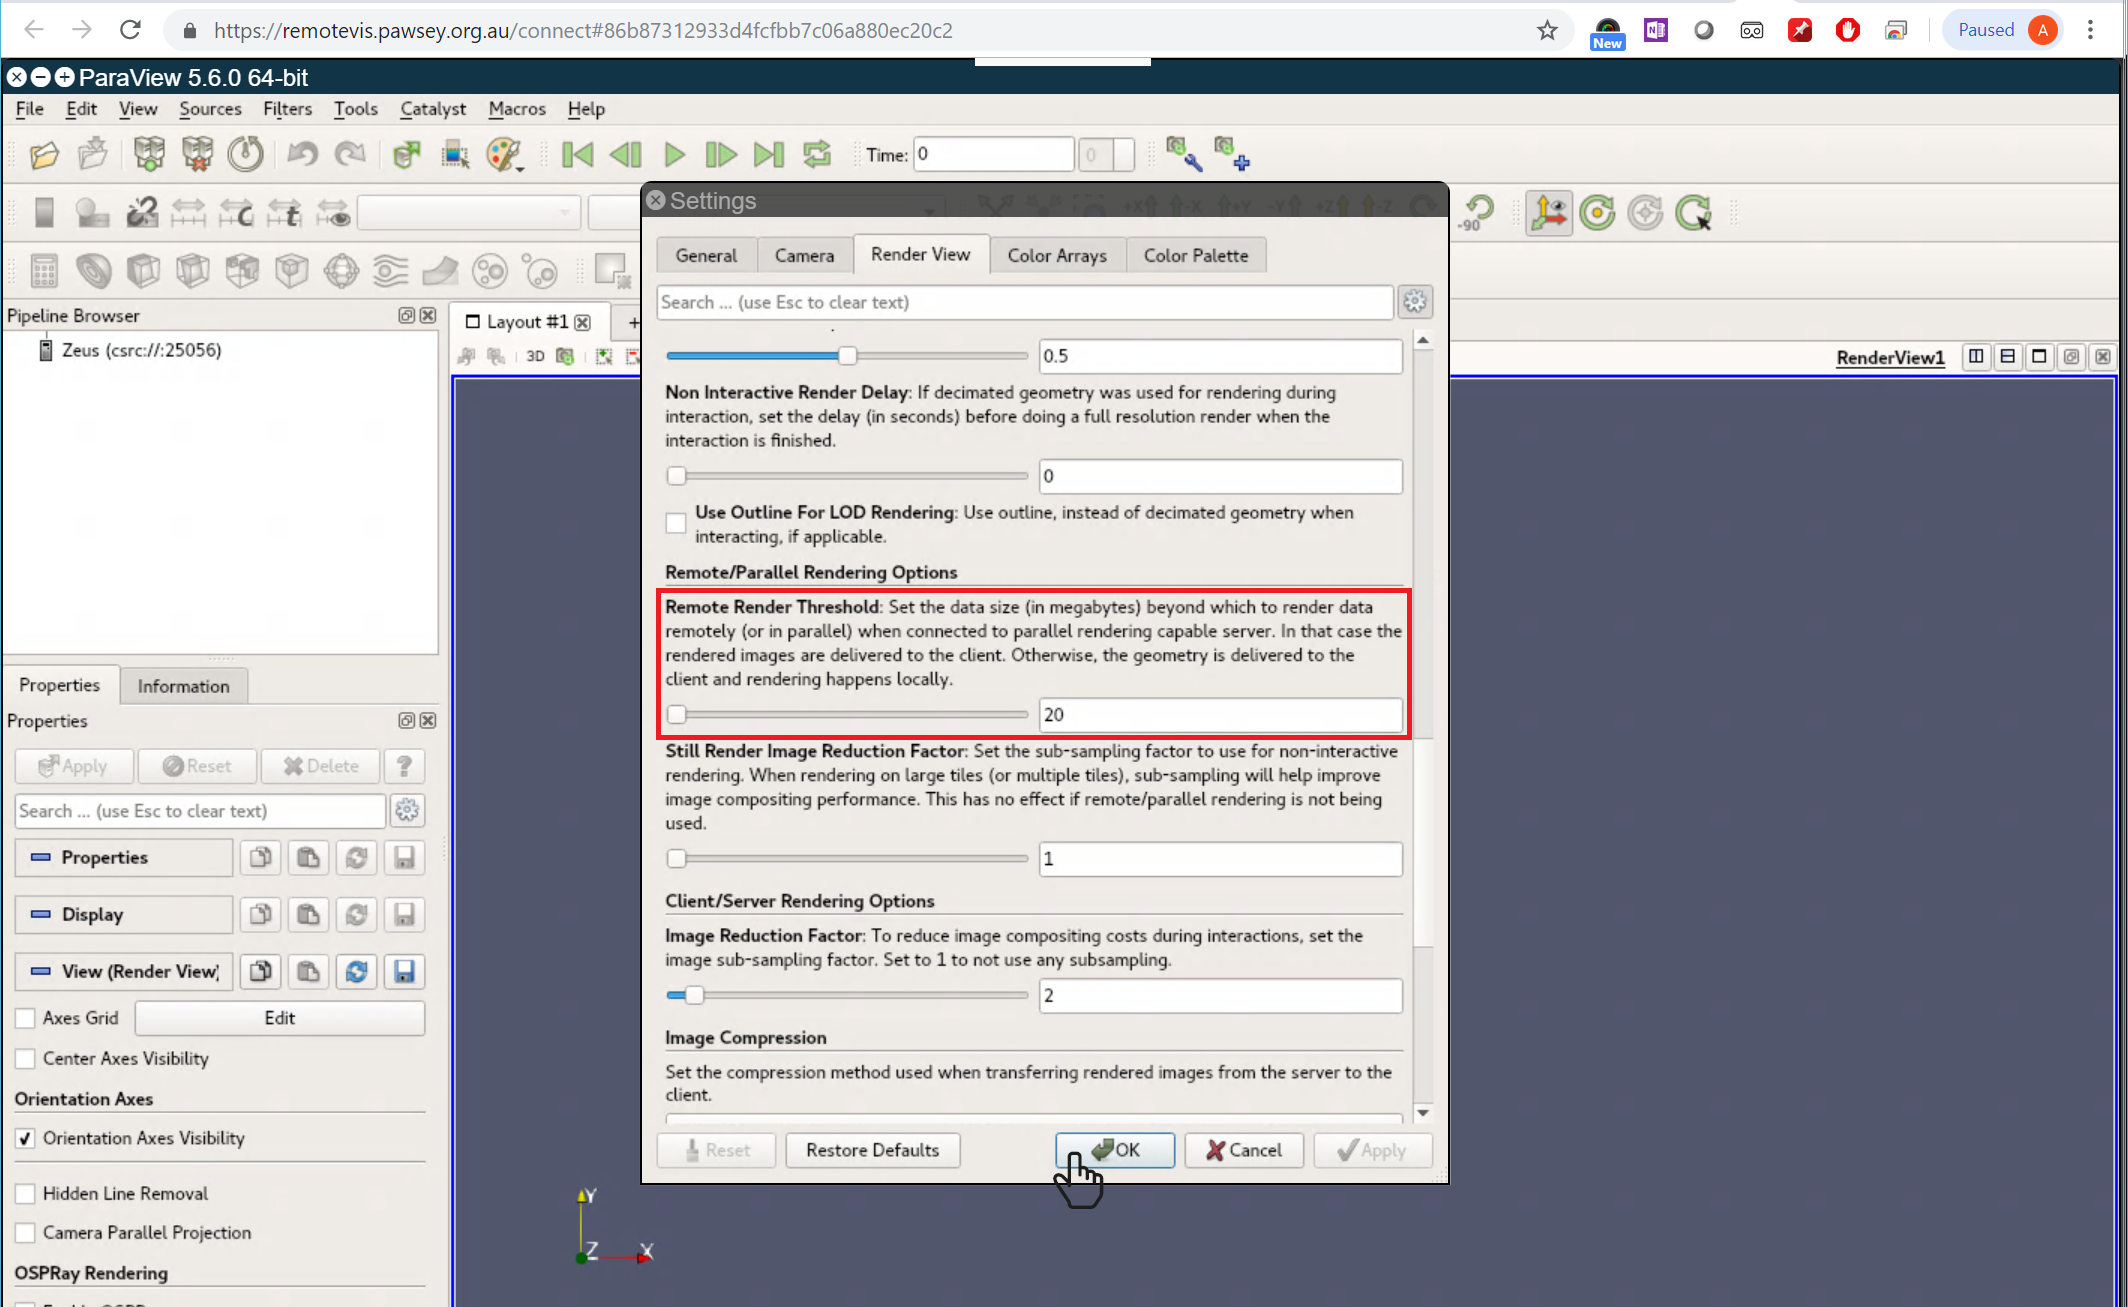
For Efficient Parallel Rendering Cont.
"Render View" tab => "Remote/Parallel Rendering Options" => Set "Remote Render threshold" to 0 (Mbytes)
Hands on Session 2:
Large Data and Rendering Movies
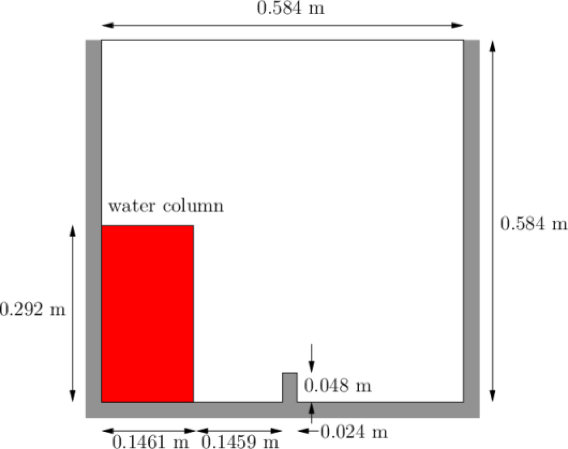
Data
- Dataset - Dam break
- Column of water behind a membrane
- At t = 0s, membrane is removed, then:
- column of water collapses
- water impacts an obstacle
- creates a complicated flow structure
- 100 total timesteps
Open Data
/scratch/courses01/remote_vis/VTK/dbreak3d_vtutorial_..vtk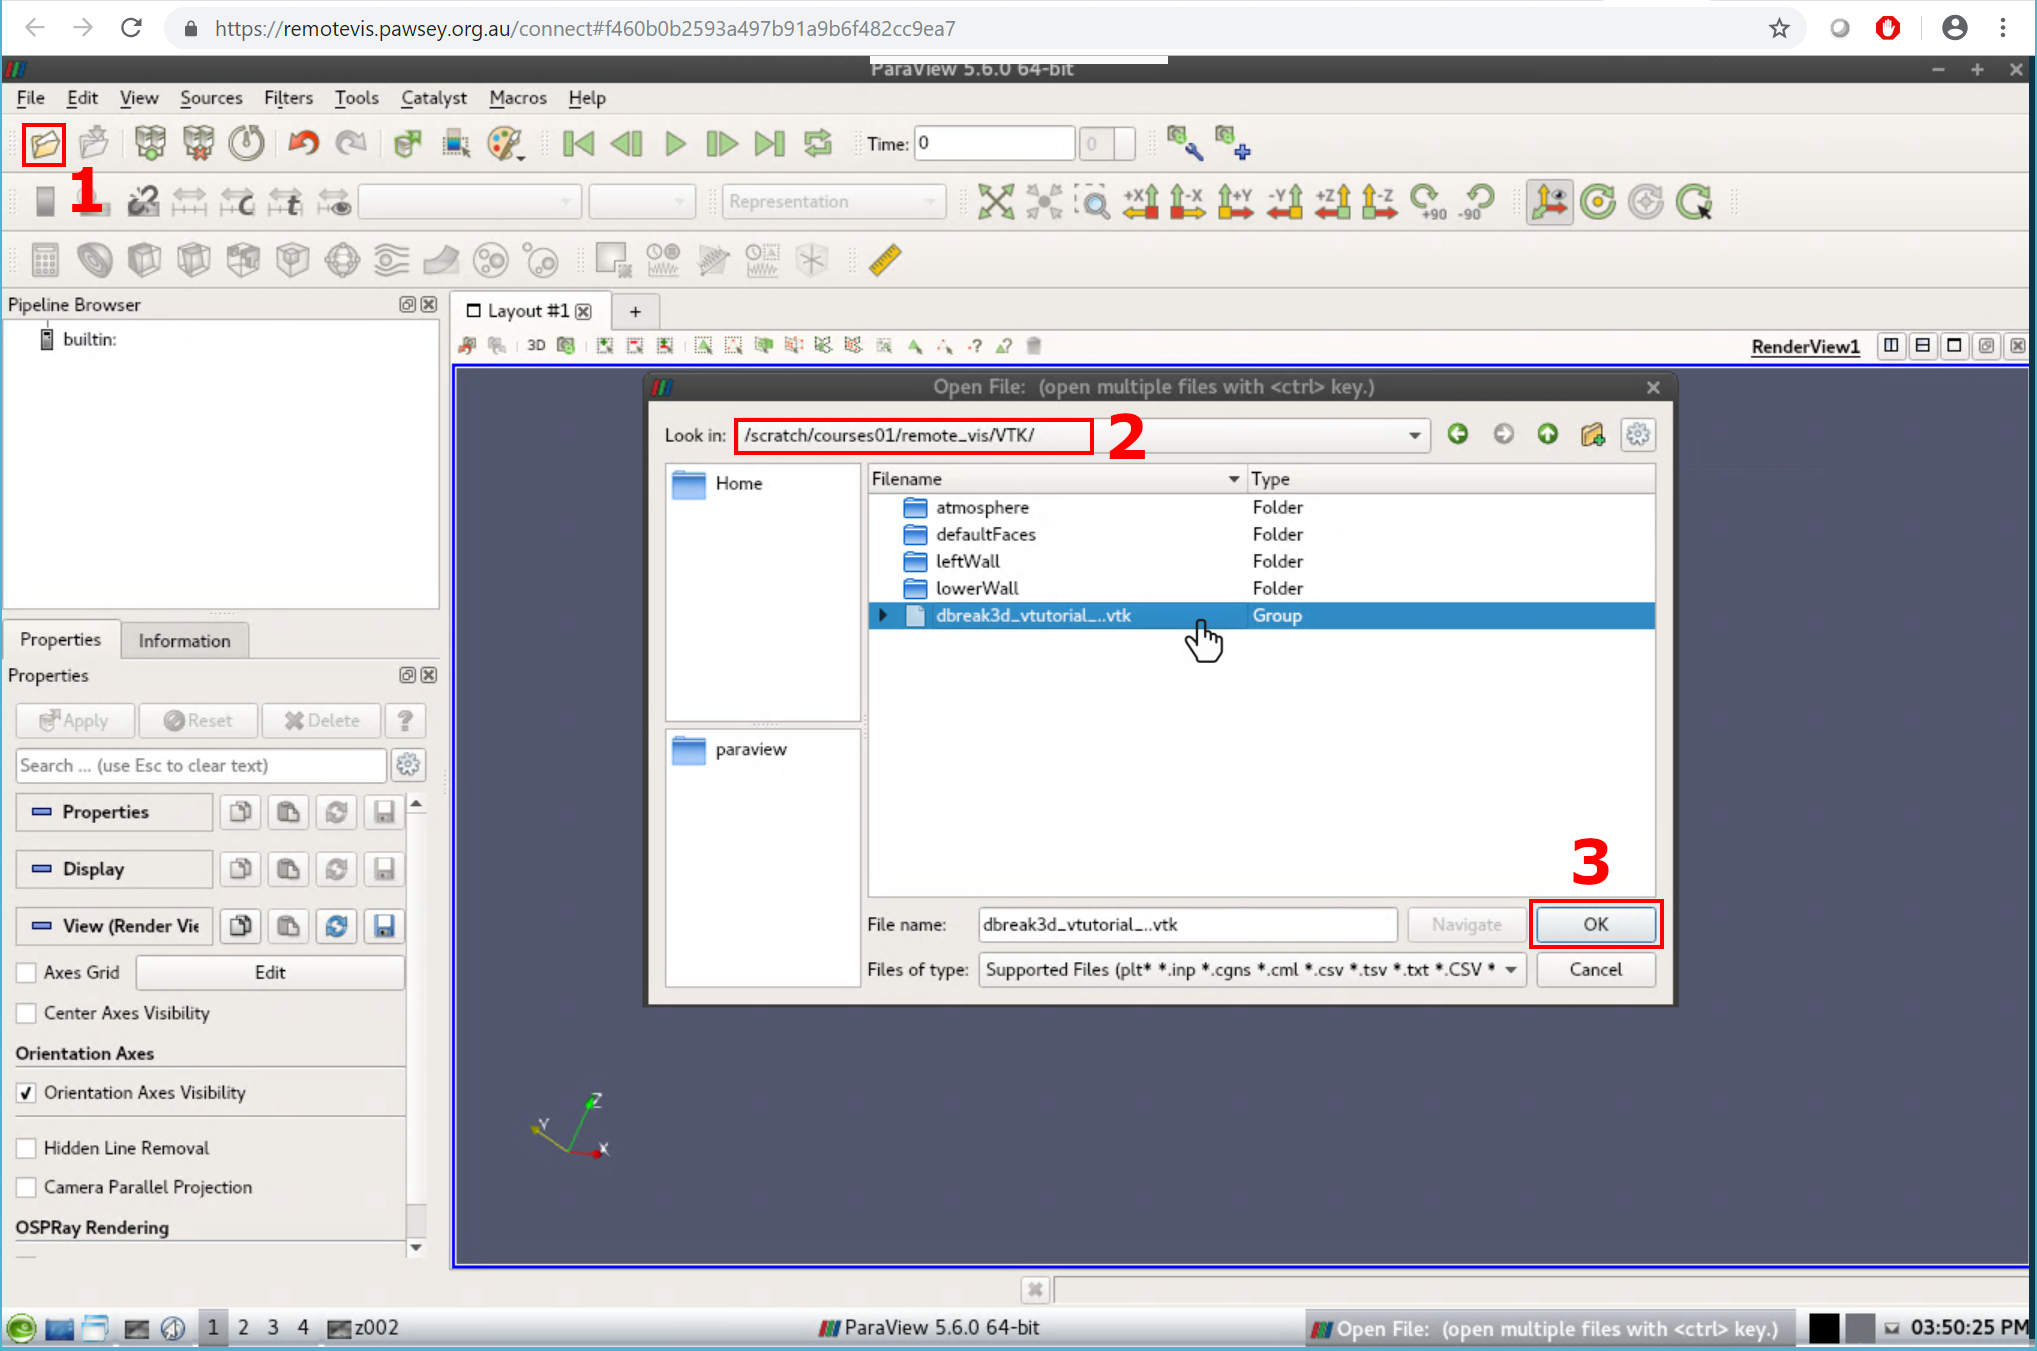
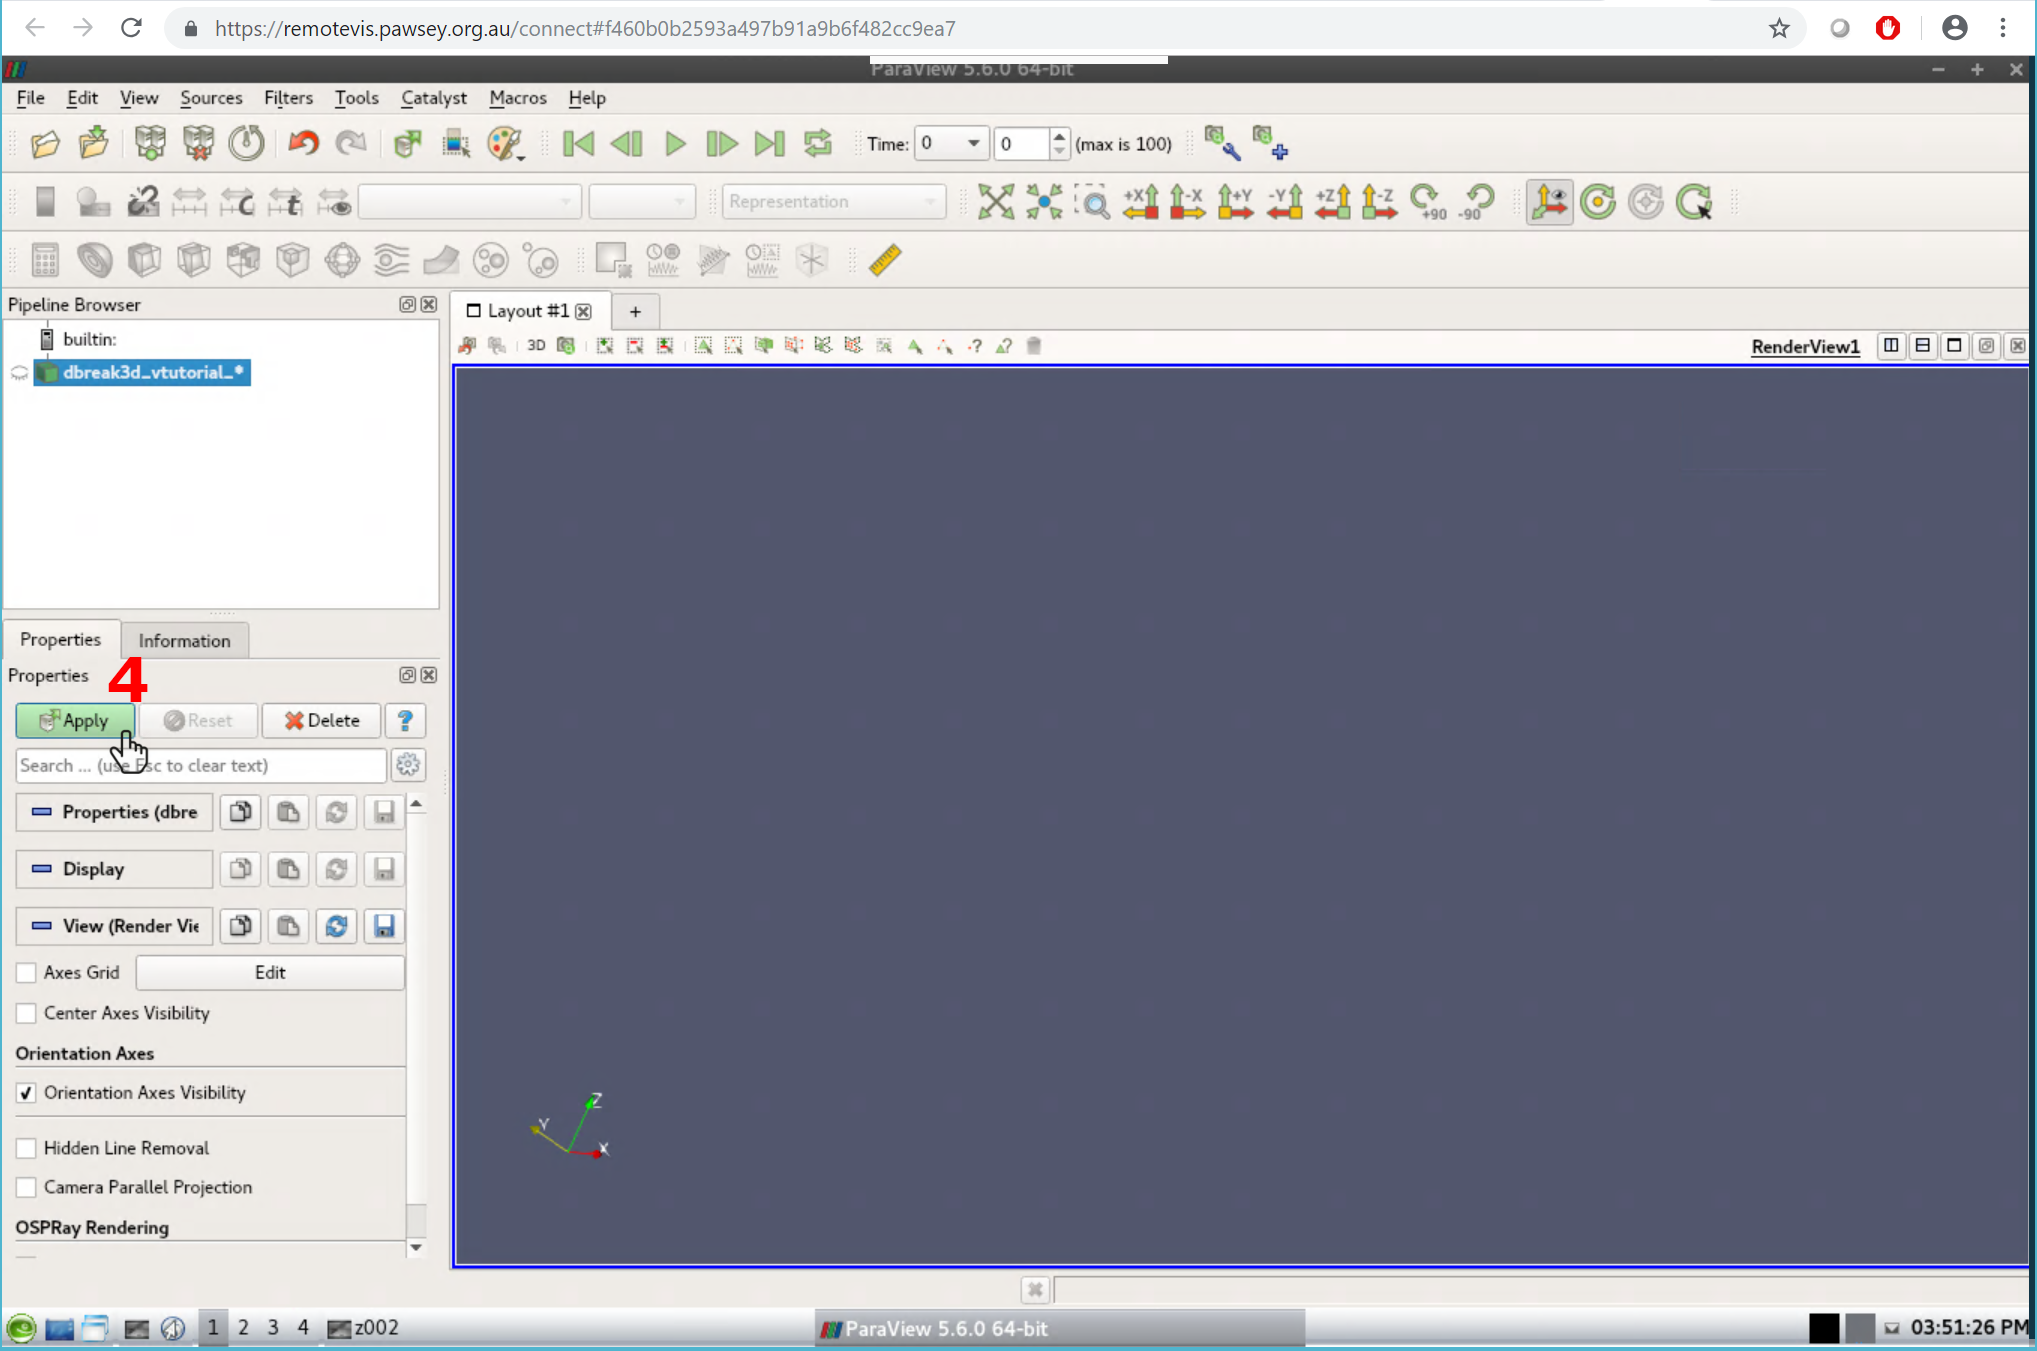
Activate Data in Render Window
- Click on the data in the pipeline broswer
- Click apply in the properties panel
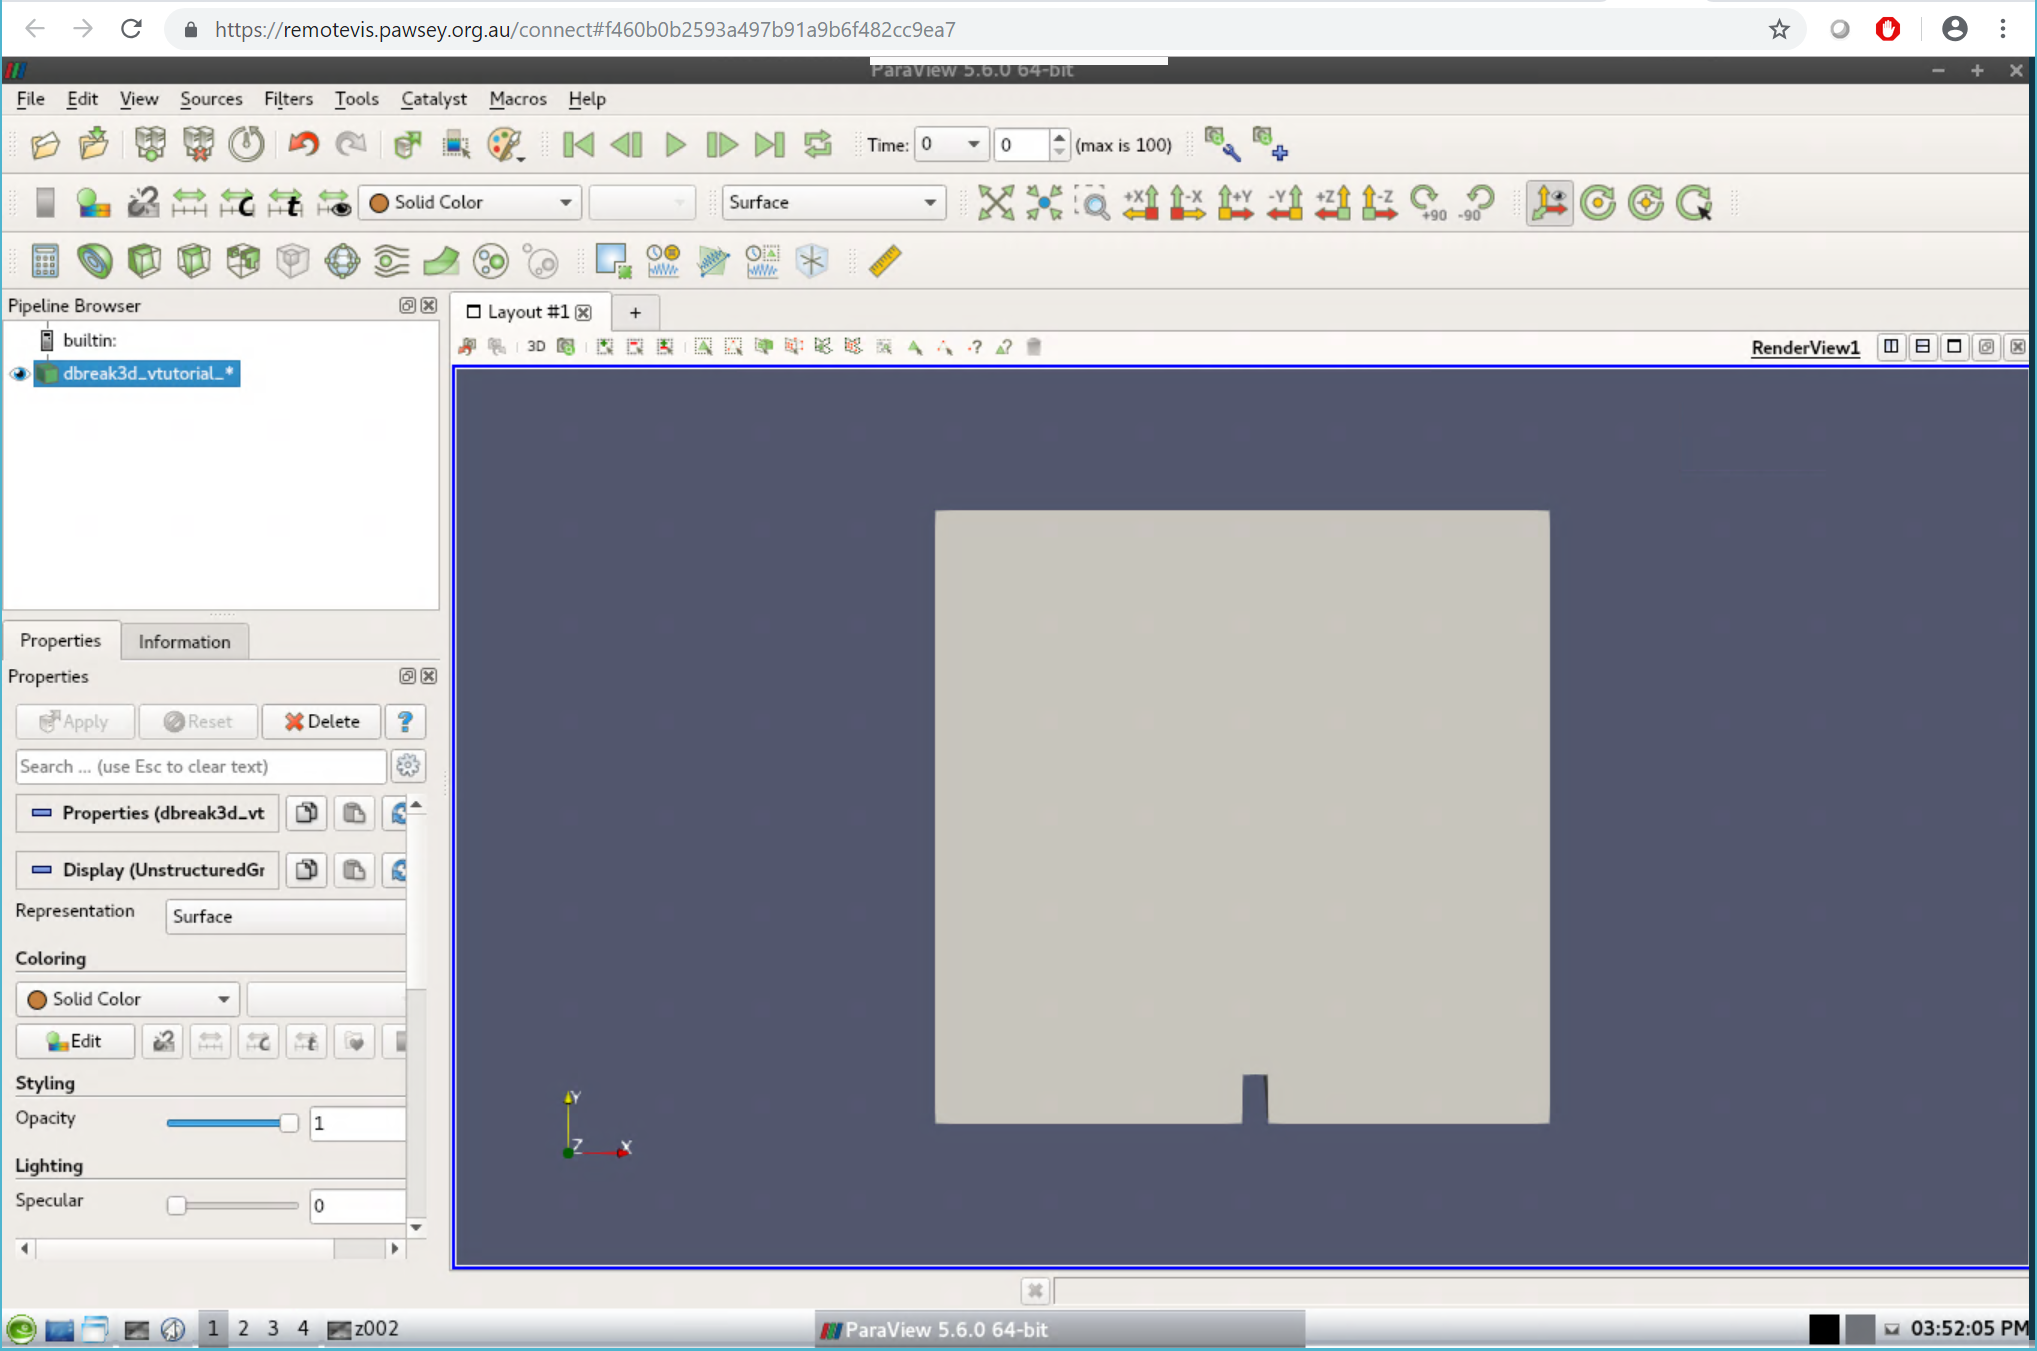
Activate Data in Render Window cont.
- The data now shows in the render window
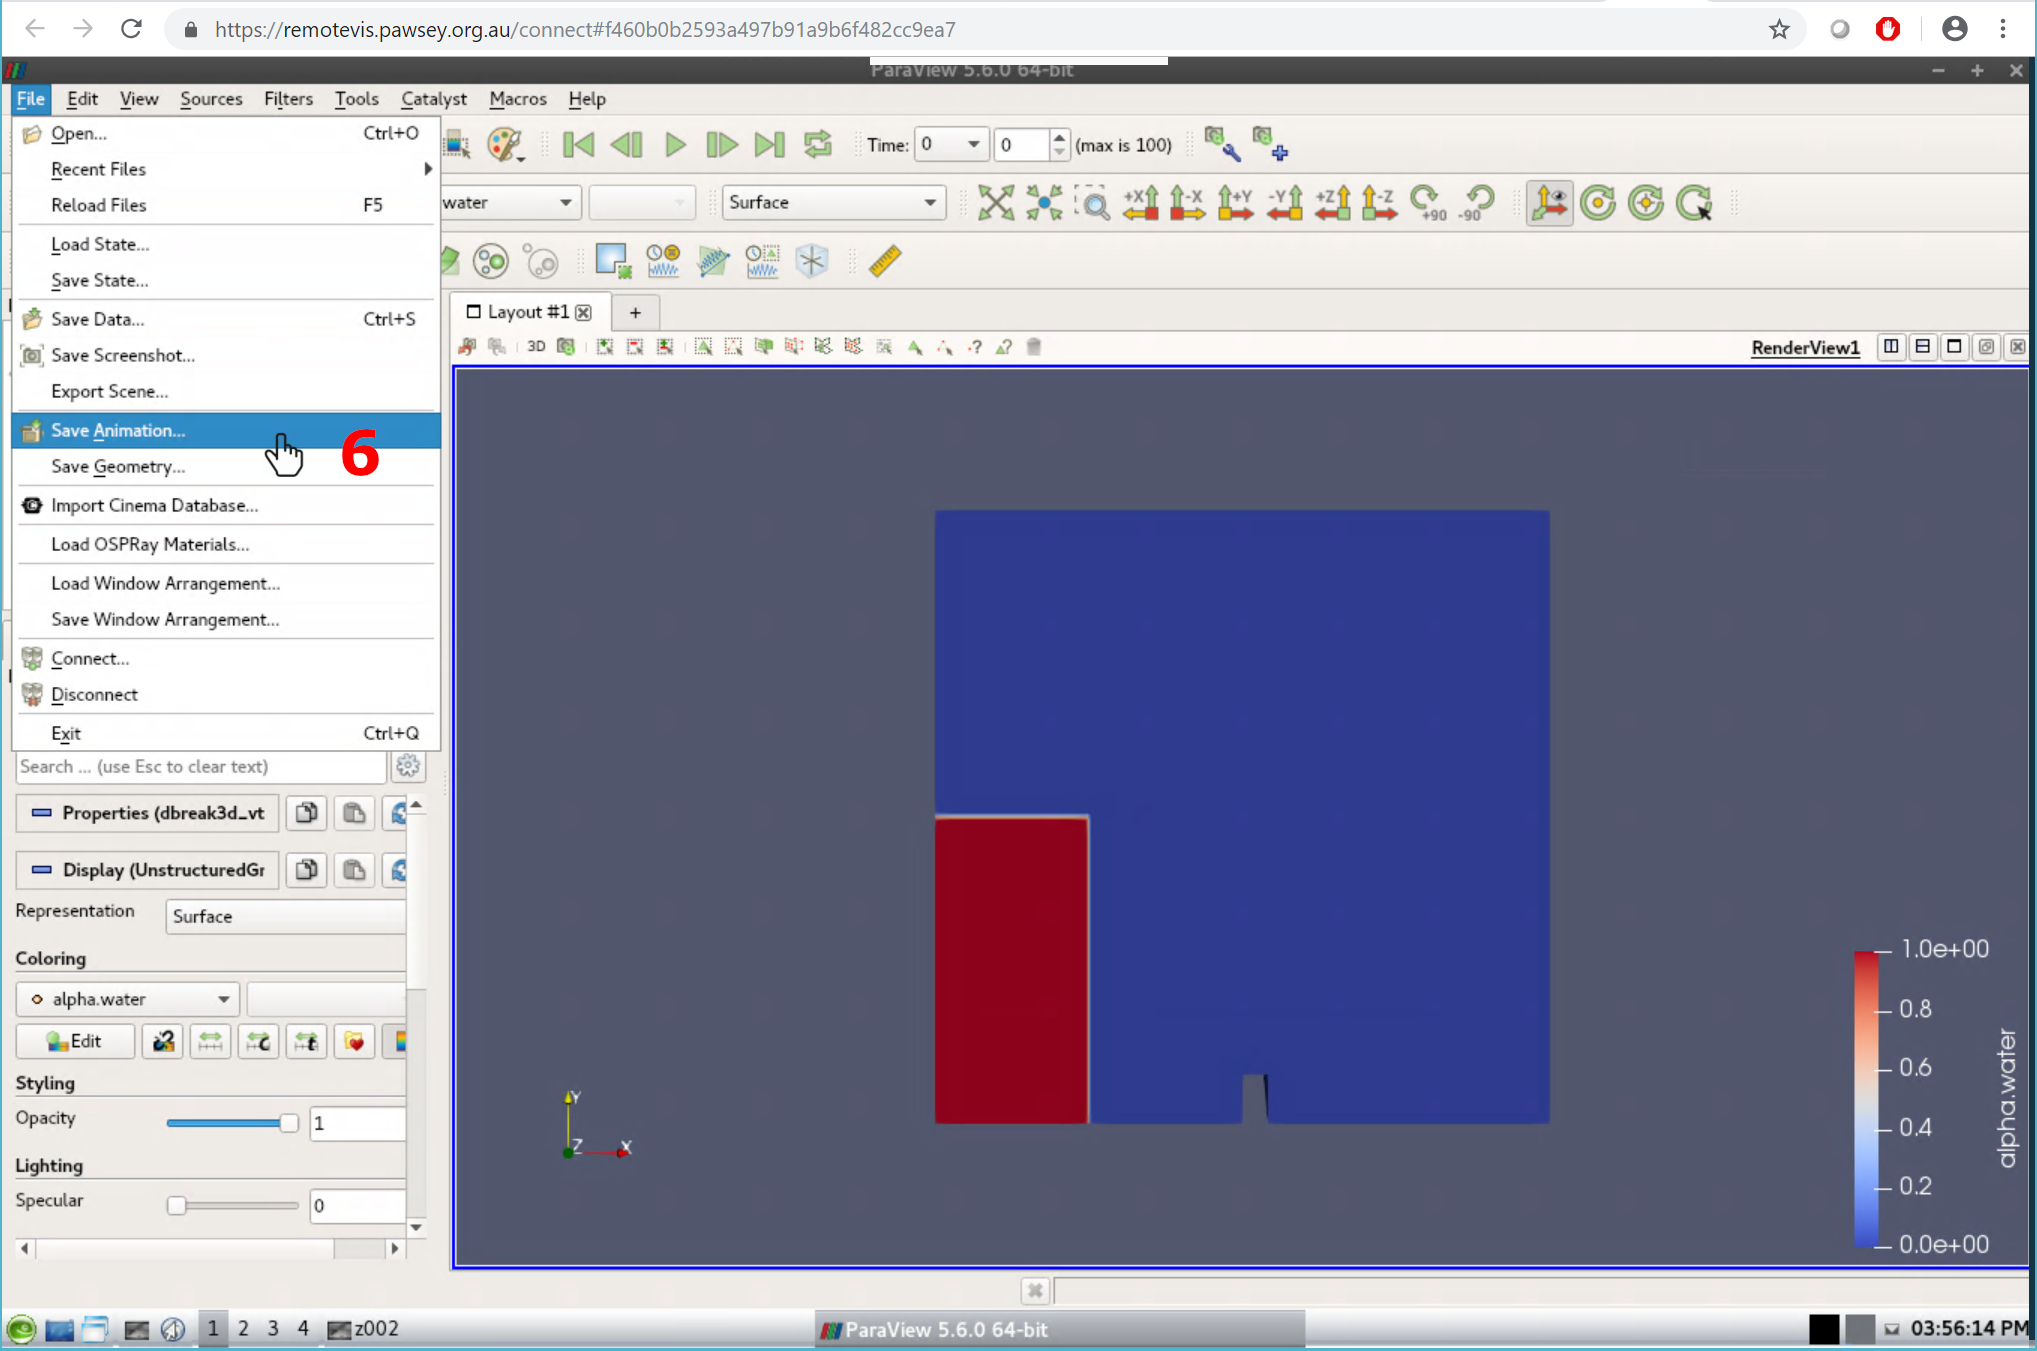
Colourise Data
- Set the colouring to be based on alpha.water in the properties panel

Generate Movie
- Click on the file menu and then save animation
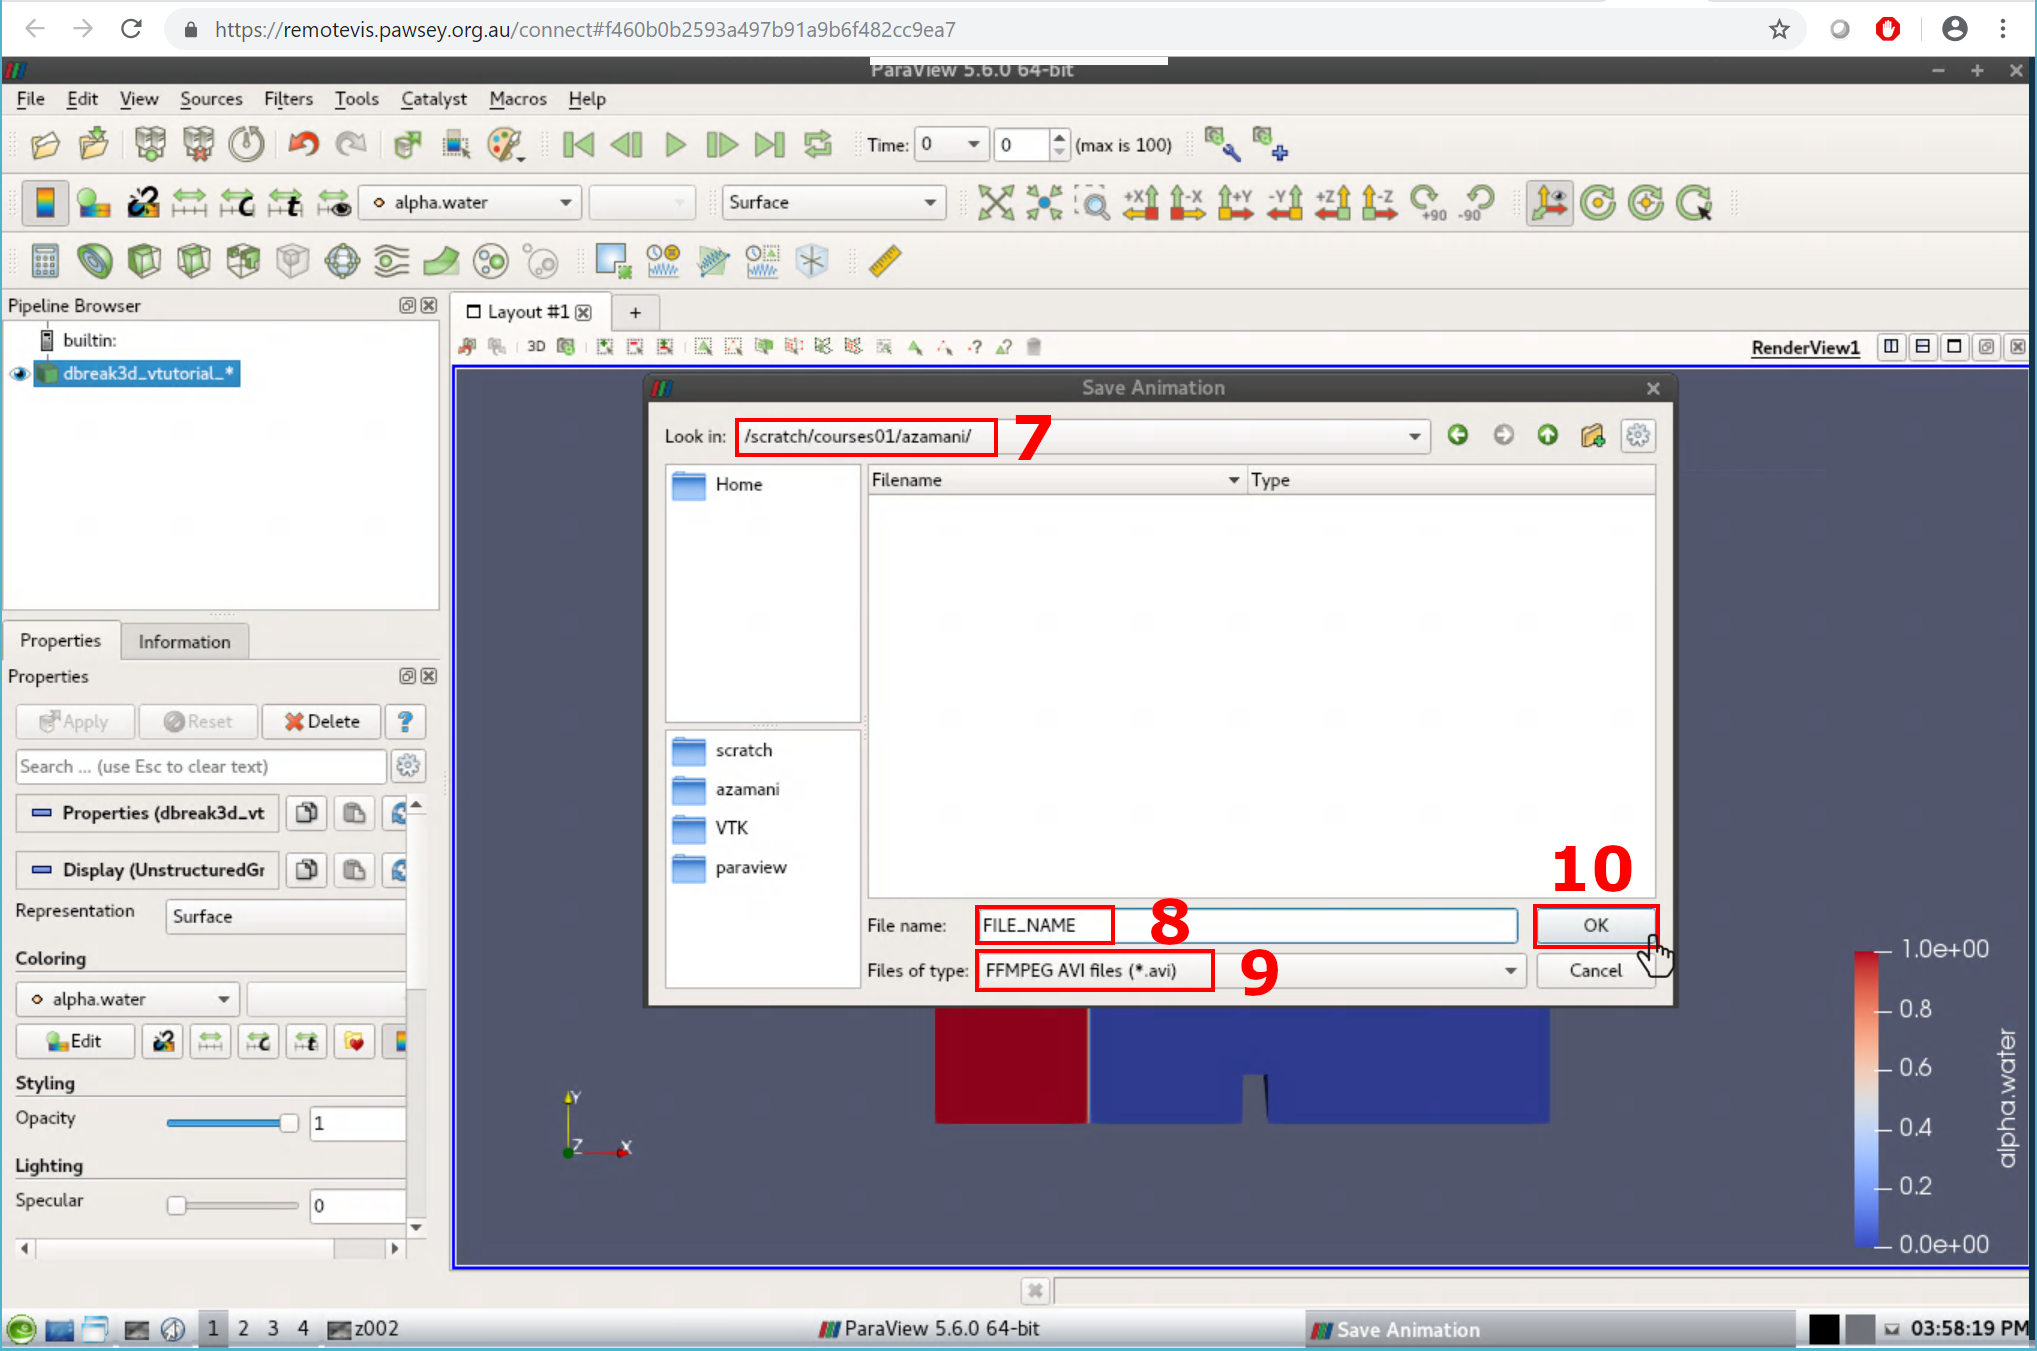
Generate Movie Cont.
- Go to your user folder in /scratch where you have write permission
- Enter a file name and select type ".avi"
Generate Movie Cont.
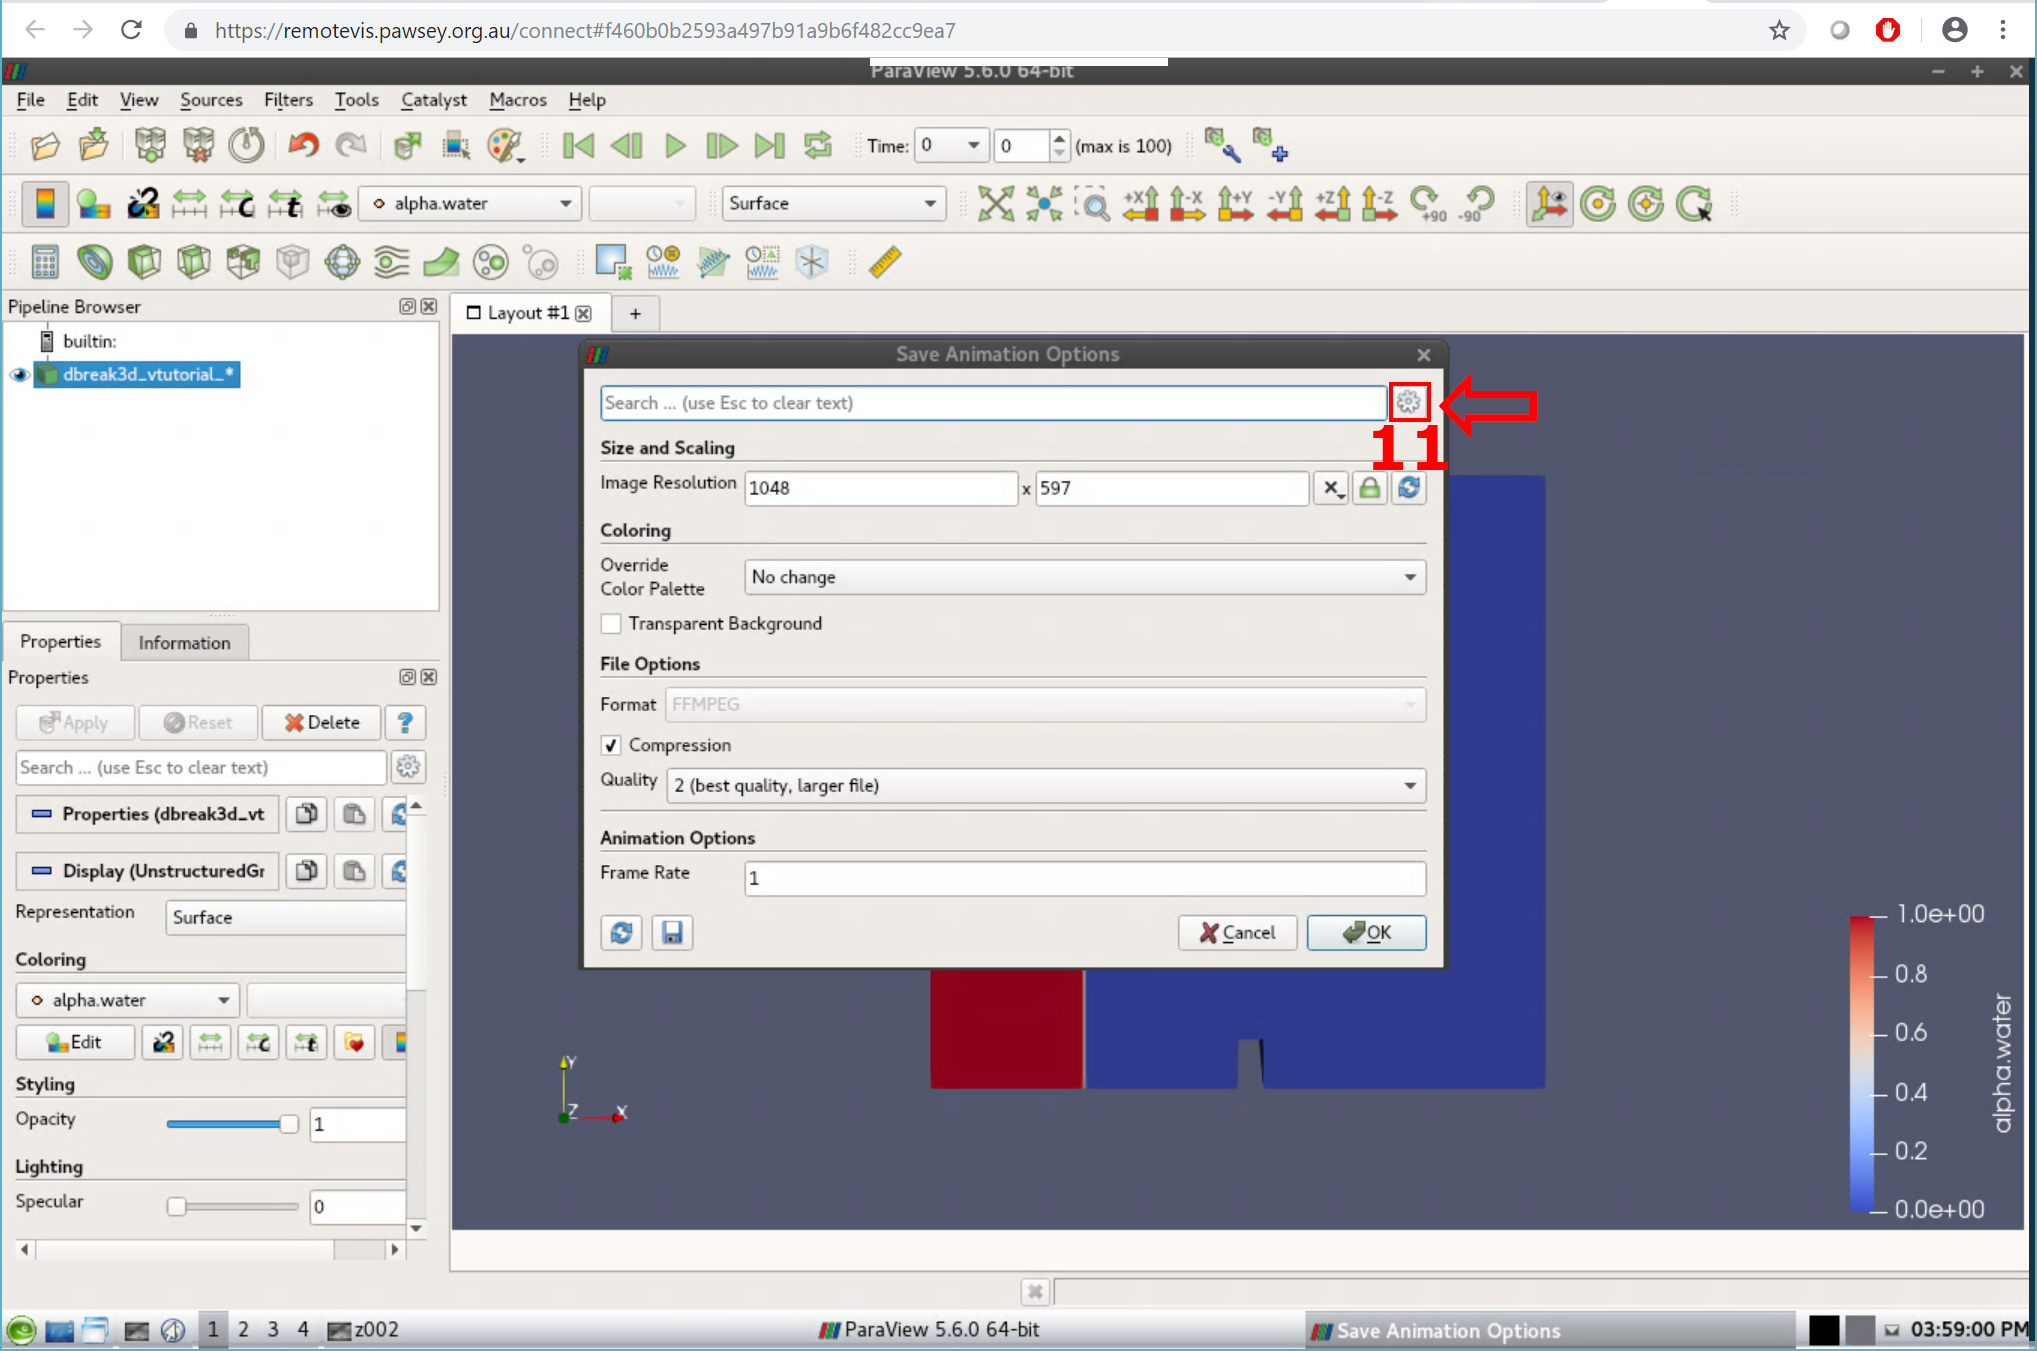
- Select the advanced options cog in the top right
Generate Movie Cont.
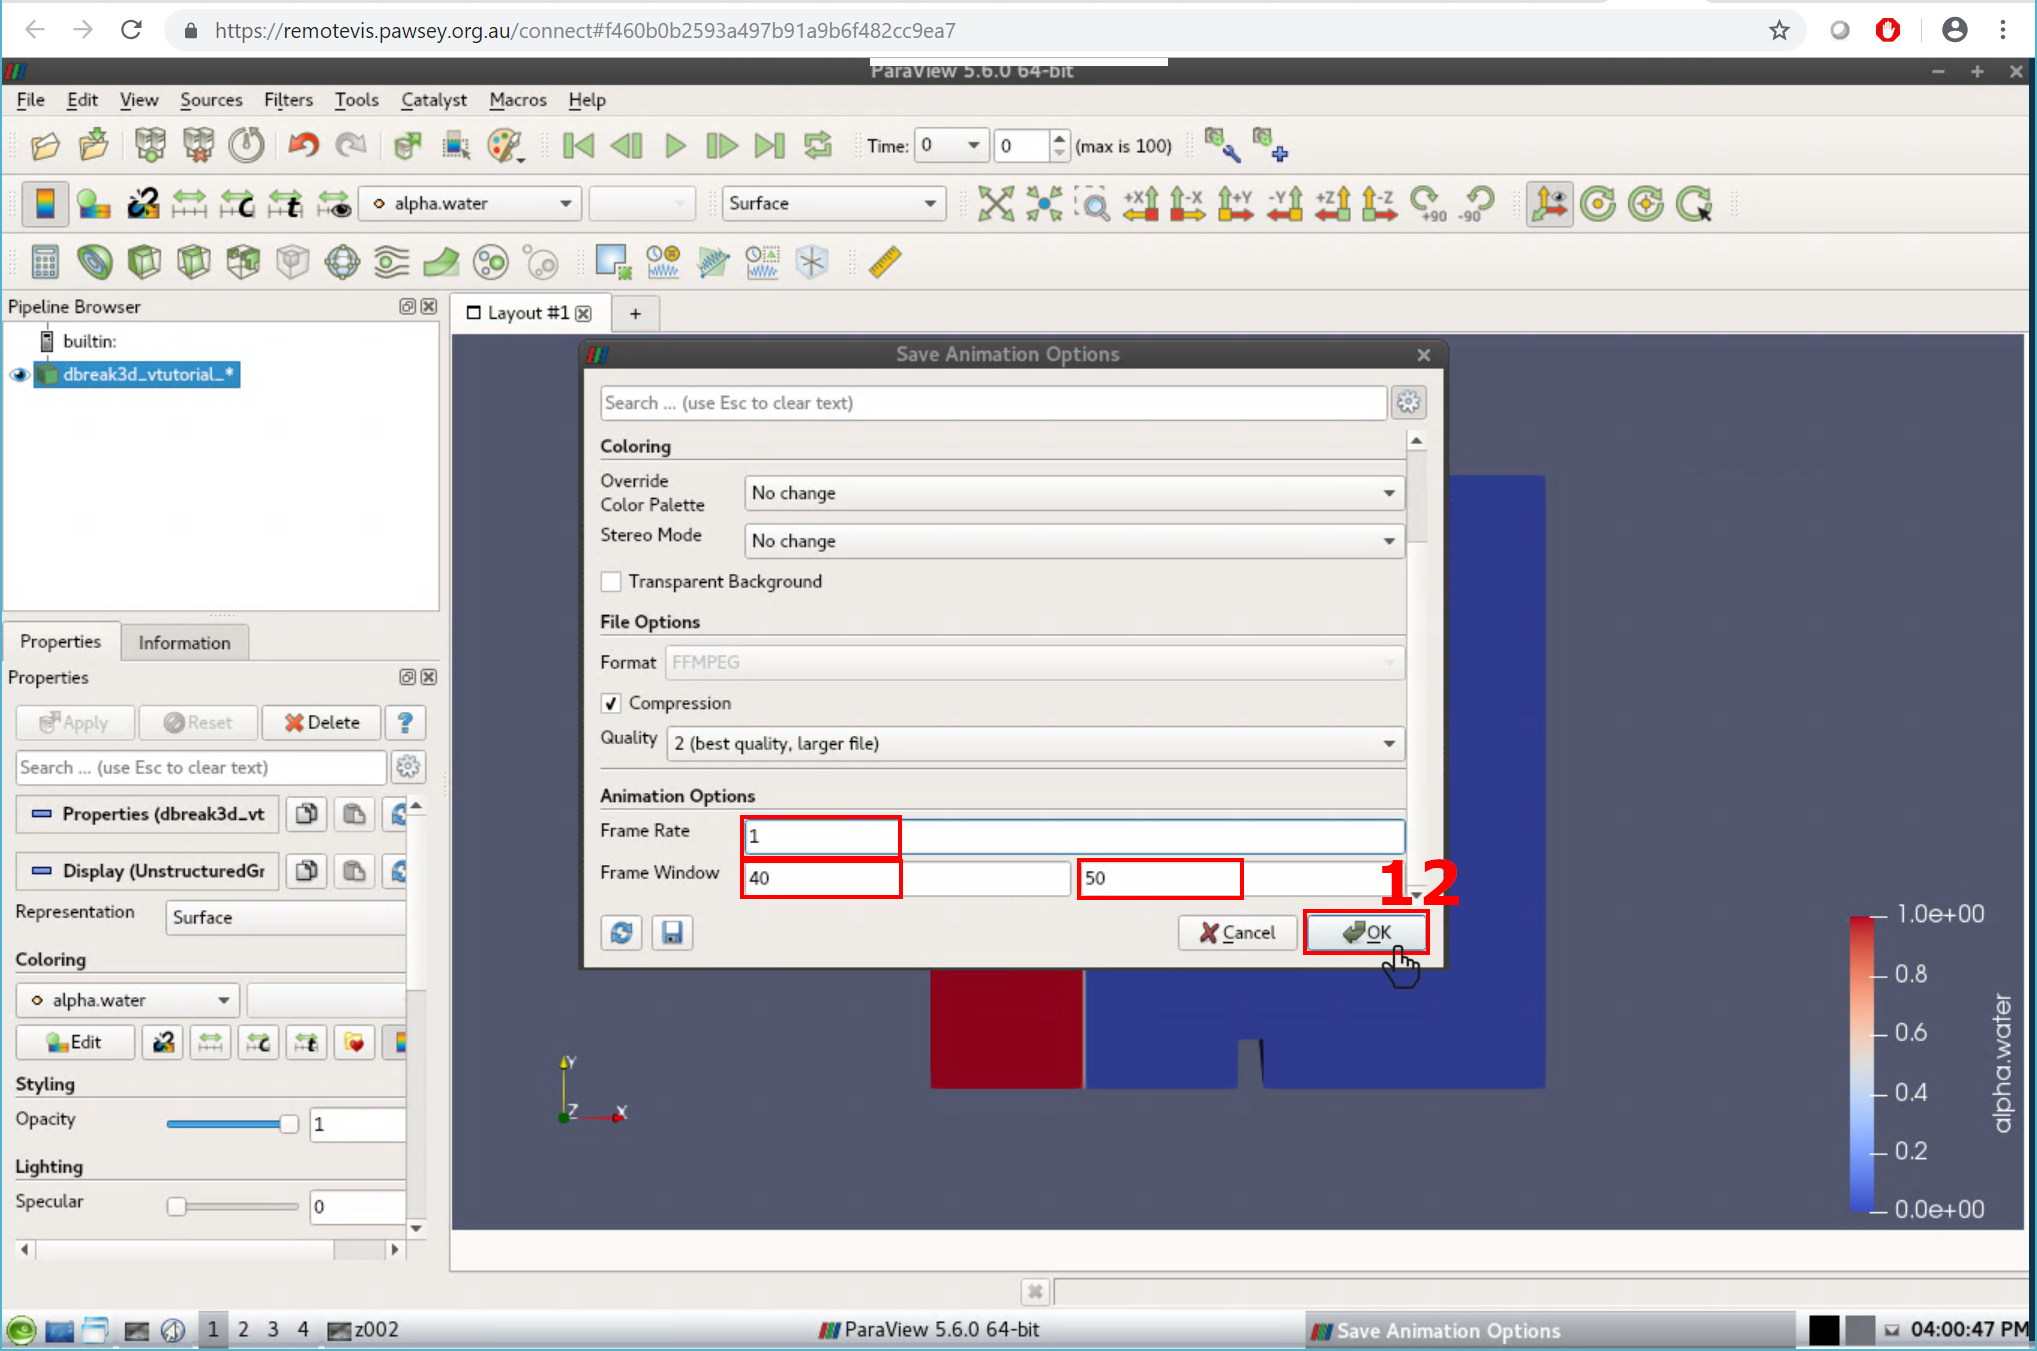
- Choose a range of frames to render and click ok
- All 100 frames will take a long time so choose a range of around 10
Generate Movie Cont.
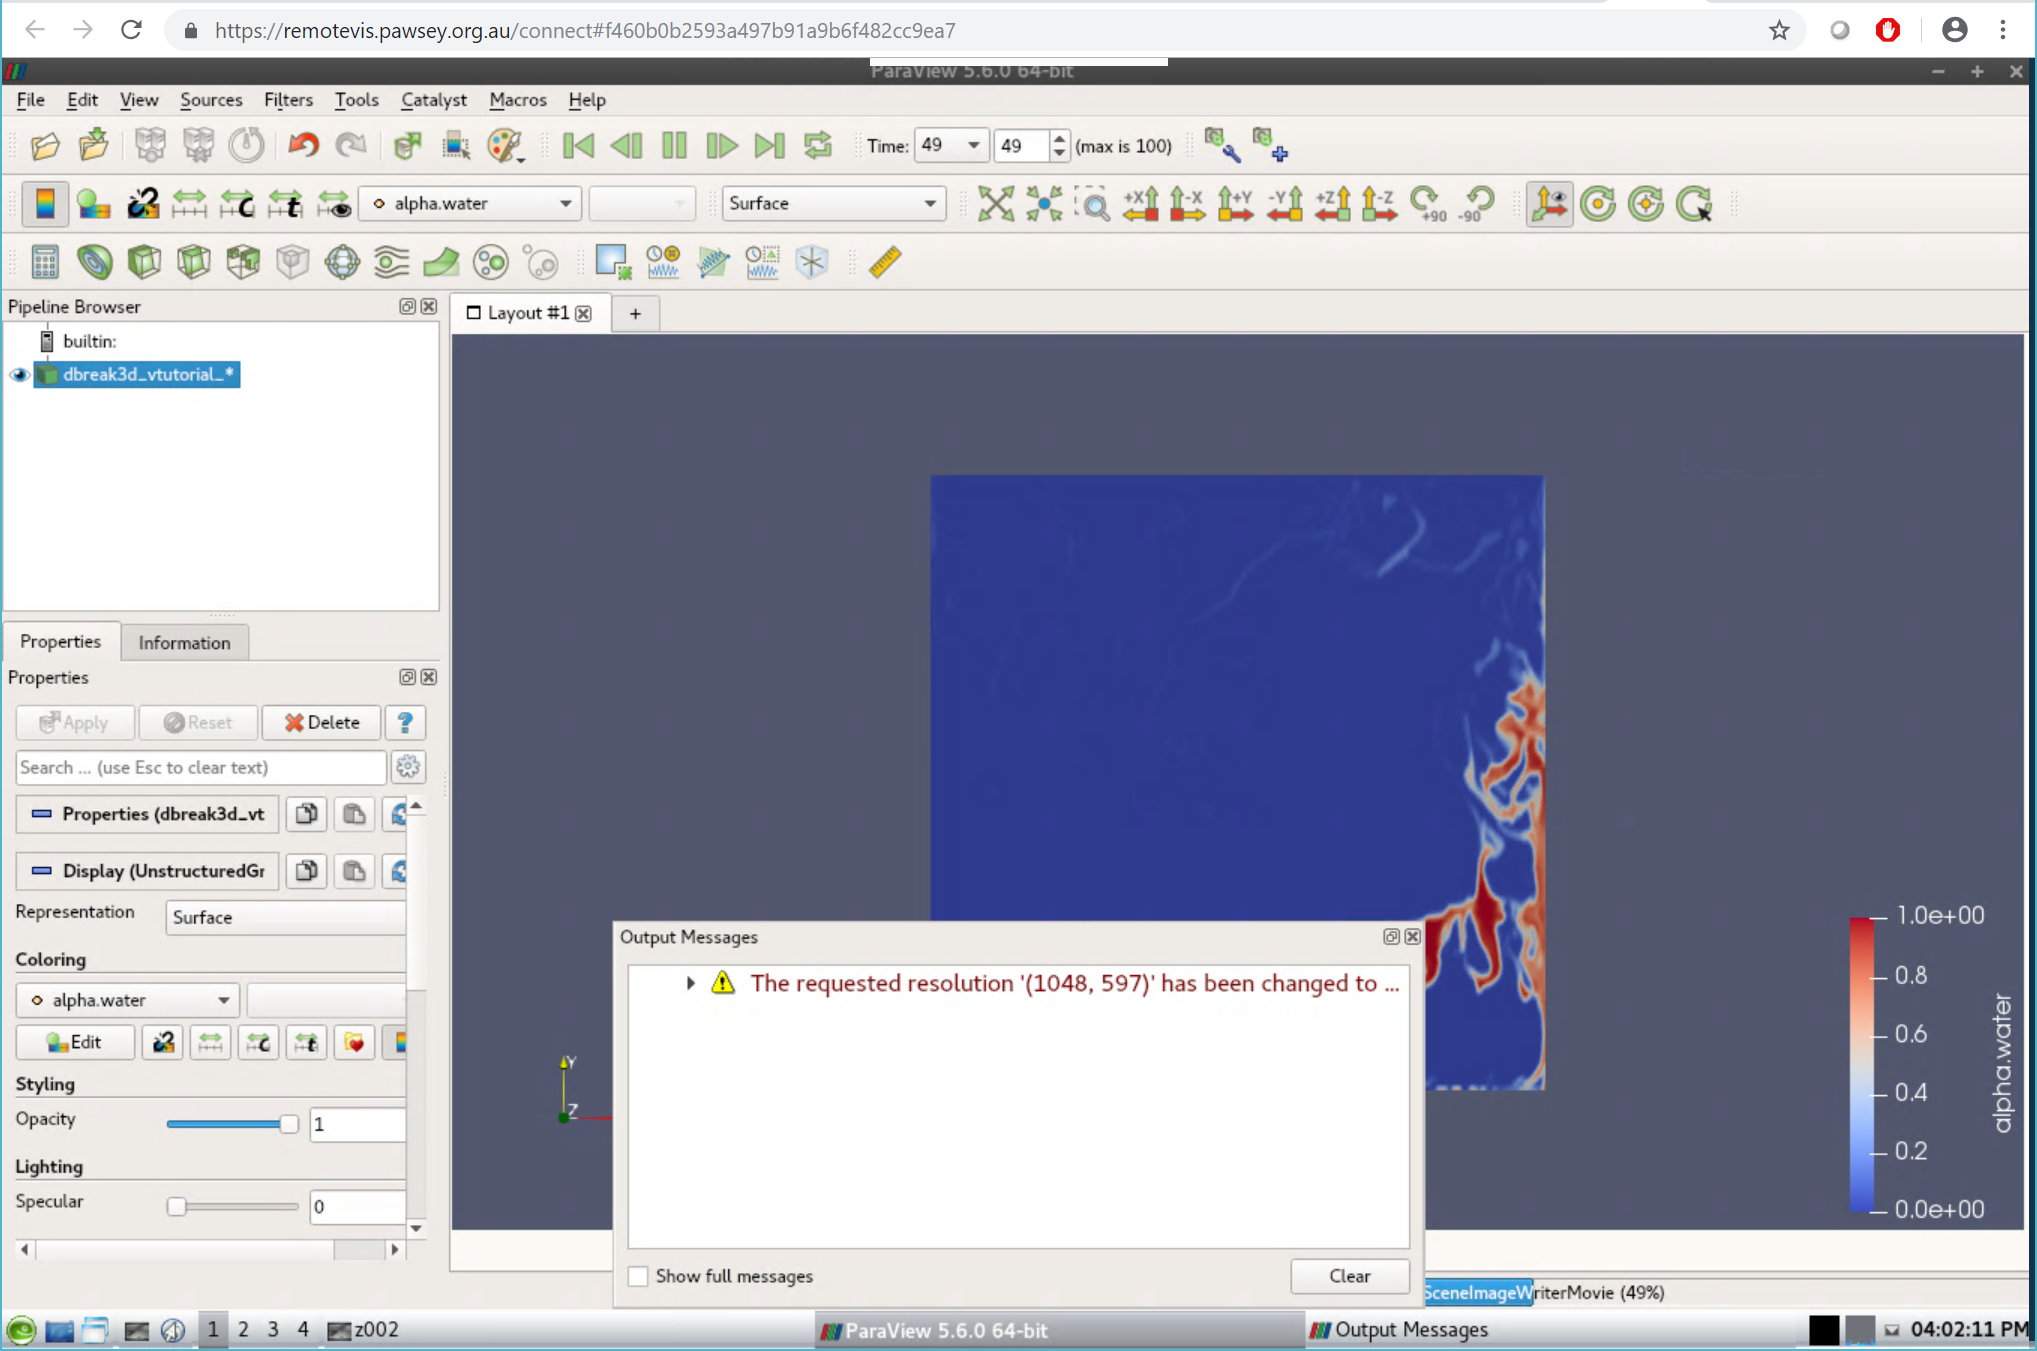
- The sofware will play though the anmiation as the frames are rendered and encoded
The final render (all 100 frames)
Copying the Video to Your Local Machine

Hands on Session 2:
Terminating ParaView Servers
Terminating ParaView Servers
Check running jobs for your user
squeue -u $USERCancel job by job_id
scancel job_id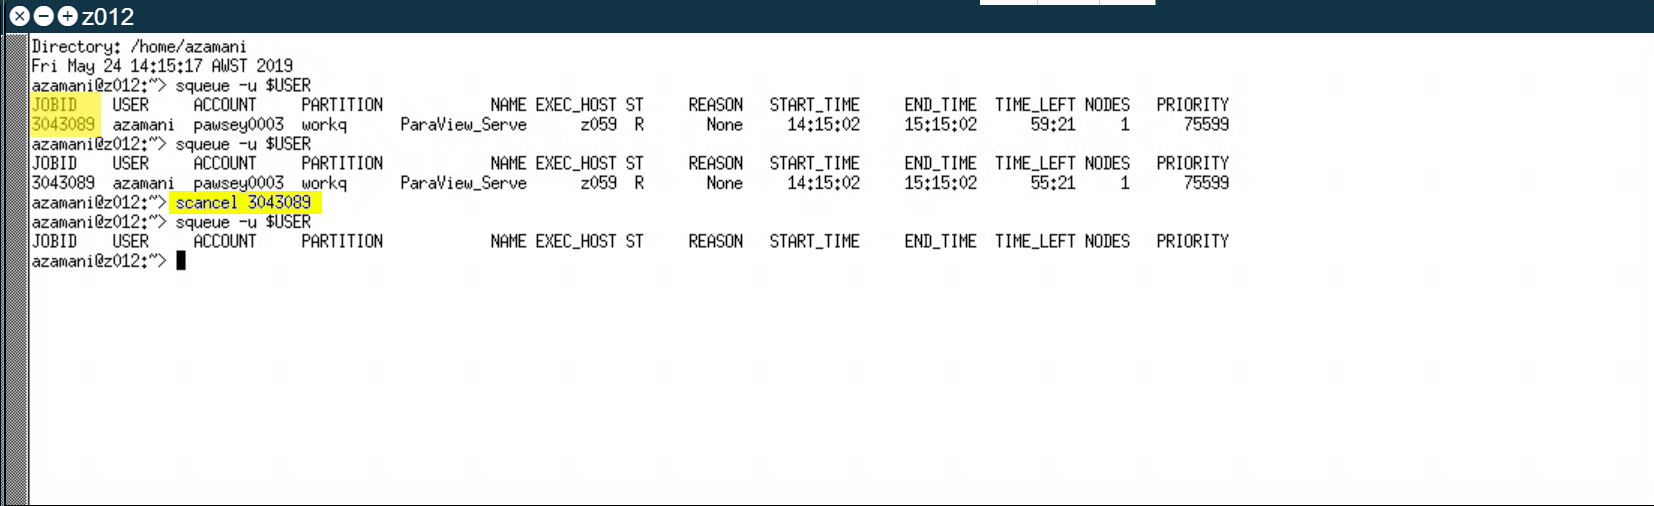
Terminating ParaView Servers
Save and close the Paraview client
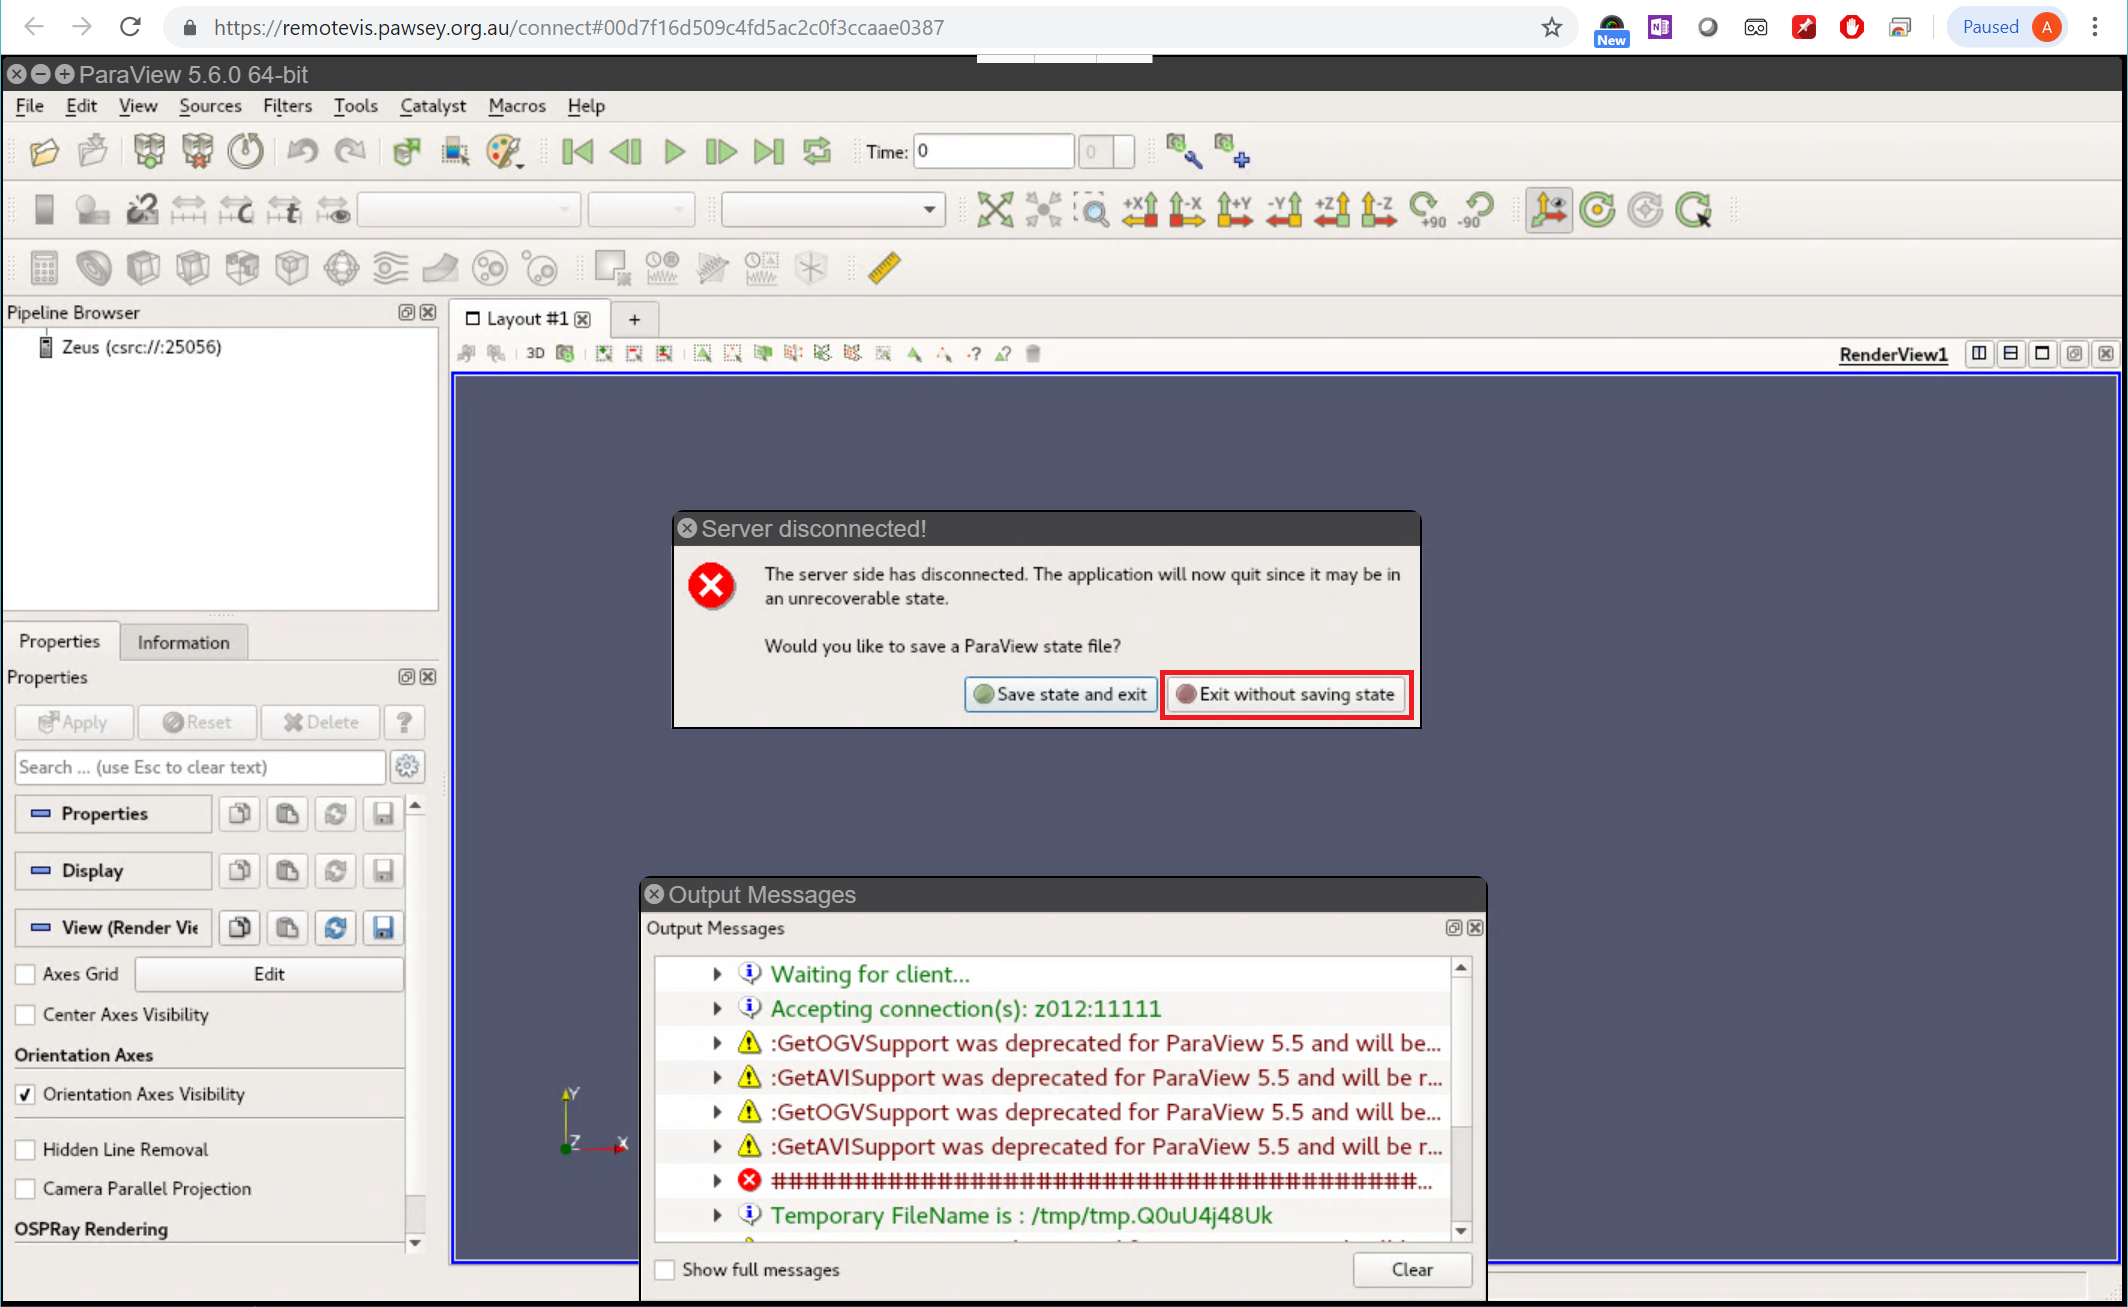
Terminating ParaView Servers
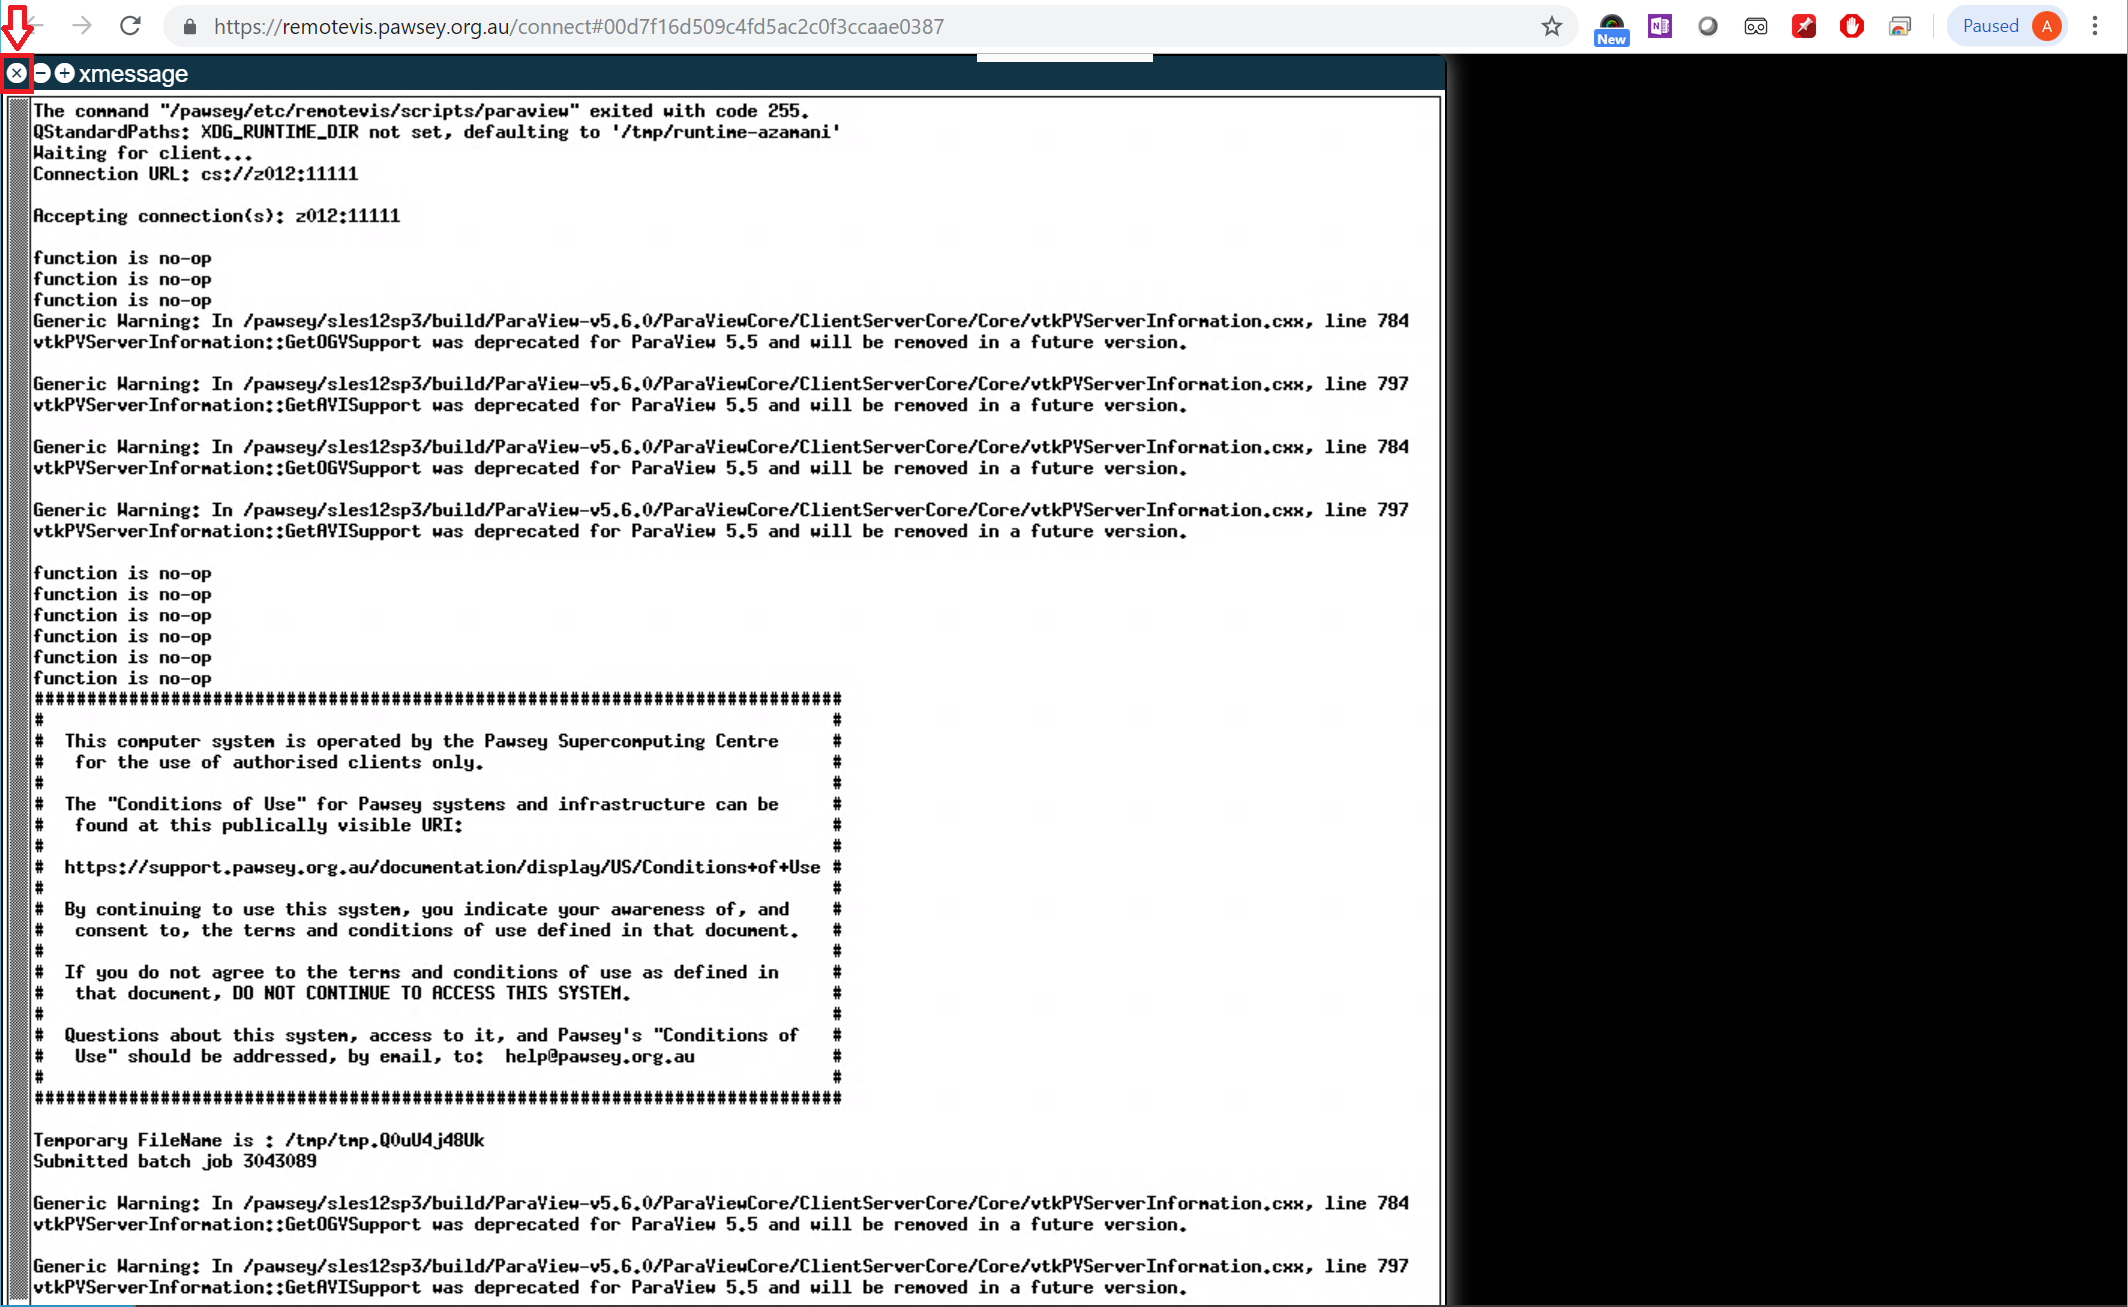
Close the terminal window opened by the server
AWST ()
Questions?
More Information and Help
Visualisation Documentation:
Contact:
visualisation@pawsey.org.au
Help:
help@pawsey.org.au